


s Beanie Hat Set Crochet Pattern")


Blue’s Clues Puppy Character Beanie Hat Crochet Pattern
free crochet pattern from cRAfterChick.com

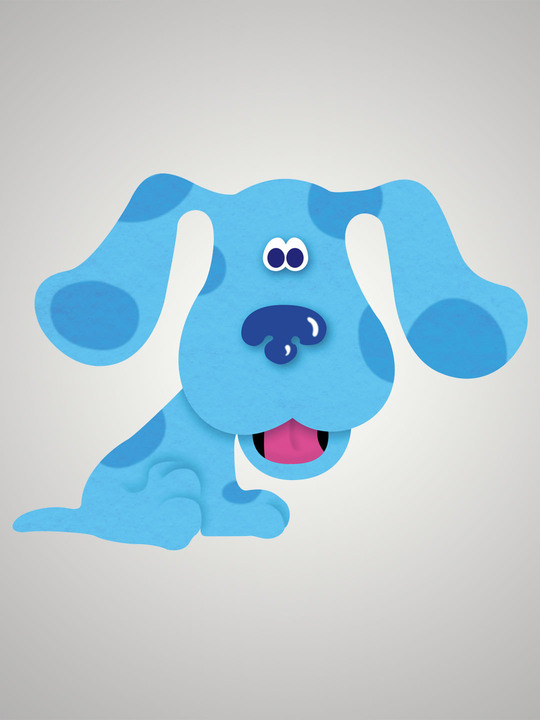
Do you know a Blue’s Clues fan? This hat was designed for my Mom to wear in reading time for her class. She’s a teacher of very young students and they all love her hats to match the different books. Blue is such a cute animated puppy and I think Blue looks good in crochet. You can learn more about Blue’s Clues or watch the television show episodes online here.
The hat in pictures is done with the teen / women’s size of the Easy Peasy Double Crochet beanie family pattern but instructions for scaling down features for infants are included. As always my patterns are free and I would love to see how yours turn out! The only part I found tricky was the nose until I got the design down so I think advanced beginner and up for suggested experience level for this pattern.
Blue’s Clues Puppy Character Beanie Hat Crochet Pattern Notes

Project requires:
Light Blue Yarn for Beanie Hat main color and ears- (I use a lot of Red Heart Saver yarn but any medium to normal weight yarn will do)
Black Yarn for eye pupils
White yarn for eye whites
Contrasting Darker Blue Yarn for nose and spots
“J” hook (6.0 mm)
Scissors or Yarn Cutter
Blunt large eye yarn / tapestry needle to weave in ends
Abbreviations used in this pattern (US crochet stitches):
ch – chain
st – stitch
sl st – slip stitch
sc – single crochet (US)
dc – double crochet (US)
hdc – half double crochet (US)

Pattern Instructions:
*Note: This project is worked in the round on the base of a magic ring. If you do not know how to do this, please see tutorial here from: yarntomato on CrochetMe
The hat in this picture is made with my free Easy Peasy Pre-Teen / Teen / Women Double Crochet Beanie Pattern, which you can find here as a foundation for the project. Want it in another size? No worries. Head over to Easy Peasy All Family Sizes Free Double Crochet Beanie Patterns to select the size of the free pattern you want for your project.
Hat Base: in main color lighter blue yarn
Use Easy Peasy Crochet Beanie Size of your choice
Once you have completed your beanie for the base you are ready to start on making your Blue’s Clues hat!
Spot Circles (Make 6): using darker blue yarn
Round 1: In magic circle, ch 2 before placing 12 dc in to the circle. Pull circle tightly closed. Sl st in to the top of 1st st in round. (12 dc)
Leave a long enough yarn tail to be able to sew your spot in place on your beanie hat during finishing steps. Cut yarn to desired length before pulling through. Set to side until needed for assembly.
Repeat steps above for the rest of the spots needed for pattern.
*For newborn to 12 month sized hats, make 8 hdc instead of 12 dc for spot circles.
Nose: using darker blue yarn
Round 1: In magic circle, ch 2 before placing 4 sc in to the circle. Do not pull circle closed. Ch 1 and turn. (4 sc)
Round 2: Place 3 sc in 1st st, (2 hdc and 1 dc) in 2nd st, (1 dc and 2 hdc) in 3rd st, 3 sc in last st. Sl st back in to circle. (12 st total)
Round 3: Ch 1 before placing 1 hdc in to the circle, ch 1 and then sl st back in to circle. (This will be the bottom part of the nose between nostril openings.)
Leave a long enough yarn tail to be able to sew the nose securely in place before cutting yarn and pulling it through. Place to side until nose is needed in finishing process.
*For newborn to 12 month sized hats, you will change Round 2 to the following: Place 2 sc in 1st st, 2 hdc in 2nd st, 2 hdc in 3rd st, 2 sc in last st
*For newborn hats, I recommend switching to a smaller hook, like “h” hook, to scale down the size of nose even more.
Eye Pupils (Make 2): using black yarn
Round 1: In magic circle, ch 1 before placing 4 sc in to the circle. Pull circle tightly closed. Sl st in to the top of 1st st in round. (4 sc)
Leave a long enough yarn tail to be able to sew your eye pupil in place on eye white during finishing steps before cutting yarn. Sit to side until needed.
Repeat process for second eye pupil.
*For newborn to 12 month sized hats, your pupil will be 2 sc and ch 1 before making a sl st to bridge gap when pulling circle closed.
Eye Whites (Make 2): using white yarn
Round 1: In magic circle, ch 1 before placing the following st in to the circle in this order: 2 sc, 1 hdc, 1 dc, 1 hdc, 3 sc, 1 hdc, 1 dc, 1 hdc, 1 sc before pulling circle closed. Sl st in to the top of 1st st in round. (12 st total)
Leave a long enough yarn tail to be able to sew your eye whites directly on to the beanie during hat assembly.
Repeat process for second eye.
*For newborn to 12 month sized hats, you will work the st in this order: 1 sc, 1 hdc, 1 dc, 1 hdc, 2 sc, 1 hdc, 1 dc, 1 sc. Sl st closed. (9 st total)
Ear Front (Make 2): using main color lighter blue yarn
Row 1: Ch 7. Place 1 dc in 3rd ch from hook and 1 dc in each of the following 4 ch. Ch 2 and turn. (5 dc)
Row 2: Make 2 dc in 1st st in row, 1 dc in each of the next 3 st and 2 dc in last st. Ch 2 and turn. (7 dc)
Row 3-6: Place 1 dc in 1st st in row and in each st across. Ch 2 and turn. (7 dc)
Row 7: Place 1 dc in 2nd st in row leaving 1st st unworked and 1 dc in each of following 5 st. Ch 2 and turn. (6 dc)
Row 8: Place 1 dc in 2nd st in row leaving 1st st unworked and 1 dc in each of following 4 st. Ch 2 and turn.(5 dc)
Row 9: Work 1 dc in each st in row across. (5 dc) Fasten off.
Repeat process for second puppy ear.
*For newborn to 12 month sizes, switch to hdc for the whole ear pattern instead of dc. This will scale it down to a proper size for these hats.
Ear Back (Make 2): using main color lighter blue yarn
Repeat instructions for Rows 1-9 of the Ear Fronts but do not fasten off at the end of Row 9. Ch 1 and turn.
Row 10: Place a finished Ear Front in front of the Ear Back you are working on, lining up the st. ( I like to use safety pins to mark the ends of mine so I don’t have to stop and keep checking to see if they line up as I can be a bit OCD about that kind of thing. 😉 but it is not a necessary step.) Now work a round of 1 sc in each st around perimeter of Blue’s ear. When you reach the bottom of ear you can make 2 sc in each of the 3 bottom st to give it a nice rounded appearance like I have in my picture. Make sure you leave a tail that is long enough to secure the ear in place on the beanie hat during assembly before cutting yarn and placing to side.
Repeat process for second ear for Blue.
Finishing off:
Starting from the bottom up, use the tail left on your nose and yarn needle to sew your nose in place on beanie hat. You can reference my pictures on how I placed mine. Once your nose is fully secured, pull your yarn to inside of hat before finishing off.
Next take the tail left over from one of the spots circles and sew it in place as indicated in clipart and my own pictures. Once securely in place, pull yarn to inside before fastening off. Now repeat this process for the rest of the puppy spot circles.
Using tail on one black eye pupil and needle, sew it in place securely on top of an eye white. I centered mine on the eye white. Once secure, pull yarn to back of eye then fasten off. Repeat this process for second eye.
Now you want to use the tail from one assembled eye and your yarn needle to sew one eye in to the proper place on beanie. You can reference my pictures as to where I placed them on my Blue’s Clues hat. Once sewn on, pull yarn to inside of hat and finish off. Now go ahead and repeat this process for second eye.
Next using the tail left behind on one of the Blue’s Clues ear, use your needle to secure the ear to the side top area of the beanie in desired location with the contrast on hat. (You can see my pictures for where I placed my own.) If you want longer hanging ears place lower on side of beanie. For shorter ones, place higher up on beanie hat. Once you have it in place, pull your yarn in to the inside of the beanie before finishing off any extra length. Repeat this process for the second ear.
Now check over your crochet project for any tails or ends that you may have missed throughout assembly process to weave in and finish off. Do so if you find any.
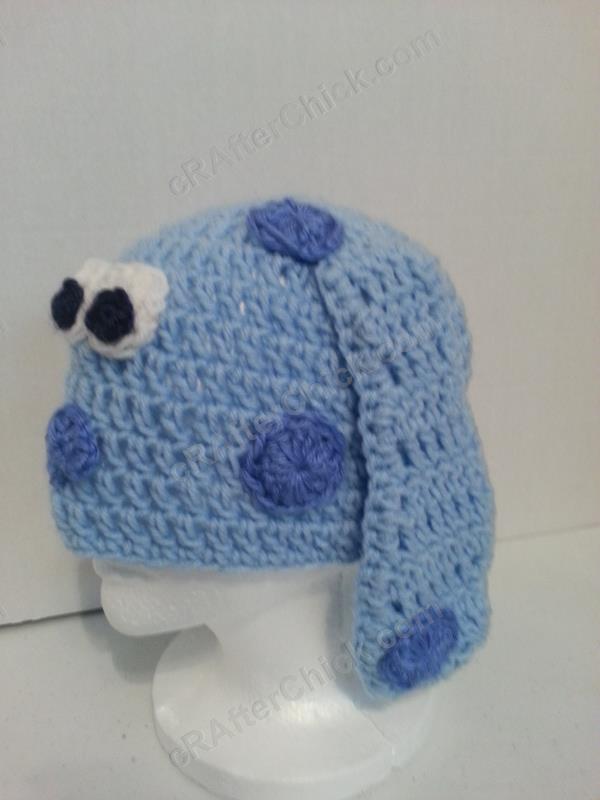
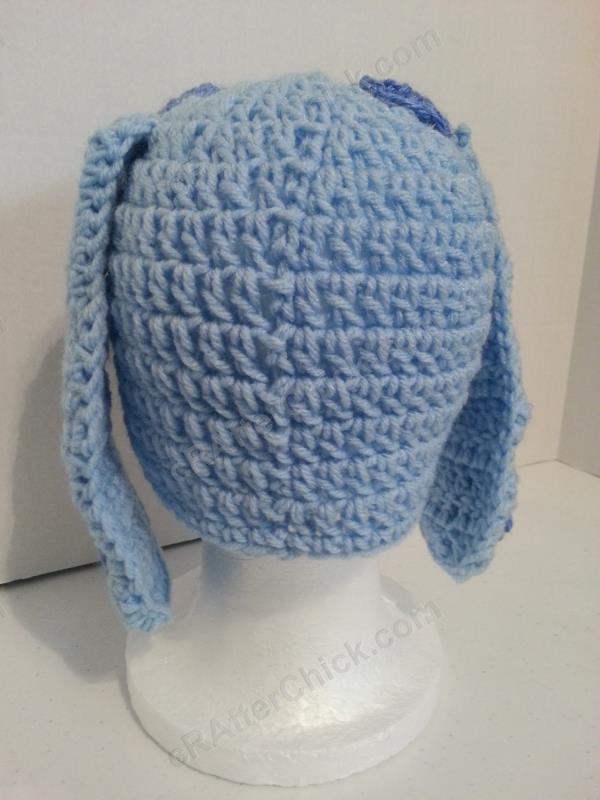
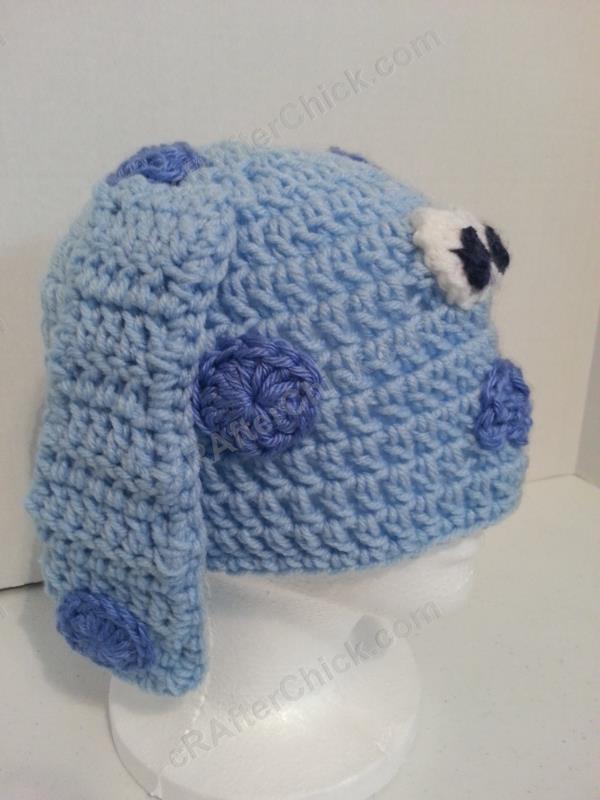
Here are some pictures to show how the completed Blue’s Clues character hat looks like worn from different angles once you are all done:


Want more free patterns? Follow cRAfterChick on Facebook or Pinterest to get updates on patterns as they are added.
Note: All the cRAfterChick patterns shared on this site are free of charge. Please feel free to use them to make your own items. If you use it to make items to sell please credit cRAfterChick for the pattern and provide link to our site. Please do not copy and paste my pattern or try to use my images as your own. You can link to any of my patterns. Happy crafting!
[…] For more information and free pattern instructions, see: http://crafterchick.com/blues-clues-puppy-character-beanie-hat-crochet-pattern/ […]