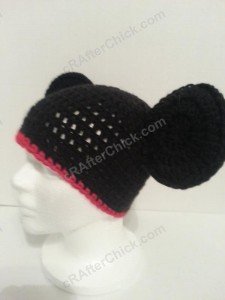
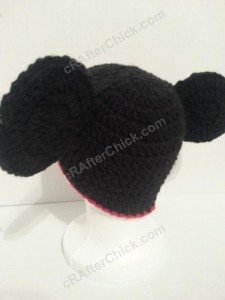
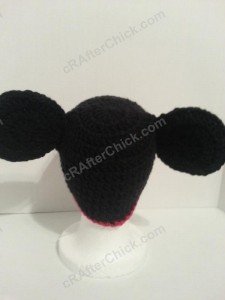
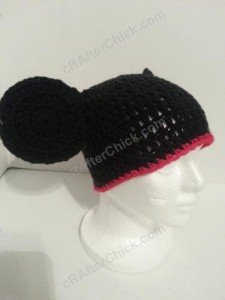
Minnie Mouse Oversized Ears and Bow Beanie Hat Crochet Pattern

Minnie Mouse Oversized Ears and Bow Beanie Hat Crochet Pattern_ a chick crafting through Rheumatoid Arthritis cRAfterChick.com

Minnie Mouse Oversized Ears and Bow Beanie Hat Crochet Pattern

  free crochet pattern from cRAfterChick.com 

Minnie Mouse Oversized Ears and Bow Beanie Hat Free Crochet Pattern

This was a cute hat project that works up pretty quickly.  After posting a picture of this hat on my personal Facebook account, I got more than 10 requests from family and friends wanting Mickey or Minnie hats within a few hours.  Oopsie.

I love that the ears are extra big on the hats versus smaller ears I have seen on other hats and her big floppy bow.  The red trim at the bottom is optional but I like it as it represents the red in her clothing and compliments her pretty bow.  :)

Minnie Mouse Oversized Ears and Bow Beanie Hat Crochet Pattern Notes

Minnie Mouse Oversized Ear and Bow Beanie Hat Crochet Pattern Front View

Project requires:
Black Yarn for Beanie Hat main color (or desired color) and ears- (I use a lot of Red Heart Saver yarn but any medium to normal weight yarn will do)
Red Yarn for contrast trim (optional) and Minnie’s bow
“J” hook (6.0 mm)
Scissors or Yarn Cutter
Blunt large eye yarn / tapestry needle to weave in ends

Abbreviations used in this pattern (US crochet stitches):
ch – chain
st – stitch
sl st – slip stitch
sc – single crochet (US)
dc – double crochet (US)

Minnie Mouse Oversized Ear and Bow Beanie Hat Crochet Pattern

Pattern Instructions:
*Note: This project is worked in the round on the base of a magic ring. If you do not know how to do this, please see tutorial here from: yarntomato on CrochetMe
The hat in this picture is made with my Easy Peasy Youth Sized (Age 3-10 years old) Double Crochet Beanie  Hat Pattern which you can find  here as a foundation for the project.  Want it in another size? No worries. Head over to Easy Peasy All Family Sizes Free Double Crochet Beanie Patterns to select the size you want for your project.

Hat Base: in main color black yarn
Use Easy Peasy Crochet Beanie Size of your choice

One completed sl st red yarn (optional contrast trim) to where you left off on beanie base. Ch 1 before placing 1 sc in each st around. Sl st in to the top of the 1st st. Fasten off.
Once you have completed your beanie for the base you are ready to start on making your Minnie the Mouse ear hat!

*Note: If you are going to do this in toddler size beanie, make the 3rd round in mouse ears sc instead of dc.  If you are going to do this in 6 months to 12 months, make both 2nd and 3rd round sc instead of dc.  If you are doing newborn to 6 months make all the mouse ear rounds in sc.

Minnie’s Oversized Bow: using red yarn
Round 1: Ch 41 before placing 1 sc in 2nd chain from hook and in each of the following 39 st across until end of chain. Ch 2 and turn. (40 sc)
Rounds 2-4:  Place 1 dc in 1st st and each of the 39 st across. Ch 2 and turn. (40 dc)
Round 5: Place 1 dc in 1st st and each of the following st across. Ch 1 and turn. (40 dc)
Round 6: Place 1 sc in 1st st and each of the following st across. ( 40 sc)
Now turn your bow so you can use a simple sc across to attach the two ends of the both by doing 1 sc through matching st put together.  Your bow piece should be a circular piece.  Fasten off.  Place your bow flat with the seam in the center bottom, seam on the inside of bow.  Put to side until ready to assemble in finishing off step.

*Note: If you are going to do this in toddler size, reduce starting chain of bow to 31 instead of 41. if you are making this in 6 months to 12 months, start the chain off at 26 instead of 41.  If you are doing this in newborn to 6 month size, start the chain off at 21 instead of 41.  You can also choose to switch to “h” hook instead of “j” hook as pattern calls for to scale down size of ears and bow.

Center Bow Strap: using red yarn
Round 1: Ch 13 before placing 1 sc in 2nd ch from the hook and each of the following 11 ch across. Ch 2 and turn. (12 sc)
Round 2:  Place 1 dc in first st and each of the following across. Ch 2 and turn. (12 dc)
Round 3: Place 1 dc in 1st st and each of the next st across. Ch 1 and turn. (12 dc)
Round 4: Place 1 sc in 1st st and each of the following st.  (12 sc)
Wrap strap around center of bow. You can pull it tighter or use a smaller strap if you want a much smaller middle versus the outside of the bow.
Round 5: Holding ends of strap together in back of bow, ch 1 before working 1 sc in each st through both ends at same time.  I then turn the seam in to inside of the bow.
Cut yarn leaving a long enough tail to sew on to the bow and then bow on to the beanie during finishing off process.

Ear Front (Make 2): using black yarn
Round 1: In a magic circle, ch 2 before placing 12 dc in circle. Pull circle closed in tight circle. Sl st in to top of 1st st in round. (12 dc)
Round 2: Ch 2 before placing 2 dc in 1st st and next 11 st. Sl st in top of 1st st in round. (24 dc)
Round 3:  Place *2 sc in first st, 1 sc in next*. Repeat this pattern *around until end of round. (36 dc)
Fasten off.

Ear Back (Make 2): using black yarn
Repeat Rounds 1-3 from Ear Front step above but do not fasten off at end of Round 3.
Cut your yarn making sure you leave a tail long enough to sew the perimeter of the mouse ears together and then on to the top of your Mickey hat.

Finishing off:
Using the tail left behind on one of the mouse ear backs, use your yarn needle to sew an ear back to an ear front. A basic in and out stitch is what I use but feel free to do whatever makes you most comfortable. Once you have Minnie’s ear assembled, use your yarn needle to secure the ear to the side top area of the beanie in desired location on hat. You can see my pictures for where I placed my own.  Once you have it in place, pull your yarn in to the inside of the beanie before finishing off extra length.  Repeat this process for the second ear.
Next use the tail you left on the center bow strap to secure Minnie’s red bow to the top of your hat.  I’m always paranoid of things following off so I stitch all the way through to the top and bow and back. Plus I use a lot of double knots. 😉
Now check over your crochet project for any tails or ends that you may have missed in process to weave in and finish off. Do so if you find any.
Minnie Mouse Oversized Ear and Bow Beanie Hat Crochet Pattern Closeup Bow View

Here are some of the pictures I took to show how this Minnie the Mouse hat looks from different directions once completed:

Minnie Mouse Oversized Ear and Bow Beanie Hat Crochet Pattern Front Left View

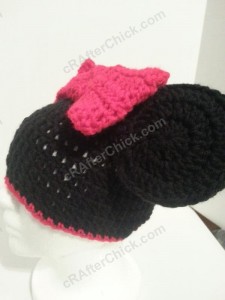
Minnie Mouse Oversized Ear and Bow Beanie Hat Crochet Pattern Left Profile View

Minnie Mouse Oversized Ear and Bow Beanie Hat Crochet Pattern Rear View

Minnie Mouse Oversized Ear and Bow Beanie Hat Crochet Pattern Right Profile View

Minnie Mouse Oversized Ear and Bow Beanie Hat Crochet Pattern Front Right View

Want more free patterns? Follow cRAfterChick on Facebook or Pinterest to get updates on patterns as they are added.  

Note: All the cRAfterChick patterns shared on this site are free of charge.  Please feel free to use them to make your own items.  If you use it to make items to sell please credit cRAfterChick for the pattern and provide link to our site.  Please do not copy and paste my pattern or try to use my images as your own.  You can link to any of my patterns.  Happy crafting!

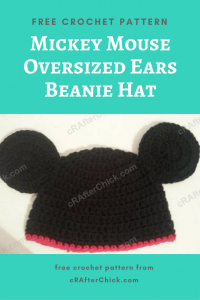
Mickey Mouse Oversized Ears Beanie Hat Crochet Pattern

Mickey Mouse Oversized Ears Beanie Hat Crochet Pattern_ a chick crafting through Rheumatoid Arthritis cRAfterChick.com

Mickey Mouse Oversized Ears Beanie Hat Crochet Pattern

  free crochet pattern from cRAfterChick.com

Mickey Mouse Oversized Ears Beanie Hat Free Crochet Pattern

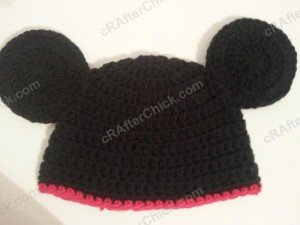
This was a cute hat project that worked up really fast and who doesn’t like Mickey Mouse?  After posting a picture of this hat on my personal Facebook account, I got more than 10 requests from family and friends wanting Mickey or Minnie hats.  Normally I just do them for a certain person but I may have to put together an army of these hats to make everyone happy.  I love that the ears are extra big on the hats versus smaller ears I have seen on other hats.  The red trim at the bottom is optional but I like it as it represents the red in his clothing.  :)

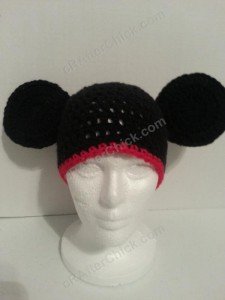
Mickey Mouse Oversized Ears Beanie Hat Crochet Pattern Front View

Mickey Mouse Oversized Ears Beanie Hat Crochet Pattern Notes

Project requires:
Black Yarn for Beanie Hat main color (or desired color) and ears- (I use a lot of Red Heart Saver yarn but any medium to normal weight yarn will do)
Red Yarn for contrast trim (optional)
“J” hook (6.0 mm)
Scissors or Yarn Cutter
Blunt large eye yarn / tapestry needle to weave in ends

Abbreviations used in this pattern (US crochet stitches):
ch – chain
st – stitch
sl st – slip stitch
sc – single crochet (US)
dc – double crochet (US)

Mickey Mouse Oversized Ears Beanie Hat Crochet Pattern

Pattern Instructions:

*Note: This project is worked in the round on the base of a magic ring. If you do not know how to do this, please see tutorial here from: yarntomato on CrochetMe

The hat in this picture is made with my Easy Peasy Youth Sized (Age 3-10 years old) Double Crochet Beanie  Hat Pattern which you can find  here as a foundation for the project.  Want it in another size? No worries. Head over to Easy Peasy All Family Sizes Free Double Crochet Beanie Patterns to select the size you want for your project.

Hat Base: in main color black yarn

Use Easy Peasy Crochet Beanie Size of your choice

One completed sl st red yarn (optional contrast trim) to where you left off on beanie base. Ch 1 before placing 1 sc in each st around. Sl st in to the top of the 1st st. Fasten off.
Once you have completed your beanie for the base you are ready to start on making your Mickey Mouse ear hat!

*Note: If you are going to do this in toddler size beanie, make the 3rd round in mouse ears sc instead of dc.  If you are going to do this in 6 months to 12 months, make both 2nd and 3rd round sc instead of dc.  If you are doing newborn to 6 months make all the mouse ear rounds in sc.

Ear Front (Make 2): using black yarn
Round 1: In a magic circle, ch 2 before placing 12 dc in circle. Pull circle closed in tight circle. Sl st in to top of 1st st in round. (12 dc)
Round 2: Ch 2 before placing 2 dc in 1st st and next 11 st. Sl st in top of 1st st in round. (24 dc)
Round 3:  Place *2 sc in first st, 1 sc in next*. Repeat this pattern *around until end of round. (36 dc)
Fasten off.

Ear Back (Make 2): using black yarn
Repeat Rounds 1-3 from Ear Front step above but do not fasten off at end of Round 3.
Cut your yarn making sure you leave a tail long enough to sew the perimeter of the mouse ears together and then on to the top of your Mickey hat.

Finishing off:
Using the tail left behind on one of the mouse ear backs, use your yarn needle to sew an ear back to an ear front. A basic in and out stitch is what I use but feel free to do whatever makes you most comfortable. Once you have ear assembled, use your yarn needle to secure the ear to the side top area of the beanie in desired location on hat. You can see my pictures for where I placed my own. Once you have it in place, pull your yarn in to the inside of the beanie before finishing off extra length.  Repeat this process for the second ear.
Now check over your crochet project for any tails or ends that you may have missed in process to weave in and finish off. Do so if you find any.

Here are some of the pictures I took to show how this Mickey the Mouse hat looks from different directions when completed:

Mickey Mouse Oversized Ears Beanie Hat Crochet Pattern Front Left View

Mickey Mouse Oversized Ears Beanie Hat Crochet Pattern Left Side Profile

Mickey Mouse Oversized Ears Beanie Hat Crochet Pattern Left Back View

Mickey Mouse Oversized Ears Beanie Hat Crochet Pattern Rear View

Mickey Mouse Oversized Ears Beanie Hat Crochet Pattern Front Right View

Want more free patterns? Follow cRAfterChick on Facebook or Pinterest to get updates on patterns as they are added.

Note: All the cRAfterChick patterns shared on this site are free of charge.  Please feel free to use them to make your own items.  If you use it to make items to sell please credit cRAfterChick for the pattern and provide link to our site.  Please do not copy and paste my pattern or try to use my images as your own.  You can link to any of my patterns.  Happy crafting!

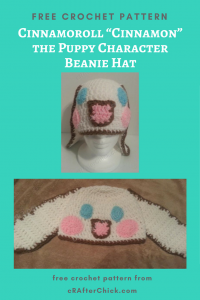
Cinnamoroll “Cinnamon” the Puppy Character Beanie Hat Crochet Pattern

Cinnamoroll Cinnamon_the Puppy Character Beanie Hat Crochet Pattern_ a chick crafting through Rheumatoid Arthritis cRAfterChick.com

Cinnamoroll “Cinnamon” the Puppy Character Beanie Hat Crochet Pattern

  free crochet pattern from cRAfterChick.com

Cinnamoroll “Cinnamon” the Puppy Character Beanie Hat Free Crochet Pattern


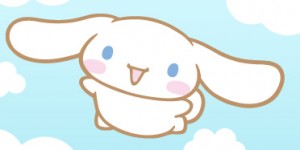
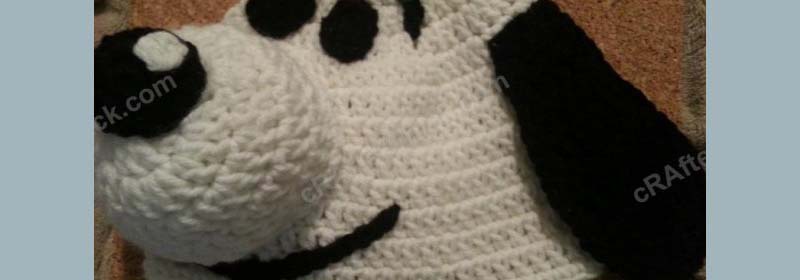
This crochet pattern was inspired by this cute picture of Cinnamoroll the Puppy with the contrast cinnamon colored lines. Even though he is an all white puppy I wanted to see how he would turn out with a bit of cinnamon. :)  So thus this hat was created.  He is a Hello Kitty world friend and adorable of course.  I think he translated pretty well to crochet. Now I have to make an all white true version of him soon!


cinnamon cinnamoroll  

Cinnamoroll “Cinnamon” the Puppy Character Beanie Hat Crochet Pattern Notes

Cinnamoroll Cinnamon the Puppy Character Beanie Hat Crochet Pattern laying flat profile pattern view

Project requires:
White Yarn for Beanie Hat main color (or desired color)- (I use a lot of Red Heart Saver yarn but any medium to normal weight yarn will do)
Brown “Cinnamon” colored yarn for features and trim
Pink yarn for blush circles and mouth
Light or Bright Blue for eye color
“J” hook (6.0 mm)
Scissors or Yarn Cutter
Blunt large eye yarn / tapestry needle to weave in ends

Abbreviations used in this pattern (US crochet stitches):
ch – chain
st – stitch
sl st – slip stitch
sc – single crochet (US)
dc – double crochet (US)
dctog- double crochet two stitches together (US) 
hdc – half double crochet (US)

Cinnamoroll Cinnamon the Puppy Character Beanie Hat Crochet Pattern Front View

Pattern Instructions:

*Note: This project is worked in the round on the base of a magic ring. If you do not know how to do this, please see tutorial here from: yarntomato on CrochetMe

The hat in this picture is made with my free Easy Peasy  Pre-Teen / Teen / Women Double Crochet Beanie Pattern  which you can find here as a foundation for the project. Want it in another size? No worries. Head over to Easy Peasy All Family Sizes Free Double Crochet Beanie Patterns to select the size of the free pattern you want for your project.

Hat Base: in main color white yarn

Use Easy Peasy Crochet Beanie Size of your choice

Hat Contrast Band: using cinnamon brown yarn
One completed sl st brown “cinnamon” yarn to where you left off on beanie base. Ch 1 before placing 1 sc in each st around. Sl st in to the top of the 1st st. Fasten off.
Once you have completed your beanie for the base you are ready to start on making your Cinnamoroll the Puppy inspired anime hat with a touch of cinnamon!

*Note: If you are going to do this in newborn / infant/ up to 1 year old sizes, switch to a G hook for the features instead of the J to scale them down in size or eliminate one increase row from each feature worked in the round

Eyes (Make 2): using bright or light blue yarn
Round 1: In magic circle, ch 1 before placing the following st in this order: 2 sc, 1 hdc, 1 dc, 1 hdc, 3 sc, 1 hdc, 1 dc, 1 hdc, and 1 sc. Pull the circle closed to line up in tight circle. Sl st in to top of 1st st. (12 st total)
Round 2:  Ch 1 before placing 1 sc in first 2 st, 2 sc in next 3 st, 1 sc in next 3 st, 2 sc in next 3 st and 1 sc in last st before sl st to the top of 1st st in round.
Cut your yarn making sure you leave a tail long enough to sew the eyes on to your Cinnamoroll hat during assembly before pulling yarn through and putting to side.
Repeat for second eye. Place to the side until needed for assembly.

Blush Circles (Make 2): using pink colored yarn
Round 1: In magic circle, ch 1 before placing the following st in this order: 2 sc, 1 hdc, 1 dc, 1 hdc, 3 sc, 1 hdc, 1 dc, 1 hdc, and 1 sc. Pull the circle closed to line up in tight circle. Sl st in to top of 1st st. (12 st total)
Round 2:  Ch 1 before placing 1 dc in first 2 st, 2 dc in next 3 st, 1 dc in next 3 st, 2 dc in next 3 st and 1 dc in last st before sl st to the top of 1st st in round.
Cut your yarn making sure you leave a tail long enough to sew the blush circle on to your Cinnamoroll hat during assembly before pulling yarn through and put to side until needed. Repeat this process for second eye.

Ear Front (Make 2): using white main color yarn
Round 1: Ch 8, dc in 3rd ch from hook and place 1 dc in each of the following 5 st. Ch 2 and turn. (6 dc)
Round 2-3: Place 1 dc in first st and each st across. Ch 2 and turn. (6 dc)
Round 4-7: Place 2 dc in 1st st and 1 dc in rest of st across. Ch 2 and turn. ( 7-8-9-10 dc)
Round 8-13: Place 1 dc in 1st st and each st across. Ch 2 and turn. (10 dc)
Round 14-15: Place 1 dc in second st, skipping first st, 1 dc in following st until you have 2 st left at end, dctog last two st. Ch 2 and turn. ( 8 – 6 dc)
Round 16: Place 1 sc in second st, skipping 1st, 1 hdc in next, 1 dc in next st, 1 hdc in following st, 1 sc in last st. Sl st into same st.
Fasten off and put down until ready to attach to ear back.

Ear Back (Make 2): using white main color yarn
Repeat Rounds 1-16 from Ear Front step above but do leave a long enough tail of yarn at the beginning of your project to be able to sew your ears once assembled on to the beanie hat. After completing Round 16 fasten off.

Ear Liner: using one ear front, one ear back and cinnamon brown yarn
Round 17: Place one finished Ear Front in front of the Ear Back you are working on. Attach your “cinnamon” yarn to a st at one of the top corners of ears with a sl st before ch 1, then work a round of  1 sc around the perimeter through both pieces until you reach the other top corner.
Fasten off once one round is completed and sl st to beginning st.

Mouth: using pink yarn 
Round 1: Ch 7 before placing 1 dc in 3rd ch from hook and 1 dc in the following 4 ch. Ch 2 and turn. (5 dc)
Round 2: Place 1 dc in 1st st and following 4 st across. Ch 2 and turn. (5 dc)
Round 3: Place 1 hdc in 2nd st, skipping 1st st in row, 1 dc in next st, 1 hdc in following st and sl st in to the last st in row.
Once completed pull yarn through and  fasten off.

Mouth Liner: using cinnamon brown contrast yarn
Attach “cinnamon” colored yarn to the mouth with a sl st in a st.  Ch 1 before placing 1 sc in each st but place 3 sc in the top two corners of mouth and in bottom dc st in curve to give it a more rounded appearance if desired.

Finishing off:
Starting from the bottom up, use the tail left on your mouth and yarn needle to sew your mouth on the beanie hat.  Once your mouth piece is secured, pull yarn to inside of hat before finishing off.
Taking the tail from one of your blush circles and yarn needle, sew them in place in desired location on face.  Pull yarn to the inside of your hat when finished sewing before fastening off end.  Repeat this process for the second blush circle.
Next you want to use the tail from one eye and your yarn needle to sew one eye in to the proper place. You can reference my pictures as to where I placed them on my own Cinnamoroll hat. Once sewn on, pull yarn to inside of hat and finish off.  Repeat this process for the second eye.
Using the tail left behind on one of the floppy puppy ears, use your yarn needle to secure the ear to the side top area of the beanie in desired location with the contrast on hat. You can see my pictures for where I placed my own. If you want longer hanging ears place it lower on the hat or higher placement for shorter length of ears hanging down. Once you have it in place, pull your yarn in to the inside of the beanie before finishing off extra length.  Repeat this process for the second ear.
Now check over your crochet project for any tails or ends that you may have missed in process to weave in and finish off. Do so if you find any.

Here are some of the pictures I took to show how my Cinnamoroll “Cinnamon” the Puppy Character Beanie Hat looks like from different directions when completed:

Cinnamoroll Cinnamon the Puppy Character Beanie Hat Crochet Pattern Alt View

Cinnamoroll Cinnamon the Puppy Character Beanie Hat Crochet Pattern

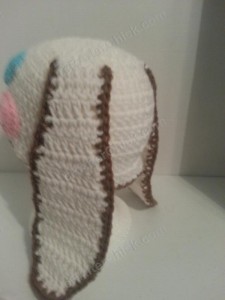
Cinnamoroll Cinnamon the Puppy Character Beanie Hat Crochet Pattern Left Profile View

Cinnamoroll Cinnamon the Puppy Character Beanie Hat Crochet Pattern Left Side View

Cinnamoroll Cinnamon the Puppy Character Beanie Hat Crochet Pattern Back left View

Cinnamoroll Cinnamon the Puppy Character Beanie Hat Crochet Pattern Rear View

Cinnamoroll Cinnamon the Puppy Character Beanie Hat Crochet Pattern Right Profile View

Cinnamoroll Cinnamon the Puppy Character Beanie Hat Crochet Pattern Down View

Want more free patterns? Follow cRAfterChick on Facebook or Pinterest to get updates on patterns as they are added.

Note: All the cRAfterChick patterns shared on this site are free of charge.  Please feel free to use them to make your own items.  If you use it to make items to sell please credit cRAfterChick for the pattern and provide link to our site.  Please do not copy and paste my pattern or try to use my images as your own.  You can link to any of my patterns.  Happy crafting!
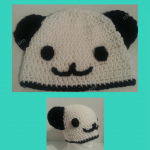
Pankun the Panda Character Beanie Hat Crochet Pattern

Pankun the Panda Character Beanie Hat Crochet Pattern_ a chick crafting through Rheumatoid Arthritis cRAfterChick.com

Pankun the Panda Character Beanie Hat Crochet Pattern

  free crochet pattern from cRAfterChick.com

  Pankun the Panda Beanie Hat Free Crochet Pattern

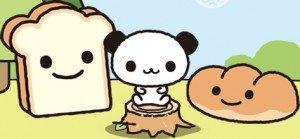
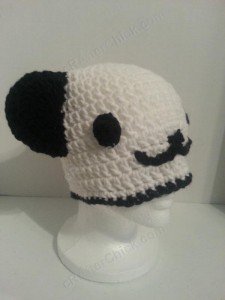
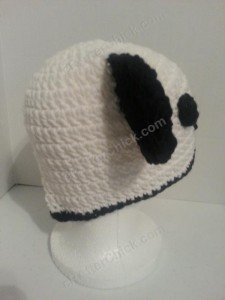
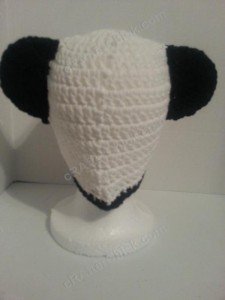
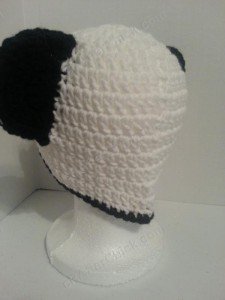
My future stepdaughter is obsessed with panda bears so when I came across an image of this anime style orphaned panda from Hello Kitty’s friends I had to make her one. He really is quite adorable and I hope you like my translation of it into a crocheted hat. If you give it a try please drop me a line or share your version on Ravelry so I can see. :) Happy crafting!

Pankun the panda inspired crochet pattern free

Pankun the Panda Character Beanie Hat Crochet Pattern Notes

Pankun the Panda Character Beanie Hat Crochet Pattern

Project requires:
White Yarn for Beanie Hat main color (or desired color)- (I use a lot of Red Heart Saver yarn but any medium to normal weight yarn will do)
Black Yarn for features and trim
“J” hook (6.0 mm)
Scissors or Yarn Cutter
Blunt large eye yarn / tapestry needle to weave in ends

Abbreviations used in this pattern (US crochet stitches):
ch – chain
st – stitch
sl st – slip stitch
sc – single crochet (US)
dc – double crochet (US) 
hdc – half double crochet (US)

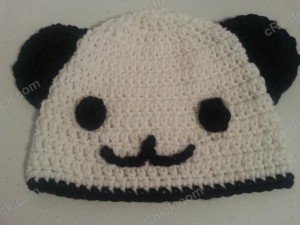
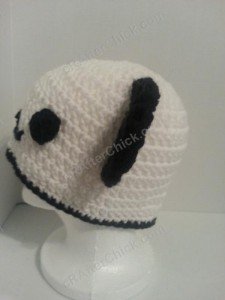
Pankun the Panda Character Beanie Hat Crochet Pattern side front view
Pattern Instructions:

*Note: This project is worked in the round on the base of a magic ring. If you do not know how to do this, please see tutorial here from: yarntomato on CrochetMe

The hat in this picture is made with my free Easy Peasy  Pre-Teen / Teen / Women Double Crochet Beanie Pattern  which you can find here as a foundation for the project. Want it in another size? No worries. Head over to Easy Peasy All Family Sizes Free Double Crochet Beanie Patterns to select the size of the free pattern you want for your project.

Hat Base: in main color white yarn
Use Easy Peasy Crochet Beanie Size of your choice
One completed sl st black yarn to where you left off on beanie base. Ch 1 before placing 1 sc in each st around. Sl st in to the top of the 1st st. Fasten off.
Once you have completed your beanie for the base you are ready to start on making your Pankun the panda bear inspired anime hat!

*Note: If you are going to do this in newborn / infant/ up to 1 year old sizes, switch to a G hook for the features instead of the J to scale them down in size or eliminate one increase row from each feature worked in the round

Eyes (Make 2): using black yarn
Round 1: In magic circle, ch 1 before placing the following st in this order: 2 sc, 1 hdc, 1 dc, 1 hdc, 3 sc, 1 hdc, 1 dc, 1 hdc, and 1 sc. Pull the circle closed to line up in tight circle. Sl st in to top of 1st st. (12 st total)
Cut your yarn making sure you leave a tail long enough to sew the eyes on to your Pankun hat during assembly.
Repeat for second eye. Place to the side until needed for assembly.

Ear Front (Make 2): using black yarn
Round 1: In a magic circle  ch 3 before placing 12 dc in circle. Pull circle closed in tight circle. Sl st in to top of 1st st in round. (12 dc)
Round 2: Ch 2 before placing 2 dc in 1st st and next 9 st. Ch 1 and turn leaving last 2 st unworked. (20 dc)
Round 3:  Place 2 sc in first st, 1 sc in next. Repeat this pattern around until bottom corner again leaving 2 unworked st not worked.  This will give it a good surface to attach to the beanie when putting together hat. Fasten off.

Ear Back (Make 2): using black yarn
Repeat Rounds 1-3 from Ear Front step above but do not fasten off at end of Round 3.
Round 8: Place one finished Ear Front in front of the Ear Back you are working on before ch 1, then work a round of  *2 sc in first st and 1 sc in next 2 st* repeating around the perimeter through both pieces.
Cut your yarn making sure you leave a tail long enough to sew the panda ears on to top of your Pankun hat during assembly.

Mouth: using black yarn 
Ch 20. Leave long enough tail to sew it securely on to beanie hat during assembly before cutting yarn and pulling through.

Finishing off:
Starting from the bottom up, use the tail left on your mouth chain and yarn needle to sew your mouth on in a “w” shape.  Once secured, pull yarn to inside of hat before finishing off.
Next you want to use the tail from one eye and your yarn needle to sew one eye in to the proper place. You can reference my pictures as to where I placed them on my Pankun hat.   Once sewn on, pull yarn to inside of hat and finish off.  Repeat this process for eye number
Using the tail left behind on one of the panda ears, use your needle to secure the ear to the side top area of the beanie in desired location with the contrast on hat. You can see my pictures for where I placed my own.  Once you have it in place, pull your yarn in to the inside of the beanie before finishing off extra length.  Repeat this process for the second ear.
Now check over your crochet project for any tails or ends that you may have missed in process to weave in and finish off. Do so if you find any.

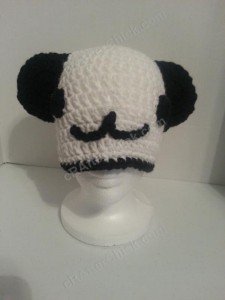
Pankun the Panda Character Beanie Hat Crochet Pattern zoom in on face

This was a fun and quick hat project that I’m sure my  stepdaughter will love.  It will make a great gift for Hello Kitty fans, those who love panda bears or for sweet crocheted baby hats. <3 Happy crafting!

Here are some of the pictures I took to show how Pankun the Panda hat looks from different directions when completed:

Pankun the Panda Character Beanie Hat Crochet Pattern Front

Pankun the Panda Character Beanie Hat Crochet Pattern alternate view

Pankun the Panda Character Beanie Hat Crochet Pattern Right side profile view

Pankun the Panda Character Beanie Hat Crochet Pattern right back view

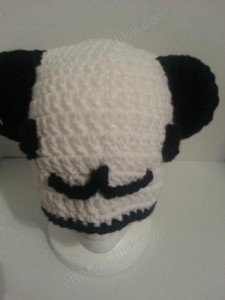
Pankun the Panda Character Beanie Hat Crochet Pattern rear view

Pankun the Panda Character Beanie Hat Crochet Pattern back left view

Pankun the Panda Character Beanie Hat Crochet Pattern Left Profile Viw

Pankun the Panda Character Beanie Hat Crochet Pattern frontal view

Want more free patterns? Follow cRAfterChick on Facebook or Pinterest to get updates on patterns as they are added.

Note: All the cRAfterChick patterns shared on this site are free of charge.  Please feel free to use them to make your own items.  If you use it to make items to sell please credit cRAfterChick for the pattern and provide link to our site.  Please do not copy and paste my pattern or try to use my images as your own.  You can link to any of my patterns.  Happy crafting!
Three Little Pig(gie)s Beanie Hat Set Crochet Pattern

Three Little Pig(gie)s Beanie Hat Set Crochet Pattern_ a chick crafting through Rheumatoid Arthritis cRAfterChick.com

Three Little Pig(gie)s Beanie Hat Set Crochet Pattern

free crochet pattern from cRAfterChick.com

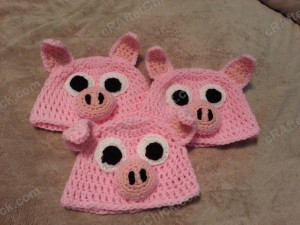
Three Little Pigs Beanie Hat Crochet Pattern

The children in the play in my mother’s classroom needed three little pig hats. I wanted to make these pigs looking more young and fun versus the adult pig hat I created previously for my mother to wear when reading Three Little Pigs to her class.  I like how the pig(gie)s turned out and find them very cute.  The kids loved them and were so excited to wear them in their play.Make just one hat or crochet the whole set! :)

Three Little Pig(gie)s Beanie Hat Set Crochet Pattern Notes

Three Little Pigs Beanie Hat Crochet Pattern Straight On View

Project requires:
Pink Yarn for Beanie Hat (main color)-  (I use a lot of Red Heart Saver yarn but any medium to normal weight yarn will do)
Contrast darker Pink Yarn for ears, nose and trim
White Yarn for white part of eyes
Black Yarn for nostrils and eye pupils
“J” hook (6.0 mm)
Scissors or Yarn Cutter
Blunt large eye yarn / tapestry needle to weave in ends
Small amount of fiberfill stuffing for snout

Abbreviations used in this pattern:
ch – chain
st – stitch
sl st – slip stitch
sc – single crochet (US)
dc – double crochet 
hdc – half double crochet

Pattern Instructions:

*Note: This project is worked in the round on the base of a magic ring. If you do not know how to do this, please see tutorial here from: yarntomato on CrochetMe

The hat in this picture is made with my Easy Peasy Youth Sized (Age 3-10 years old) Double Crochet Beanie  Hat Pattern which you can find  here as a foundation for the project.  Want it in another size? No worries. Head over to Easy Peasy All Family Sizes Free Double Crochet Beanie Patterns to select the size you want for your project.

Hat Base:

Use Easy Peasy Crochet Beanie Size of your choice

Once you have completed your beanie for the base you are ready to start on making your own Three Little Pig(gie)s hat.
Starting off we are going to put a simple contrast color band to the bottom of the hat.  For this sl st your darker Pink contrast  yarn to a st on the last round. Ch 1, then work 1 sc in each st around, sl st to top of first st in round before finishing off.

Inner Black Pupil of Eyes: using black yarn
Round 1:  Starting off with your black yarn for the pupils of the eye, ch 2 (does not count as a st throughout pattern) before placing 8 hdc in a magic circle. Pull circle tight before sl st in top of beginning st. (8 hdc)
Cut yarn leaving a long tail in order to sew your pupil in place on your eye white during assembly process. Pull yarn through and put to side until needed.

Outer White Eye: using white yarn
Round 1:  Starting off with your black yarn for the pupils of the eye, ch 2 (does not count as a st throughout pattern) before placing 10 dc in a magic circle. Pull circle tight before sl st in top of beginning st.  (10 dc)
Round 2:  Ch 2 before placing 2 dc in first st and 3 dc in the next 9 st. Sl st in top of 1st st in round. (20 dc)
Cut yarn leaving a long tail in order to sew your eye on to the beanie during assembly process. Pull yarn through and put to side until needed.

Nostrils (make 2): using black yarn
Ch 3. Pull yarn through after cutting with a tail long enough to secure nostrils on to the nose front. Put to side until assembly steps.

Nose Front: using darker pink contrast yarn 
Round 1:  Taking the darker pink contrast yarn, ch 2 (does not count as a st throughout pattern) before placing 8 dc in a magic circle. Pull circle tight before sl st in top of beginning st.  (8 dc)
Round 2:  Ch 1 before placing 2 sc in first st and 2 sc in the next 7 st. Sl st in top of 1st st in round. (16 sc)
Round 3:  Ch 1 before placing *2 sc in first st, 1 sc in next st*   repeating * pattern until end of round. Sl st in top of 1st st in round. (24 sc)
Fasten off.

Nose back:  using main color  pink yarn – optional step

Note:  This is not a necessary step in making this hat but I highly recommend doing this. Since we are putting fiberfill stuffing inside nose / snout during assembly and the openings between st on beanie expand when worn, this will keep it in the snout and not of the wearers forehead which can get a bit itchy. :)

Round 1:  Starting off with your black yarn for the pupils of the eye, ch 2 (does not count as a st throughout pattern) before placing 12 dc in a magic circle. Pull circle tight before sl st in top of beginning st.  (12 dc)
Round 2:  Ch 2 before placing 2 dc in first st and 3 dc in the next 11 st. Sl st in top of 1st st in round. (24 dc)
Fasten off nose back.

Attaching Nostrils:
Now is a good time to attach your nostrils on to the front of the nose front you have just assembled. Otherwise you have to sew in around the depth of the snout.   So using your yarn needle and the tail left on one nostril, sew it securely on to the front of the Nose Front. (see pictures to see where I placed mine).  Pull yarn through to back of nose front when secure before fastening off.
Repeat process with second nostril.

Nose Snout: using main color  pink yarn
With nose front facing you sl st your main color pink yarn (or desired main color for hats) where you left off in last round in creating the nose snout so that the good side is facing towards you.
Rounds 1-3:  Ch 1 before placing 1 sc in first st and in each of the following 23 st. Sl st in top of 1st st in round. (24 sc)

Attaching Nose Back: *optional*
At this point before cutting yarn if you choose to do the Nose Back (optional step) to keep the stuffing inside the snout, place it against the opening of your snout and do Round 4 like rounds 1-3 but through the st in both pieces at once, securing it in to place.  You want to stop 1/2 to 2/3 of the way around to start stuffing your snout to desired fullness. Once you have reached end of sc round, sl st in top of the 1st st in round.
Cut yarn leaving a long enough tail needed to sew nose in place on your Three Little Pig(gies) hat during finishing off process before pulling through. Put your assembled nose/snout to side for now.

Ear front (Make 2): using darker contrast pink yarn
Round 1: Ch 8. Starting with 3rd ch from hook place 1 dc in this ch and 1 dc in the following 5 ch. Ch 2 and turn. (6 dc)
Round 2: Dc in 2nd st, skipping the 1st st, and place 1 dc in the following 4 st. Ch 2 and turn. (5 dc)
Round 3: Dc in 2nd st, skipping the 1st st, and place 1 dc in the following 3 st. Ch 2 and turn. (4 dc)
Round 4:  Dc in 2nd st, skipping the 1st st, and place 1 dc in the following 2 st. Ch 2 and turn. (3 dc)
Round 5:  Dc in 2nd st, skipping the 1st st, and place 1 dc in the following st. Ch 2 and turn. (2 dc)
Round 6:  Place 1 hdc in the 2nd st, skipping the 1st st. Sl st in to st. (1 hdc)
Cut yarn, pull through and fasten off.
Repeat for second ear front.

Ear back (Make 2): using main color pink yarn
For Ear Backs, repeat Rounds 1-6 from Ear Fronts but do not fasten off at end of Round 6.  You want to leave a long tail at the beginning of this part so you can sew it on to the beanie hat during assembly process.
Round 7:  Place one finished Ear Front in front of your Ear Back you are currently working on.  Ch 1 and place 1 sc in each of the st around.  I place 3 sc in each of the bottom corners and in the top most ear tip st to give it more of a rounded appearance.
Cut yarn, pull through and fasten off. You should still have your main color tail from Round 1 to attach ear during finishing off process. Do not fasten off this tail.

Finishing off:
Since I like to start adding my features from the bottom up we will start with Winnie the Pooh’s smile. I find that by working from bottom up you get a better idea of how much space you have during the process.  Otherwise you may find yourself scrunching up features at the bottom if you haven’t left enough space in your process. By working upwards you always have extra room as you can just move the next feature up a little higher if need be.
Using the tail left on the assembled nose/snout  from before and your yarn needle, sew the piece onto the desired place on the hat.  (You can reference my pictures to see how I placed my own.) Once you have secured it into place, bring the yarn into the inside of the beanie hat and finish off.
Now we will assemble the pig’s eyes for this hat. Take the yarn tail left from one black eye pupil and sew it into place onto one eye white. Once sewn in place, pull yarn to back of eye and fasten off black yarn. Repeat this process for the second eye.
Next we will work on the attaching the pig(gies)’eyes. Taking the white yarn tail left on your assembled eye sew it in to desired place. You can see my pictures to see where I placed mine on the face.
Once it’s sewn on, pull yarn in to the inside of the hat before finishing off. Repeat for second eye.
Now all that is left is to attach the pig’s ears on to the beanie. Sew each of the ears in place by using the leftover yarn tail (in main color yarn – pink) from when you crocheted the ears before directly on to the top sides of the beanie in your desired position. You want to attach the ears with the contrast darker pink color facing forwards (your ear front). Once secure, pull yarn in to inside of your hat before finishing off.  Repeat process for second ear.
Check for any tails or ends that you may have missed in process to weave in and finish off. Do so if you find any. Then you are all done. One little pig(gie) hat all ready to wear. Now you just need to repeat process for the other two pig(gies) to have a set. :)

Here are some additional pictures to show how the Three Little Pig(gies) beanie hat looks worn from different directions once crocheted:

Three Little Pigs Beanie Hat Crochet Pattern Fronr Right View

Three Little Pigs Beanie Hat Crochet Pattern Side View

Three Little Pigs Beanie Hat Crochet Pattern Back Left Side View

Three Little Pigs Beanie Hat Crochet Pattern Rear View

Want more free patterns? Follow cRAfterChick on Facebook or Pinterest to get updates on patterns as they are added.

Note: All the cRAfterChick patterns shared on this site are free of charge.  Please feel free to use them to make your own items.  If you use it to make items to sell please credit cRAfterChick for the pattern and provide link to our site.  Please do not copy and paste my pattern or try to use my images as your own.  You can link to any of my patterns.  Happy crafting!

Easy Anime Inspired Bunny Beanie Hat Crochet Pattern

Easy Anime Inspired Bunny Beanie Hat Crochet Pattern_ a chick crafting through Rheumatoid Arthritis cRAfterChick.com

Easy Anime Inspired Bunny Beanie Hat Crochet Pattern

  free crochet pattern from cRAfterChick.com

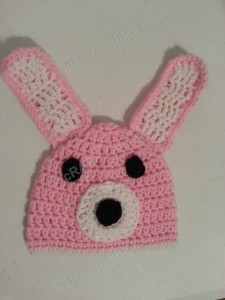
This pattern was created by wanting to make a fun by easy alternative to normal bunny hats for one of my nieces for Easter. Of course we look anime, gaming and geeky things in our family so used an anime influence to making this bunny face beanie hat.

It is a very beginner to beginner advanced friendly pattern and works up in a short amount of time. Happy crafting!

Easy Anime Inspired Bunny Beanie Hat Crochet Pattern Notes

Easy Anime Inspired Bunny Beanie Hat Free Crochet Pattern

Project requires:
Pink Yarn for Beanie Hat main color (or desired color)-  (I use a lot of Red Heart Saver yarn but any medium to normal weight yarn will do)
Black Yarn for eye pupil and smile
White Yarn for face circle and front ear pieces
“J” hook (6.0 mm)
Scissors or Yarn Cutter
Blunt large eye yarn / tapestry needle to weave in ends

Abbreviations used in this pattern (US crochet stitches):
ch – chain
st – stitch
sl st – slip stitch
sc – single crochet (US)
dc – double crochet (US) 
hdc – half double crochet (US)

Easy Anime Inspired Bunny Beanie Hat Crochet Pattern

Pattern Instructions:

*Note: This project is worked in the round on the base of a magic ring. If you do not know how to do this, please see tutorial here from: yarntomato on CrochetMe

The hat in this picture is made with my free Easy Peasy Baby / Infant Sized (6- 12 Months) Double Crochet Beanie Hat Pattern which you can find here as a foundation for the project. Want it in another size? No worries. Head over to Easy Peasy All Family Sizes Free Double Crochet Beanie Patterns to select the size of the free pattern you want for your project.

Hat Base: in main color yarn
Use Easy Peasy Crochet Beanie Size of your choice
Once you have completed your beanie for the base you are ready to start on making your anime inspired anime hat!
One completed sl st white yarn to where you left off on beanie base. Ch 1 before placing 1 sc in each st around. Sl st in to the top of the 1st st. Fasten off.   Now you are ready to start making the features for this easy crochet bunny hat.

 *Note: If you are going to do this in newborn / infant/ up to 1 year old sizes, switch to a G hook for the features instead of the J to scale them down in size or eliminate one increase row from each feature worked in the round.

Nose: using black yarn
Round 1: In magic circle, ch 2 before placing 10 dc.  Pull the circle closed to line up in tight circle. Sl st in to top of 1st st. (10 dc)

Face Area Circle: Using white yarn
Round 1: In magic circle, ch 2 before placing 12 dc.  Pull the circle closed to line up in tight circle. Sl st in to top of 1st st. (12 dc)
Round 2: Ch 2 before placing 2 dc in first st and in each of the following 11 st. Sl st in to the top of the 1st st in round. (24 dc)
Before you cut your yarn make sure you leave a tail long enough sew your face area on to your beanie hat.

Eyes (Make 2): using black yarn
Round 1: In magic circle, ch 2 before placing  8 hdc.  Pull the circle closed to line up in tight circle. Sl st in to top of 1st st. (8 hdc)
Cut your yarn making sure you leave a tail long enough  to sew the eyes on to your bunny hat during assembly.
Repeat for second eye.

Ear Front (Make 2): using white yarn
Round 1: Ch 7 before placing 1 dc in the 3rd ch from the hook and place 1 dc in each of the following 5 ch. Ch 2 and turn.  (5 dc)
Round 2-5: Make 1 dc in 1st st and each of the following 4 st. Ch 2 and turn. (5 dc)
Round 6: Make 1 dc in 1st st and each of the following 4 st. Ch 1 and turn. (5 dc)
Round 7: Sc in 1st st, hdc in next st, dc in next st, hdc in following st, and sc in last st.  Sl st in to the bottom of last st.  Fasten off.

Ear Back (Make 2): using pink or main color yarn
Repeat Rounds 1-7 from Ear Front step above but do not fasten off at end of Round 7.
Round 8: Place one finished Ear Front in front of the Ear Back you are working on before ch 1, then work a round of sc around the perimeter through both pieces.  For a more rounded ear top, place 3 sc in each of the bottom corners of the ears and 2 sc in the top most 3 st from Round 7.
Cut your yarn making sure you leave a tail long enough  to sew the ears on to top of your bunny hat during assembly.

Easy Anime Inspired Bunny Beanie Hat Crochet Pattern Face Close Up

Finishing off:

Tip: I find that by working from bottom up you get a better idea of how much space you have during the process.  Otherwise you may find yourself scrunching up features at the bottom if you haven’t left enough space in your process. By working upwards you always have extra room as you can just move the next feature up a little higher if need be.

You are now going to use this the tail left on your nose from before and your yarn needle to sew the nose into the desired place on the white face area.  (You can reference my pictures to see how I placed my own.) Once you have secured it into place, bring the yarn into the back side of the face area before finishing off.
Next we will attach the face area to your beanie hat. Using the tail left on the face area circle and yarn needle secure the face area in place on to the beanie hat.  Pull yarn in to the inside of beanie once sewn on and fasten off.
Next we will work on the eyes.  Take the yarn tail left from one eye and sew it into place on to the hat using yarn needle.   Once it’s sewn in place, pull yarn in to the inside of the hat before finishing off. Repeat for second eye.
Using the tail left behind on one of the ears, use your needle to secure the ear to the top of the beanie in desired location with the contrast white yarn (or desired color) facing forward on hat.  Once you have it in place, pull your yarn in to the inside of the beanie before finishing off extra length.  Repeat this process for the second ear.
Now check over your crochet project for any tails or ends that you may have missed in process to weave in and finish off. Do so if you find any.  I would love to see your version of my anime inspired bunny hat if you make one, just drop me a link. :)

Here are some of the pictures I took to show how this bunny hat looks from different directions when completed:

Easy Anime Inspired Bunny Beanie Hat Crochet Pattern Front View

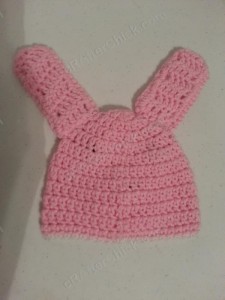
Easy Anime Inspired Bunny Beanie Hat Crochet Pattern Rear View

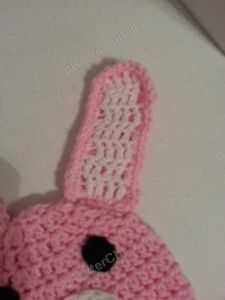
Easy Anime Inspired Bunny Beanie Hat Crochet Pattern Closeup of Ear details

Want more free patterns? Follow cRAfterChick on Facebook or Pinterest to get updates on patterns as they are added.

Note: All the cRAfterChick patterns shared on this site are free of charge.  Please feel free to use them to make your own items.  If you use it to make items to sell please credit cRAfterChick for the pattern and provide link to our site.  Please do not copy and paste my pattern or try to use my images as your own.  You can link to any of my patterns.  Happy crafting!

Skippyjon Jones Siamese Cat Book Character Beanie Hat Crochet Pattern

Skippyjon Jones Book Character Beanie Hat Crochet Pattern_ a chick crafting through Rheumatoid Arthritis cRAfterChick.com

Skippyjon Jones Book Character Beanie Hat Crochet Pattern

 free crochet pattern from cRAfterChick.com

Skippyjon Jones Siamese Cat Book Character Beanie Hat Free Crochet Pattern

When I started making hats for my mother’s classroom, Skippyjon Jones was brought up a few dozen times at least. Apparently he is a very popular children’s book character and my nephew was horrified that I did not know who he was. lol

So I ended up making up this guy for my nephew and  one in adult size for the auction at my mother’s school to raise funds.  I donated this in addition to a Winnie the pooh hat, a Keroppi hat, and a Diary of a Wimpy Kid hat.   I was shocked to find out about the bidding war going over these character hats.  Almost all sold for $50 to $60 each!  So many people were unhappy that they did not win, they begged my mother for me to make more for them to purchase.  I guess you can say I now have been recruited to make an entire army of SkippyJon Jones hats..

Skippyjon Jones Siamese Cat Children Book Character Inspired Free Crochet Pattern

Skippyjon Jones Book Character Beanie Hat Crochet Pattern Notes

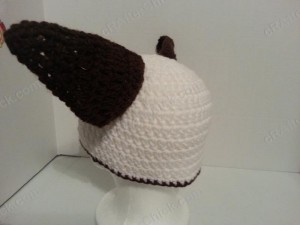
  Skippyjon Jones Book Character Beanie Hat Crochet Pattern Laying Flat

Project requires:
White or Off-white Yarn for Beanie Hat main color-  (I use a lot of Red Heart Saver yarn but any medium to normal weight yarn will do) I used a white on this one but subsequent ones I opted for a very light cream
Black Yarn for face features
Blue Yarn for eye color
Medium Brown Yarn for face area
Lighter Brown Yarn for ear front
Darker Brown Yarn for ear backs and trim
“J” hook (6.0 mm)
Scissors or Yarn Cutter
Blunt large eye yarn / tapestry needle to weave in ends

Abbreviations used in this pattern (US crochet stitches):
ch – chain
st – stitch
sl st – slip stitch
sc – single crochet (US)
dctog – double crochet two st together (US) 
dc – double crochet (US)

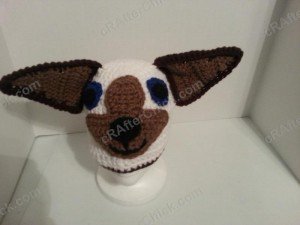
Skippyjon Jones Book Character Beanie Hat Crochet Pattern Front View

Pattern Instructions:
*Note: This project is worked in the round on the base of a magic ring. If you do not know how to do this, please see tutorial here from: yarntomato on CrochetMe

The hat in this picture is made with my free Easy Peasy  Pre-Teen / Teen / Women Double Crochet Beanie Pattern  which you can find here as a foundation for the project. Want it in another size? No worries. Head over to Easy Peasy All Family Sizes Free Double Crochet Beanie Patterns to select the size of the free pattern you want for your project.

Hat Base: in main color yarn
Use Easy Peasy Crochet Beanie Size of your choice

Contrast Trim: using darkest brown yarn
Using a sl st attach the darkest brown yarn color to st where you left off at end of your beanie hat base. Ch 1 before working a round of 1 sc in each st around. Sl st in to the top of the 1st st in round.  Pull yarn through and fasten off.
Once you have completed your beanie for the base you are ready to start on making your Skippyjon Jones hat!

Eye Color (Make 2): Using bright blue yarn
Round 1: In magic circle, ch 2 before placing 14 dc.  Pull the circle closed to line up in tight circle. Sl st in to top of 1st st. (14 dc) Leave tail long enough to secure eye on to the beanie hat during assembly process.
*For infant through 12 months sizes, make 12 hdc instead.

Eyes  Pupils (Make 2): Using black yarn
Round 1:  In magic circle ch 1 before placing 6 sc. Pull circle closed. Sl st in to the top of 1st st in round. (6 sc)
Before you cut your yarn make sure you leave a tail long enough sew your eye pupils on to your eye color during assembly.
*For infant through 12 months sizes, make 4 sc instead of 6 sc.

Black Nose: using black yarn
Row 1:  Ch 3 before making 1 sc in 2nd ch from hook and following ch. Ch 1 and turn. (2 sc)
Row 2:  Place 2 sc in first st and 2 sc in following st. Ch 1 and turn. (4 sc)
Row 3: Place 2 sc in 1st st, 1 sc in following 2 st and 2 sc in last st. Ch 1 and turn. (6 sc)
Row 4: Work a round of sc around the perimeter of the nose placing 1 sc in each st and 3 sc in each of the three corners for your triangular shaped nose. The 3 sc will give a more rounded corner to your finished nose.
Before you cut your yarn make sure you leave a tail long enough sew your nose in place on to your face area during assembly process..
*For infant through 12 months sizes, skip Round 3 increase.

Face Area: using medium brown yarn
Row 1: Ch 6 before placing 1 sc in the 2nd ch from hook and each of the following 4 ch. Ch 1 and turn. (5 sc)
Row 2: Place 2 sc in 1st st, 1 sc in following 3 st, and 2 dc in the last st of row. Ch 1 and turn. (7 sc)
Row 3: Place 2 sc in 1st st, 1 sc in following 5 st, and 2 dc in the last st of row. Ch 1 and turn. (9 sc)
Row 4: Place 2 sc in 1st st, 1 sc in following 7 st, and 2 dc in the last st of row. Ch 1 and turn. (11 sc)
Row 5: Place 2 sc in 1st st, 1 sc in following 9 st, and 2 dc in the last st of row. Ch 1 and turn. (13 sc)
Row 6: Place 2 sc in 1st st, 1 sc in following 11 st, and 2 dc in the last st of row. Ch 1 and turn. (15 sc)
Row 7: Place 2 sc in 1st st, 1 sc in following 13 st, and 2 dc in the last st of row. Ch 1 and turn. (17 sc)
Row 8: Sl st in the first 7 st, work 1 sc in next 3 st, sl st in next st before ch 1 and turn leaving last sts unworked. (3 sc)
Row 9: Work 1 sc in 1st st and following 2 st. Ch 1 and turn. (3 sc)
Row 10:  Place 2 sc in the 1st st, 1 sc in next st, and 2 sc in last st of row. Ch 1 and turn. (5 sc)
Row 11-12: Work 1 sc in 1st st and following 4 st. Ch 1 and turn. (5 sc)
Row 13: Work 1 sc in the 2nd st of row, skipping 1st st, place 1 sc in next st and sctog last two st together. Ch 1 and turn. (3 sc)
Row 14:  Work 1 sc in the 2nd st of row, skipping 1st st and sl st in to last st. Ch 1 and turn. (1 sc)
Row 15: Now work a round of 1 sc in each st around the perimeter of your face area in order to give it a more defined and polished look. Work 3 sc in to corners or curves to give it a more rounded look if desired.
Make sure you leave a long enough tail to be able to sew your face area once assembled in place on the beanie hat before cutting yarn and pulling through.
*For infant through 12 months sizes, skip Row 6 and 7 increases for face area. This means you will sl st in the first 5 st in Row 8 instead of 7.

Ear Fronts (Make 2): using lighter brown yarn
Row 1:  Ch 14. Place 1 dc in 3rd ch from hook and each of the following 11 st. Ch 2 and turn. (12 dc)
Row 2:  Place 1 dc in 2nd st , skipping 1st st, work 1 dc in each of the following st, dctog last two st in round. Ch 2 and turn. (10 dc)
Row 3:  Place 1 dc in 2nd st , skipping 1st st, work 1 dc in each of the following st, dctog last two st in round. Ch 2 and turn. (8 dc)
Row 4: Place 1 dc in 2nd st , skipping 1st st, work 1 dc in each of the following st, dctog last two st in round. Ch 2 and turn. (6 dc)
Row 5:  Place 1 dc in 2nd st , skipping 1st st, work 1 dc in each of the following st, dctog last two st in round. Ch 2 and turn. (4 dc)
Row 6: Place 1 dc in 2nd st , skipping 1st st, work 1 dc in each of the following st, dctog last two st in round. Ch 2 and turn. (2 dc)
Row 7: Place 1 dc in 2nd st , skipping 1st st. Fasten off (1 dc)
*For infant through 12 months sizes, make start with a chain of 12 and work hdc stitches instead of dc throughout ear front.

Ear Back (Make 2): using darkest brown yarn
Leave a long enough yarn tail to secure ear when finished at start of your ear backs. I tend to estimate roughly 3 to 4 times the length I will be stitching to be on the safe side.
Starting off leaving the tail, repeat rows 1-7 from Ear Fronts in previous step but do not fasten off at the end of Row 7.  Ch 1 and turn.  Place a completed ear front in front of the ear back you are working on, lining up the stitches.
Row 8: With the lighter colored ear front facing you, work 2 sc in to the top st of both pieces, work 1 sc in each st down side of ear pieces, working 3 sc in each of the bottom corners. Continue working 1 sc in each side stitch of ears up to 1st st. Place 1 sc in same sp as 1st st in round. Sl st and fasten off.

Skippyjon Jones Book Character Beanie Hat Crochet Pattern Zoom In on Face Details

Finishing off:
You are now going to use this the tail left on your finished nose from before and your yarn needle to sew the nose on to the face area piece into the desired place on the hat.  (You can reference my pictures to see how I placed my own.) Once you have secured it into place, use remaining tail to freehand stitch your mouth lines from bottom of nose (see picture above) before bringing the yarn to the back of the face area and finish off.
Now you have a completed face area piece, so using the tail left on your face area from before, sew your face area securely in place on your beanie hat.  I normally start mine at the bottom roughly 1 dc round up from bottom of the beanie but feel free to play around with it.
Next we will work on Skippyjon Jones’ eyes.  Take the yarn tail left from one eye pupil and sew it into place on to blue eye color piece .  Once it’s sewn on, pull yarn in to the inside of the hat before finishing off. Repeat for second eye.
You should now have two completed eyes and each should still have a long blue yarn tail. You want to use this and your darning / tapestry needle now to sew them in place on each side of the narrow nose color from face area on to beanie hat.  Once secure, pull yarn to inside of beanie before fastening off.
Now all that is left is to attach Skippyjon’s ears on to the beanie.  Sew each of the ears in place by using the leftover yarn tail from your assembled ears you crocheted before directly on to the top sides of the beanie in your desired position.  Once secure, pull yarn in to inside of your hat before finishing off.  Repeat process for second ear.
Check for any tails or ends that you may have missed in process to weave in and finish off. Do so if you find any. Then you are all done. :) One completed

Here are some of the pictures I took to show how this Skippyjon Jones hat looks worn and from different directions when completed:

Skippyjon Jones Book Character Beanie Hat Crochet Pattern Front Left View

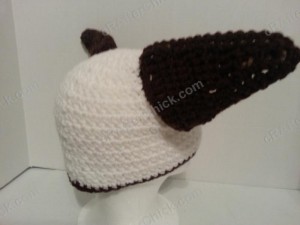
Skippyjon Jones Book Character Beanie Hat Crochet Pattern Left Profile View

Skippyjon Jones Book Character Beanie Hat Crochet Pattern Left Back View

Skippyjon Jones Book Character Beanie Hat Crochet Pattern Right Back View

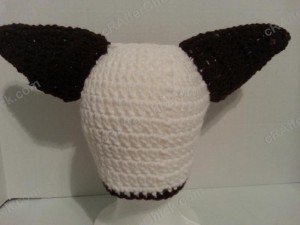
Skippyjon Jones Book Character Beanie Hat Crochet Pattern Rear View

Skippyjon Jones Book Character Beanie Hat Crochet Pattern Right Front View

Skippyjon Jones Book Character Beanie Hat Crochet Pattern Zoom Out View of hat being worn


Want more free patterns? Follow cRAfterChick on Facebook or Pinterest to get updates on patterns as they are added.

Note: All the cRAfterChick patterns shared on this site are free of charge.  Please feel free to use them to make your own items.  If you use it to make items to sell please credit cRAfterChick for the pattern and provide link to our site.  Please do not copy and paste my pattern or try to use my images as your own.  You can link to any of my patterns.  Happy crafting!
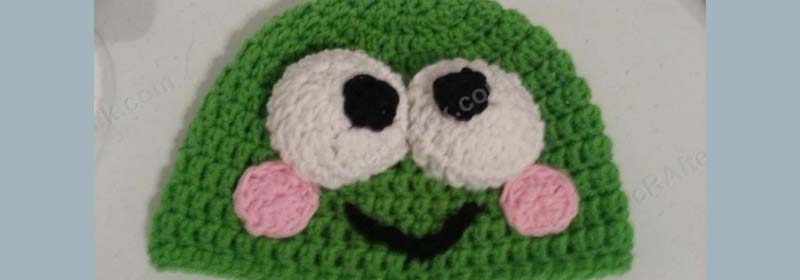
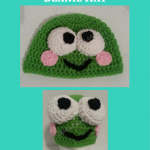
Keroppi the Frog Beanie Hat Crochet Pattern

Keroppi the Frog Beanie Hat Crochet Pattern_ a chick crafting through Rheumatoid Arthritis cRAfterChick.com

Keroppi the Frog Beanie Hat Crochet Pattern

 free crochet pattern from cRAfterChick.com

Keroppi the Frog Beanie Hat Free Crochet Pattern

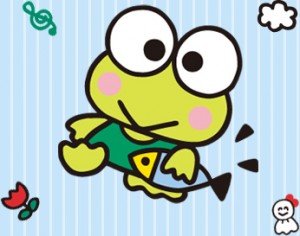
Are you a fan of the cutest little frog from Hello Kitty land?  Keroppi has always been a favorite of mine. Whether you just love frog items, anime or cute hats, be sure to check this one out.

If you can work in the round you can whip this up in very little time.  It’s an advanced beginner pattern so give it a shot.   I had fun making his cute little face for an auction event at my mother’s school. I have a feeling Keroppi is going to be a big hit. :)

Who is Keroppi the Frog

Keroppi the Frog Beanie Hat Crochet Pattern Notes

Keroppi the Frog Beanie Hat Crochet Pattern

Project requires:
Bright Green Yarn for Beanie Hat main color-  (I use a lot of Red Heart Saver yarn but any medium to normal weight yarn will do)
Black Yarn for eye pupil and smile
Pink Yarn for blush circles
White Yarn for eye whites
“J” hook (6.0 mm)
Scissors or Yarn Cutter
Blunt large eye yarn / tapestry needle to weave in ends
Small amount of fiberfill stuffing

Abbreviations used in this pattern (US crochet stitches):
ch – chain
st – stitch
sl st – slip stitch
sc – single crochet (US)
sctog – single crochet two st together (US)
dc – double crochet  (US)
hdc – half double crochet (US)

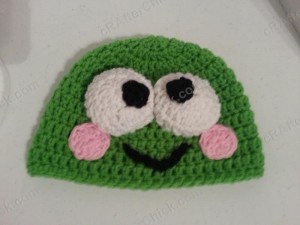
Keroppi the Frog Beanie Hat Crochet Pattern Front View


Pattern Instructions:

*Note: This project is worked in the round on the base of a magic ring. If you do not know how to do this, please see tutorial here from: yarntomato on CrochetMe

The hat in this picture is made with my free Easy Peasy  Pre-Teen / Teen / Women Double Crochet Beanie Pattern which you can find here as a foundation for the project. Want it in another size? No worries. Head over to Easy Peasy All Family Sizes Free Double Crochet Beanie Patterns to select the size of the free pattern you want for your project.

Hat Base: in main color yarn
Use Easy Peasy Crochet Beanie Size of your choice

Once you have completed your beanie for the base you are ready to start on making your Keroppi the Frog hat!

 Note: If you are going to do this in newborn / infant/ up to 1 year old sizes, switch to a G hook for the features instead of the J to scale them down in size or eliminate one increase row from each feature worked in the round.

Eyes back piece (Make 2):  in white yarn (optional)

*Note:  This is an optional step but I do recommend doing this step as it keeps your stuffing in the snout and now falling through the stitches when the hat is worn since they stretch to conform to head.

Round 1: In magic circle, ch 2 before placing 10 dc.  Pull the circle closed to line up in tight circle. Sl st in to top of 1st st. (10 dc)
Round 2: Ch 2 before placing 2 dc in first st and in each of the following 9 st. Sl st in to the top of the 1st st in round. (20 dc)
Pull yarn through and fasten off.  Put to side until needed in eye assembly.
Repeat for second eye.

Eyes (Make 2): using white yarn
Round 1: In magic circle, ch 2 before placing 10 dc.  Pull the circle closed to line up in tight circle. Sl st in to top of 1st st. (10 dc)
Round 2: Ch 2 before placing 2 dc in first st and in each of the following 9 st. Sl st in to the top of the 1st st in round. (20 dc)
Round 3: Ch 2 before placing 1 dc in first st and in each of the following 19 st. Sl st in the top of the 1st st in round. (20 dc)
Before you cut your yarn make sure you leave a tail long enough sew your eyes on to your beanie hat and attach the eyes back if you choose to do this optional step.
Repeat for second eye.

Eye Pupil (Make 2): using black yarn
Round 1: In magic circle, ch 2 before placing  8 dc.  Pull the circle closed to line up in tight circle. Sl st in to top of 1st st. (8 dc)
Cut your yarn making sure you leave a tail long enough  to sew the eye pupils on to Keroppi’s eyes.
Repeat for second eye.

Blush Circles (Make 2): using pink yarn
Round 1: In magic circle, ch 2 before placing  10 dc.  Pull the circle closed to line up in tight circle. Sl st in to top of 1st st. (10 dc)
Make sure you leave a tail long enough sew the blush circle in place on to your beanie hat.
Repeat for second blush circle.

Smile: using black yarn
Make 1 chain of  9 ch and leave tail to sew this chain into  a v shaped smile like in pictures.

Finishing off:
Since I like to start adding my features from the bottom up we will start with Keroppi’s smile. I find that by working from bottom up you get a better idea of how much space you have during the process.  Otherwise you may find yourself scrunching up features at the bottom if you haven’t left enough space in your process. By working upwards you always have extra room as you can just move the next feature up a little higher if need be.You are now going to use this the tail left for the smile chain from before and your yarn needle to sew the main smile piece into the desired place on the hat in a “v” shape.  (You can reference my pictures to see how I placed my own.) Once you have secured it into place, bring the yarn into the inside of the beanie hat and finish off.
Next we will work on attaching the pink blush circles. These should be located on each side of smile on face near bottom of where you plan to attach the eyes.  Using the tail on one circle and needle secure Keroppi’s blush circle in place on to the beanie hat.  Pull yarn in to the inside of beanie once sewn on and fasten off. Repeat with second blush circle.
Next we will work on his eyes.  Take the yarn tail left from one assembled eye and sew it into place on to the hat.   Once it’s sewn on, pull yarn in to the inside of the hat before finishing off. Repeat for second eye.
Check for any tails or ends that you may have missed in process to weave in and finish off. Do so if you find any. Then you are all done. :)  You have one easy but fun Keroppi hat to wear. I’m completely in love with this little hat and will have to make one of my own to keep since this one is headed to an auction to benefit a school. I would love to see your version if you make one, just drop me a link. :)

Here are some of the pictures I took to show how it looks worn and from different directions when completed:

Keroppi the Frog Beanie Hat Crochet Pattern Front Right Side view

Keroppi the Frog Beanie Hat Crochet Pattern Right Profile

Keroppi the Frog Beanie Hat Crochet Pattern - right back view

Keroppi the Frog Beanie Hat Crochet Pattern Rear View

Keroppi the Frog Beanie Hat Crochet Pattern Left Side View

Keroppi the Frog Beanie Hat Crochet Pattern Left Front View

Keroppi the Frog Beanie Hat Crochet Pattern Front View Zoom out

Want more free patterns? Follow cRAfterChick on Facebook or Pinterest to get updates on patterns as they are added.

Note: All the cRAfterChick patterns shared on this site are free of charge.  Please feel free to use them to make your own items.  If you use it to make items to sell please credit cRAfterChick for the pattern and provide link to our site.  Please do not copy and paste my pattern or try to use my images as your own.  You can link to any of my patterns.  Happy crafting!

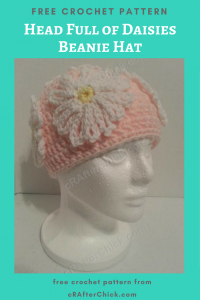
Head Full of Daisies Beanie Hat Crochet Pattern

Head Full of Daisies Beanie Hat Crochet Pattern_ a chick crafting through Rheumatoid Arthritis cRAfterChick.com

Head Full of Daisies Beanie Hat Crochet Pattern

 free crochet pattern from cRAfterChick.com

Head Full of Daisies Beanie Hat Free Crochet Pattern

There were four students being narrator’s in the classroom play. I didn’t want them to feel left out on the costume hats I made all the actors in the play so I went with nature related hats.

This pattern is really quick and simple as I was in a time crunch.  It is definitely beginner friendly. All you have to know is how to work in the round. Link below to instructions if you don’t know how to use magic circle.

P.S. I love daisies 😀

Head Full of Daisies Beanie Hat Crochet Pattern Notes

Head Full of Daisies Beanie Hat Crochet Pattern

Project requires:
Pink Yarn for Beanie Hat main color or desired hat color-  (I use a lot of Red Heart Saver yarn but any medium to normal weight yarn will do)
White Yarn for daisy petals
Yellow / Gold Yarn for center of daisies
“J” hook (6.0 mm)
Scissors or Yarn Cutter
Blunt large eye yarn / tapestry needle to weave in ends
Small amount of fiberfill stuffing

Abbreviations used in this pattern (US crochet stitches):
ch – chain
st – stitch
sl st – slip stitch
sc – single crochet (US)
ch-1 sp – chain 1 space
dc – double crochet  (US)

Pattern Instructions:

*Note: This project is worked in the round on the base of a magic ring. If you do not know how to do this, please see tutorial here from: yarntomato on CrochetMe

The hat in this picture is made with my free Easy Peasy Youth Sized (Age 3-10 years old) Double Crochet Beanie  Hat Pattern which you can find here as a foundation for the project. Want it in another size? No worries. Head over to Easy Peasy All Family Sizes Free Double Crochet Beanie Patterns to select the size of the free pattern you want for your project.

Hat Base: in main color yarn
Use Easy Peasy Crochet Beanie Size of your choice

Once you have completed your beanie for the base you are ready to start on making your own head full of daisies beanie hat!

 Note: If you are going to do this in newborn / infant/ up to 1 year old sizes, switch to a G hook for the features instead of the J to scale them down in size.

Making Daisies:
Round 1: Starting with yellow / gold yarn in a magic circle ch 1 before placing 12 sc. Pull circle closed and sl st in the top of the first sc in round. (ch 1 does not count as a st) (12 sc)
Round 2: Ch 1 before placing *1 sc in st, ch 1 * and repeat process around until you are back at beginning. Sl st in to the top of the 1st st in round. ( 12 sc, 12 ch-1 sp) Fasten off your yellow / gold yarn.  I leave a short tail on mine to use it to attach the daisy in place during assembly process.
Round 3: Taking your white yarn (or other flower color if you so desire) and sl st in to the one of the ch-1 sp. Ch 12 before sl st back into same ch-1 sp, *sl st in to next ch-1 sp, ch 12 before sl st back in to same ch-1 sp* repeat this process until you sl st back in the original ch-1 sp.
Leave tail long enough to attach your daisy to hat once all are completed if you fastened off the yellow/ gold completely in previous step and want to secure it with the white yarn. If you already left tails from flower center fasten off white.

Repeat this pattern with rest of daisies until you have:
Teen – Adult : 6 daisies
Toddler – Child / Youth:  4 daisies
Newborn to 1 year old:  4 daisies done with a “G” hook instead of “J” hook pattern calls for above.

Finishing off:
Place your daisy flowers on the hat where you want them situated. I often pin mine in place to get a good feel of the end result before I start tying them on.  With these just a few double knots and loops through to secure it works out just fine.  Not a lot of stitching required.  Once you have secured all your flowers in place, turn the hat inside out and finish off all left over tails or ends of yarn. Turn right side out again.

All done!  You have one Head Full of Daisies Hat to show off.  I’m not normally a girly girl but I love how this one turned out.

Here are some of the pictures I took to show how it looks worn and from different directions when completed:

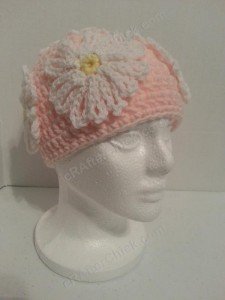
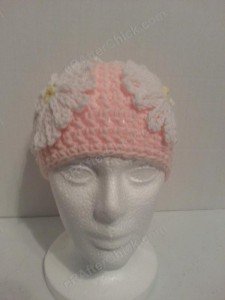
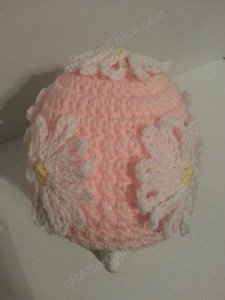
Head Full of Daisies Beanie Hat Crochet Pattern Front View

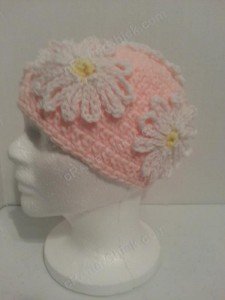
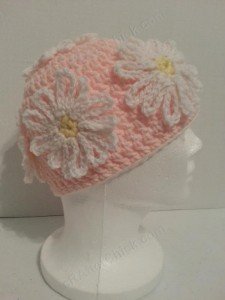
Head Full of Daisies Beanie Hat Crochet Pattern Left Side Profile

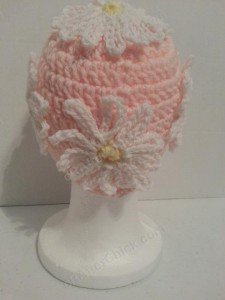
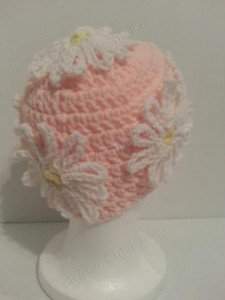
Head Full of Daisies Beanie Hat Crochet Pattern From Behind View

Head Full of Daisies Beanie Hat Crochet Pattern From Behind

Head Full of Daisies Beanie Hat Crochet Pattern Right Back View

Head Full of Daisies Beanie Hat Crochet Pattern Right Side View

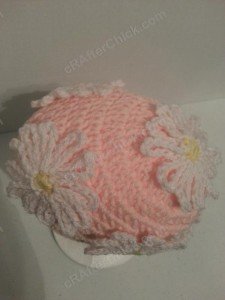
Head Full of Daisies Beanie Hat Crochet Pattern Pattern Side Down View

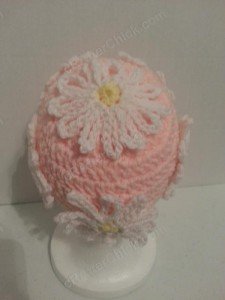
Head Full of Daisies Beanie Hat Crochet Pattern Frontal Top View

Want more free patterns? Follow cRAfterChick on Facebook or Pinterest to get updates on patterns as they are added.

Note: All the cRAfterChick patterns shared on this site are free of charge.  Please feel free to use them to make your own items.  If you use it to make items to sell please credit cRAfterChick for the pattern and provide link to our site.  Please do not copy and paste my pattern or try to use my images as your own.  You can link to any of my patterns.  Happy crafting!

Winnie the Pooh Bear Beanie Hat Crochet Pattern

Winnie the Pooh Bear Beanie Hat Crochet Pattern_ a chick crafting through Rheumatoid Arthritis cRAfterChick.com

Winnie the Pooh Bear Beanie Hat Crochet Pattern

 free crochet pattern from cRAfterChick.com

Winnie the Pooh Bear Beanie Hat Free Crochet Pattern

Oh bother! I know a lot of my friends love Winnie the Pooh as well as the children in my Mother’s school so I made this one up to be auctioned off to raise money for the school.

It’s actually a fairly easy crochet project and works up pretty fast.  You will be sporting your own Winnie the Pooh Bear hat in a short amount of time. Happy crafting!

Winnie-The-Pooh-psd58477

Winnie the Pooh Bear Beanie Hat Crochet Pattern Notes

Winnie the Pooh Bear Beanie Hat Crochet Pattern

Project requires:
Yellow / Gold Yarn for Beanie Hat main color-  (I use a lot of Red Heart Saver yarn but any medium to normal weight yarn will do)
Black Yarn for face features
“J” hook (6.0 mm)
Scissors or Yarn Cutter
Blunt large eye yarn / tapestry needle to weave in ends
Small amount of fiberfill stuffing

Abbreviations used in this pattern (US crochet stitches):
ch – chain
st – stitch
sl st – slip stitch
sc – single crochet (US)
sctog – single crochet two st together
dc – double crochet (US) 
hdc – half double crochet (US) 

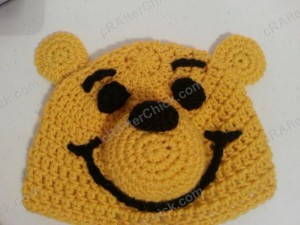
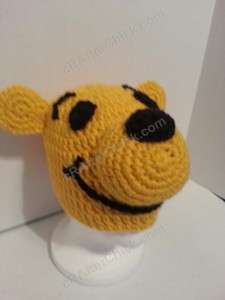
Winnie the Pooh Bear Beanie Hat Crochet Pattern Alternate View

Pattern Instructions:

*Note: This project is worked in the round on the base of a magic ring. If you do not know how to do this, please see tutorial here from: yarntomato on CrochetMe

The hat in this picture is made with my free Easy Peasy  Pre-Teen / Teen / Women Double Crochet Beanie Pattern  which you can find here as a foundation for the project. Want it in another size? No worries. Head over to Easy Peasy All Family Sizes Free Double Crochet Beanie Patterns to select the size of the free pattern you want for your project.

Hat Base: in main color yarn

Use Easy Peasy Crochet Beanie Size of your choice

Once you have completed your beanie for the base you are ready to start on making your own Pooh beanie hat!

 *Note: If you are going to do this in newborn / infant/ up to 1 year old sizes, switch to a G hook for the features instead of the J to scale them down in size or eliminate one increase row from each feature worked in the round.

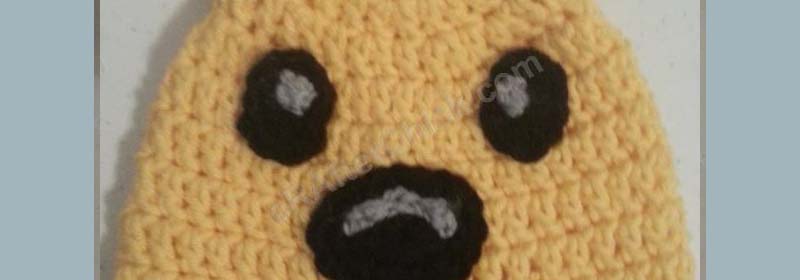
Eyes (Make 2): Using black yarn
Round 1:  In magic circle ch 1 before placing the following st in to the circle as follows: 1 sc, 3 hdc, 3 sc, 3 hdc, 2 sc. Pull circle closed. Sl st in to the top of 1st st in round. (12 st total)
Before you cut your yarn make sure you leave a tail long enough sew your eyes on to your beanie hat.

Eyebrows (Make 2): Using black yarn
Make 2 chains of 5 each. You want to make sure you leave a little bit of a tail on each to sew it into place with your yarn needle during assembly.

Smile: Using black yarn
Make 1 chain of  25 ch and leave tail to sew this main part of the smile in to place.
Make 2 chains of 5 ch and leave tail of yarn to sew the sides of the smile in to place on each end of the smile chain from previous step.

Black Nose: using black yarn
Round 1:  In a magic circle, ch 1 before placing the following st in this order into the circle: 1 sc, 2 hdc, 3 sc, 2 hdc, 1 sc. Sl st in to top of 1st st in round. (9 st total)
Round 2:  Ch 1, sc in 1st st, 2 sc in next 2 st, 1 sc in next 3 st, 2 sc in next 2 st, 1 sc in last st. Sl st in to top of 1st st in round. ( st total)
Before you cut your yarn make sure you leave a tail long enough sew your nose in place on to your beanie hat.

Nose back:  in main color yarn

Note:  This is an optional step but I do recommend doing this step as it keeps your stuffing in the snout and now falling through the stitches when the hat is worn since they stretch to conform to head.

Round 1: In magic circle, ch 2 before placing 10 dc.  Pull the circle closed to line up in tight circle. Sl st in to top of 1st st. (10 dc)
Round 2: Ch 2 before placing 2 dc in first st and in each of the following 9 st. Sl st in to the top of the 1st st in round. (20 dc)

Round 3:  Ch 2 before placing *2 dc in 1st st then 1 dc in next*  repeat * pattern until end of round. (30 dc)
Pull yarn through and fasten off.  Put to side until needed in nose assembly.

Nose/snout: in main color yarn
Round 1: In magic circle, ch 1 before placing 8 sc.  Pull the circle closed to line up in tight circle. Sl st in to top of 1st st. (8 sc)
Round 2: Ch 1 before placing 2 sc in first st and in each of the following 7 st. Sl st in to the top of the 1st st in round. (16 sc)
Round 3:  Ch 1 before placing *2 sc in 1st st then 1 sc in next*  repeat * pattern until end of round. (24 sc)
Round 4:  Ch 1 before placing *2 sc in 1st st then 1 sc in next 2 st*  repeat * pattern until end of round. (32 sc)
Round 5-8:  Ch 1 before placing 1 sc in 1st st and in each of the following 31 st. Sl st in to the top of the 1st st in round. (32 sc)
Pull yarn through leaving a long enough tail to sew the nose back (optional) on to the opening of snout and then directly on to the beanie hat.

Assembling Nose/ Snout:
Pick up your Black Nose, using tail and yarn needle secure it in to place on the top front of the snout. See my pictures for placement of mine.

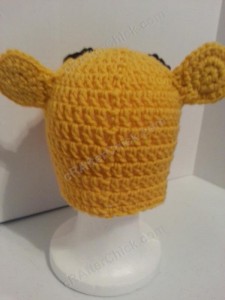
Ear Fronts (Make 2): using main color gold / yellow yarn
Round 1: In magic circle, ch 1 before placing 8 sc.  Pull the circle closed to line up in tight circle. Sl st in to top of 1st st. (8 sc)
Round 2: Ch 1 before placing 2 sc in first st and in each of the following 7 st. Sl st in to the top of the 1st st in round. (16 sc)
Round 3:  Ch 1 before placing *2 sc in 1st st then 1 sc in next*  repeat * pattern until end of round. (24 sc)
Cut yarn and fasten off

Ear Back (Make 2): using main color gold/ yellow yarn
Repeat rounds 1-3 of Ear Fronts in previous step but do not fasten off at end of round 3.  Placing one ear front in front of your ear back you are working on, continue working the following through both pieces at same time.
Round 4: Ch 1 before working 1 sc in first 6 st, then alternate 1 sc then 2 sc repeatedly until back at first st in round. Sl st in to top of 1st st in round.
Leave a long enough tail to be able to sew your ear in place on the beanie hat before cutting yarn and pulling through.

Finishing off:
Since I like to start adding my features from the bottom up we will start with Winnie the Pooh’s smile. I find that by working from bottom up you get a better idea of how much space you have during the process.  Otherwise you may find yourself scrunching up features at the bottom if you haven’t left enough space in your process. By working upwards you always have extra room as you can just move the next feature up a little higher if need be.
You are now going to use this the tail left on the large smile chain from before and your yarn needle to sew the main smile piece into the desired place on the hat.  (You can reference my pictures to see how I placed my own.) Once you have secured it into place, bring the yarn into the inside of the beanie hat and finish off.
Next we will work on attaching the nose/snout that was assembled previously.  Use the tail left behind and needle to secure the nose/snout piece in place on to the beanie hat.  Pull yarn in to the inside of beanie once sewn on and fasten off.
Next we will work on the Winnie’s eyes.  Take the yarn tail left from one eye and sew it into place on to the hat. Note that you want the oval of yes to have the narrow sides on top and bottom whereas the long ends facing sides.  Once it’s sewn on, pull yarn in to the inside of the hat before finishing off. Repeat for second eye.
Next we will work on the Winnie’s eyebrows.  Take the yarn tail left from one eyebrow chain and sew it into place on to the hat above the eyes you just attached.  Once it’s sewn on, pull yarn in to the inside of the hat before finishing off.   Repeat for second eyebrow.
Now all that is left is to attach Pooh’s ears on to the beanie.  Sew each of the ears in place by using the leftover yarn tail from when you crocheted the ears before directly on to the top sides of the beanie in your desired position.  Once secure, pull yarn in to inside of your hat before finishing off.  Repeat process for second ear.
Check for any tails or ends that you may have missed in process to weave in and finish off. Do so if you find any. Then you are all done. :) One completed Pooh Bear hat! Enjoy your crocheted creation.
All done!  You have one easy Winnie the Pooh Bear Beanie Hat to show off.  I’ve gotten such great responses from my completed one so far. I would love to see your version if you make one, just drop me a link. :)

Here are some of the pictures I took to show how it looks worn and from different directions when completed:

Winnie the Pooh Bear Beanie Hat Crochet Pattern Alternate View

Winnie the Pooh Bear Beanie Hat Crochet Pattern Alternate View

Winnie the Pooh Bear Beanie Hat Crochet Pattern Downward Front view

Winnie the Pooh Bear Beanie Hat Crochet Pattern Left Profile View

Winnie the Pooh Bear Beanie Hat Crochet Pattern Left Back view

Winnie the Pooh Bear Beanie Hat Crochet Pattern Rear View

Winnie the Pooh Bear Beanie Hat Crochet Pattern Laying flat zoom out view

Want more free patterns? Follow cRAfterChick on Facebook or Pinterest to get updates on patterns as they are added.

Note: All the cRAfterChick patterns shared on this site are free of charge.  Please feel free to use them to make your own items.  If you use it to make items to sell please credit cRAfterChick for the pattern and provide link to our site.  Please do not copy and paste my pattern or try to use my images as your own.  You can link to any of my patterns.  Happy crafting!