Adventure of Tintin’s Snowy the Dog Character Hat Crochet Pattern

Adventure of Tintin's Snowy the Dog Character Hat Crochet Pattern_ a chick crafting through Rheumatoid Arthritis cRAfterChick.com

Adventure of Tintin’s Snowy the Dog Character Hat Crochet Pattern

free dog character hat crochet pattern from cRAfterChick.com

Copy of Adventure Time’s Jake the Dog Character Hat Free Crochet Pattern long

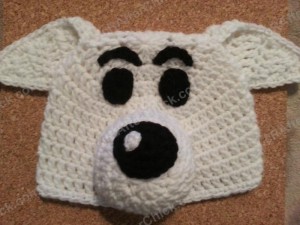
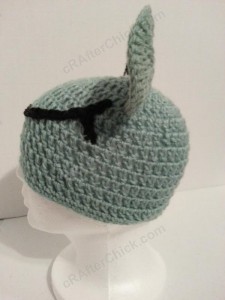
After playing the Adventure of Tintin video game recently I was inspired to make Snowy into a character hat.  He is so cute.  I used his original drawings from the Tintin comic book illustrations to make this hat come to live versus the video game version.  I like how his features stand out more this way, especially with the eyebrows. You don’t have to be a comic or video game fan to like Snowy. He is an adorable all white terrier that is Tintin’s little sidekick on his adventures.  He makes a cute hat for children, boys or girls, adults, comic book lovers and more.  I made the hat in this pattern and as shown in pictures for one of my nephews.  I think I’m going to be making a matching Tintin hat in the near future too. :)

Don’t know about Snowy or Tintin? You can learn more about them here.

Want to check out the video game? This is the game I was talking about here. (P.S. It’s been out for awhile so it’s really cheap now!)

You can also watch episodes of his cartoon online here!

I hope you like this hat and enjoy making your own. Happy crafting!

Inspiration picture for the Snowy the Dog Adventure of Tintin hat crochet pattern

Adventure of Tintin’s Snowy the Dog Character Hat Crochet Pattern Notes

Adventure of Tintin Snowy the Dog Character Hat Crochet Pattern (10)

Project requires:
White yarn for beanie main color,ears, shining light spot on nose and snout
(I use a lot of Red Heart Saver yarn but any medium to normal weight yarn will do)
Black yarn for nose, eyes and eyebrows
“J” hook (6.0 mm)
Scissors or Yarn Cutter
Blunt large eye yarn / tapestry needle to weave in ends
Small amount of fiberfill stuffing for snout

Abbreviations used in this pattern (US crochet stitches):
ch – chain
st – stitch
sl st – slip stitch
sc – single crochet (US)
dc – double crochet (US)
hdc – half double crochet (US)

Adventure of Tintin Snowy the Dog Character Hat Crochet Pattern

Pattern Instructions:
*Note: This project is worked in the round on the base of a magic ring. If you do not know how to do this, please see tutorial here from: yarntomato on CrochetMe

The hat in this picture is made with my free Easy Peasy Youth Sized(Age 3-10 years old) Double Crochet Beanie  Hat Pattern which you can find  here as a foundation for the project. Want it in another size? No worries. Head over to Easy Peasy All Family Sizes Free Double Crochet Beanie Patterns to select the size of the free pattern you want for your project.

Hat Base: in main color white yarn 

Use Easy Peasy Crochet Beanie Size of your choice Once you have completed your beanie for the base you are ready to start creating your beanie into a Snowy hat. :)

Snout back *optional*: using white yarn
Note: This step is an optional step but one I highly recommend as it will prevent stuffing from slipping between stitches on to the wearers head when wearing hat as it stretches when worn. It can make it a bit itchy so I take this extra step to keep it where the stuffing belongs. :)
Round 1: In a magic circle, ch 2 before placing 10 dc in to the circle. Pull the circle closed.  Sl st in the top of the 1st st in round.  (10 dc)
Round 2: Ch 2 before placing 2 dc in 1st st and 2 dc in each of the following 9 st.  Sl st in top of 1st st in round.  (20 dc)
Round 3: Ch 2 before placing *2 dc in 1st st, 1 dc in next st* repeating * around for next 18 st around.  Sl st in top of the 1st st in round.  (30 dc)
Fasten off.

The feature above works well on toddler, youth, preteen, teen, womens and men sized hats. For slightly smaller features for toddler you can always switch to a G or H hook if wanted. For newborn to 12 months old sized hats, do the following instructions instead of those given above:
Round 1:  In a magic circle, ch 2 before placing 10 hdc in to the circle. Pull circle fully closed. Sl st in the top of the 1st st in round.  (10 hdc)
Round 2:  Ch 2 before placing 2 hdc in 1st st and 2 hdc in each of the following 9 st around. Sl st in the top of the 1st st in round.  (20 hdc)
Fasten off.

Snout: using white yarn
Round 1: In a magic circle, ch 2 before placing 10 dc in to the circle. Pull the circle closed.  Sl st in the top of the 1st st in round.  (10 dc)
Round 2: Ch 2 before placing 2 dc in 1st st and 2 dc in each of the following 9 st.  Sl st in top of 1st st in round.  (20 dc)
Round 3: Ch 2 before placing *2 dc in 1st st, 1 dc in next st* repeating * around for next 18 st around.  Sl st in top of the 1st st in round.  (30 dc)
Round 4: Ch 1 before placing 1 dc in 1st st and each of the following 29 st around.  Sl st in the top of the 1st st in round.  (30 dc)
Round 5: Ch 1 before placing 1 sc in the 1st st and 1 sc in each of the following 29 st around.  Sl st in the top of the 1st st.  (30 sc)
Before you cut the yarn, make sure you leave a yarn tail long enough to be able to sew the snout on to the beanie hat *and* the snout back on the opening of the snout back area before attaching to hat if you choose that optional step.  Pull yarn through last loop on hook after cutting yarn and place to side until needed in finishing steps.

The feature above works well on toddler, youth, preteen, teen, womens and men sized hats. For slightly smaller features for toddler you can always switch to a G or H hook if wanted. For newborn to 12 months old sized hats, do the following instructions instead of those given above:
Round 1:  In a magic circle, ch 2 before placing 10 hdc in to the circle. Pull circle fully closed. Sl st in the top of the 1st st in round.  (10 hdc)
Round 2:  Ch 2 before placing 2 hdc in 1st st and 2 hdc in each of the following 9 st around. Sl st in the top of the 1st st in round.  (20 hdc)
Round 3: Ch 2 before placing 1 hdc in 1st st and 1 hdc in each of the following 19 st around.  Sl st in the top of the 1st st in round.  (20 hdc)
Round 4: Ch 1 before placing 1 sc in 1st st and 1 sc in each of the following 19 st around.  Sl st in the top of the 1st st in round.  (20 sc)
Before you cut the yarn, make sure you leave a yarn tail long enough to be able to sew the snout on to the beanie hat *and* the snout back on the opening of the snout back area before attaching to hat if you choose that optional step.  Pull yarn through last loop on hook after cutting yarn and place to side until needed in finishing steps.

Ear Fronts (Make 2): using white yarn
Row 1: Ch 3.  Place 2 dc in 3rd ch from hook.  Ch 2 and turn. (2 dc)
Row 2: Place 2 dc in both st across.  Ch 2 and turn.  (4 dc)
Row 3:  Place 2 dc in 1st st and 1 dc in the next 3 st across.  Ch 2 and turn.  (5 dc)
Row 4: Place 2 dc in 1st st and 1 dc in the next 4 st across.  Ch 2 and turn.   (6 dc)
Row 5: Place 2 dc in 1st st and 1 dc in the next 5 st across.  Ch 2 and turn.    (7 dc)
Row 6: Place 2 dc in 1st st and 1 dc in the next 6 st across.  Ch 2 and turn.   (8 dc)
Fasten off.
Repeat process above for the second ear front.

The feature above works well on toddler, youth, preteen, teen, womens and men sized hats. For slightly smaller features for toddler you can always switch to a G or H hook if wanted. For newborn to 12 months old sized hats, do the following instructions instead of those given above:
Row 1: Ch 3.  Place 2 hdc in 3rd ch from hook.  Ch 2 and turn. (2 hdc)
Row 2: Place 2 hdc in both st across.  Ch 2 and turn.  (4 hdc)
Row 3:  Place 2 hdc in 1st st and 1 hdc in the next 3 st across.  Ch 2 and turn.  (5 hdc)
Row 4: Place 2 hdc in 1st st and 1 hdc in the next 4 st across.  Ch 2 and turn.   (6 hdc)
Fasten off.
Repeat process above for the second ear front.

Ear Back and Assembly (Make 2): using white yarn and completed ear fronts from previous steps
Repeat Rows 1-6 from Ear fronts but do not fasten off at end of Row 6 as you have with the ear fronts. Ch 1 and turn. Place one completed ear front in front of the ear back you are working on, lining up the stitches.
Row 7:  Place 1 sc in each st around and in each corner make the following: (1 sc, ch 1, 1 sc). Continue process around the perimeter of both pieces until you are back to the 1st st in this row. Sl st in the top of the 1st st in row.
Before you cut your yarn, leave a tail that will be long enough to secure the ear on the top of the beanie hat during assembly. Once you cut yarn, pull through last loop on hook and place to side until needed.
Repeat the above process for second ear

Shining Light Spot for Nose: using white yarn
Make a chain of 3. Sl st in last ch from hook. Leave short yarn tail before cutting yarn and pulling through loop on hook. Place to side until needed in assembly.

The feature above works well on toddler, youth, preteen, teen, womens and men sized hats. For slightly smaller features for toddler you can always switch to a G or H hook if wanted. For newborn to 12 months old sized hats, make a large knot with white yarn to represent the shining light spot instead of above instructions leaving a short yarn tail to attach during assembly.

Nose: using black yarn
Round 1: In a magic circle, ch 1 and place the following stitches in this order: 2 sc, 1 hdc, 1 dc, 1 hdc, 3 sc, 1 hdc, 1 dc, 1 hdc, 1 sc. Pull ovalish shaped circle closed. Sl st in the top of the 1st st in round. (12 st total)
Round 2: Ch 1 before placing 1 sc in 1st 2 st, 2 sc in next 3 st, 1 sc in next 3 st, 2 sc in next 3 st and 1 sc in last st. Sl st in the top of the 1st st worked in round. (18 st total)
Leave a yarn tail long enough to be able to sew the nose in place on the front of the snout during assembly before cutting your yarn and pull through last loop on hook.  Place to side until needed.

The feature above works well on toddler, youth, preteen, teen, womens and men sized hats. For slightly smaller features for toddler you can always switch to a G or H hook if wanted. For newborn to 12 months old sized hats, skip round 2 and just make round 1 for his nose.

Eyes (Make 2): using black yarn
Round 1: In a magic circle, ch 1 and place the following sts in this order: 2 sc, 3 hdc, 3 sc, 3 hdc, 1 sc. Pull ovalish circle closed. Sl st in the top of the first st in round. (12 st total)
Leave a yarn tail length long enough to sew the eye on the hat during assembly process before cutting yarn and pulling tail through last loop on hook. Place to side until needed in assembly.
Repeat this process for second eye.

The feature above works well on toddler, youth, preteen, teen, womens and men sized hats. For slightly smaller features for a toddler sized hat, you can always switch to a G or H hook if wanted. For newborn to 12 months old sized hats, do the following instructions instead of those given above:
Round 1: In a magic circle, ch 1 before placing the following st in this order: 1 sc, 2 hdc, 2 sc, 2 hdc, 1 sc. Pull ovalish circle closed and sl st in the top of the 1st st in round. (8 st total)

Eyebrows (Make 2): using black yarn
Make a chain of 6. Cut yarn leaving a yarn tail long enough to sew his eyebrows in place during assembly before pulling through loop on hook and placing to side. Repeat instructions for second eyebrow.

The feature above works well on toddler, youth, preteen, teen, womens and men sized hats. For slightly smaller features for toddler you can always switch to a G or H hook if wanted. For newborn to 12 months old sized hats, leave a small length of black yarn to the side to freehand stitch on skinny eyebrows on top of the eyes during assemble instead of chain instructions given above.

Finishing off steps:
Starting with the nose and snout assembly, use your yarn needle to take the yarn tail left on your shining light spot for nose and sew it on to the top left portion of the black nose. You can see my pictures on how I placed mine to look more like Snowy.  Once you have secured it in place, pull yarn to the backside of the black nose and fasten off.
Now take the black yarn tail left on your nose from previous step and using the yarn needle sew it in desired place on the front of the nose snout.   I placed mine just above the center of the front so it would be more near top like comic pictures but feel free to play around with your placement to find what you like the best.  Once it is secure, pull yarn to the inside of the snout and fasten off.
Next up use your yarn needle and the extra long white yarn tail on the snout piece to attach it to your snout to the bottom front of your beanie hat.  If you have opted to do the optional snout back, take the time to stitch that over opening first before sewing it on to the beanie hat.  You want to stop 2/3 to 3/4 of the way around stuff your nose/snout to desired fullness with the fibefill stuffing. Try not to overstuff this feature as it will bubble and can cause the area it is attached to on the beanie hat to sag or bunch. Not cute.  You just want to stuff it enough for it to hold the shape of the snout.   Once fully secured in place, pull yarn to the inside of the beanie hat and fasten off.
Now take one of the tails left on an eye and use the yarn needle to sew it in desired place above the snout.  I placed mine just above the snout as you can see in pictures but you can move them around a little to see what works best for your hat.   Once sewn in place, pull yarn to inside of beanie hat and fasten off.  Repeat for second eye.
Next you are going to use the tail on one of Snowy’s eyebrows and use your yarn needle to sew it in place above one of the eyes.  I did mine in an upside “U” shape, kind of a curve, as you can see in pictures.  Once you have sewed them on to your liking, pull yarn to the inside of the hat and fasten off.  Repeat process for second eyebrow.
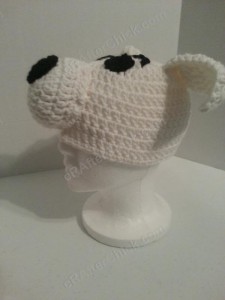
Now all that is left is to attach Snowy’s ears.  If you want your ears to be more upright like in most of his comics, place the ears closer to the top center of the beanie hat when attaching them.  I wanted my ear tips to flip forward like in comics so I didn’t use anything inside the ears to keep them fully upright like a pipe cleaner that I would use during ear assembly for bunnies and such.  If you want your ears to be more downward floppy, place more to the sides of the head.  You can also tilt the ears so the front concave part is facing forward while on the side of the head too.  You can see where I placed mine in pictures below.  Once your ear is sewn in place, pull yarn to inside.  At this point on features that are on top of hat, I run another short row of stitches and knots on the inside to support them but it’s mandatory.  Fasten off and repeat the process for the second ear.
Go ahead and double check your work for any tails or loose ends you might of missed during process.  If you find any, fasten them off now.
All done! One fun Snowy hat that Tintin fans and children will love. :)

Here are some pictures taken to show how this Snowy hat looks worn once completed:

Adventure of Tintin Snowy the Dog Character Hat Crochet Pattern (11)

Adventure of Tintin Snowy the Dog Character Hat Crochet Pattern (3)

Adventure of Tintin Snowy the Dog Character Hat Crochet Pattern (12)

Adventure of Tintin Snowy the Dog Character Hat Crochet Pattern (4)

Adventure of Tintin Snowy the Dog Character Hat Crochet Pattern (5)

Adventure of Tintin Snowy the Dog Character Hat Crochet Pattern (8)

Adventure of Tintin Snowy the Dog Character Hat Crochet Pattern (6)

Adventure of Tintin Snowy the Dog Character Hat Crochet Pattern (7)

Want more free patterns? Follow cRAfterChick on Facebook or Pinterest to get updates on patterns as they are added.

Note: All the cRAfterChick patterns shared on this site are free of charge.  Please feel free to use them to make your own items.  If you use it to make items to sell please credit cRAfterChick for the pattern and provide link to our site.  Please do not copy and paste my pattern or try to use my images as your own.  You can link to any of my patterns.  Happy crafting!

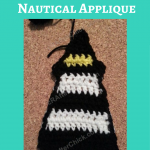
Large Lighthouse Nautical Applique Crochet Pattern

Large Lighthouse Applique Crochet Pattern_ a chick crafting through Rheumatoid Arthritis cRAfterChick.com

Large Lighthouse Applique Crochet Pattern

free applique crochet pattern from cRAfterChick.com

Large Lighthouse Nautical Applique Free Crochet Pattern

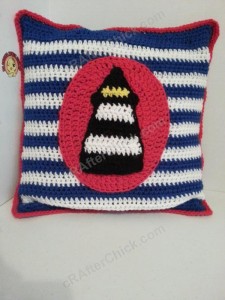
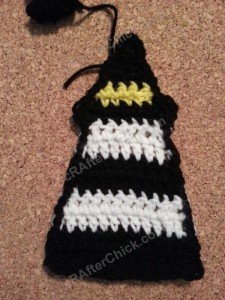
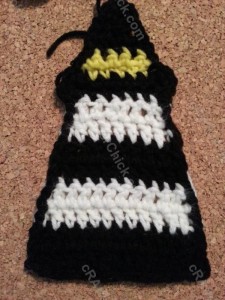
My Roy, my step grandfather since I was little, collects lighthouses so when I was brainstorming for ideas of a gift to make for his birthday I came up with a lighthouse nautical theme set of crocheted items that I can add to each holiday or special occasion.  I started out with this lighthouse applique then once I figured out how to do that I was able to move on.  For the first gift item on this occasion I put this applique on to a nap pillow. I actually made it a nautical striped pillow but this is the crochet pattern for just the applique as shown in pictures.

Below is a picture to show the lighthouse applique on his nap pillow.  I thought it was cute and wanted to show the size of how the lighthouse applique will turn out once finished in comparison to a standard throw pillow. :)  I will be adding that pattern to the site very soon. I just need to type it up. Happy crafting!

Large Lighthouse Nautical Applique Crochet Pattern (2)

Large Lighthouse Applique Crochet Pattern Notes

Project requires:
Black yarn  for lighthouse main color and trim
White yarn for white stripes
Golden / yellow yarn for light deck level
(I use a lot of Red Heart Saver yarn but any medium to normal weight yarn will do)
“J” hook (6.0 mm)
Scissors or Yarn Cutter
Blunt large eye yarn / tapestry needle to weave in ends

Abbreviations used in this pattern (US crochet stitches):
ch – chain
st – stitch
sl st – slip stitch
sc – single crochet (US)
dc – double crochet (US)
hdc – half double crochet (US)
hdctog- half double crochet two stitches together (US)

Large Lighthouse Nautical Applique Crochet Pattern (3)

Pattern Instructions:
Row 1: Ch 16. Place 1 dc in 3rd ch from hook and 1 dc in each of the following 13 ch across. Ch 2 and turn. (14 dc)
Row 2: Place 1 dc in 2nd st, leaving 1st unworked and make 1 dc in each of the following 12 st across. In last pull through on final dc of row, drop the black yarn and pick up white yarn before pulling through loops. Ch 2 and turn with white yarn. (13 dc)
Row 3: Place 1 dc in 2nd st, skipping 1st st, and 1 dc in each of the following 11
st across. Ch 2 and turn. (12 dc)
Row 4: Place 1 dc in 2nd st, leaving 1st unworked and 1 dc in each of the following 10 st across. In last pull through on final dc of row, drop the white yarn and pick up black yarn before pulling through loops. Ch 2 and turn with black yarn. (11 dc)
Row 5: Place 1 dc in 2nd st, leaving 1st unworked and 1 dc in each of the following 9 st across. Ch 2 and turn. (10 dc)
Row 6: Place 1 dc in 2nd st, leaving 1st unworked, and 1 dc in each of the following 8 st across. In last pull through on final dc of row, drop the black yarn and pick up white yarn before pulling through loops. Ch 2 and turn with white yarn. (9 dc)
Row 7: Place 1 dc in 2nd st, leaving 1st unworked, and 1 dc in each of the following 7 st across. Ch 2 and turn. (8 dc)
Row 8: Place 1 dc in 2nd st, leaving 1st unworked, and 1 dc in each of the following 6 st across. In last pull through on final dc of row, drop the white yarn and pick up black yarn before pulling through loops. Ch 1 and turn with black yarn. (7 dc)
Row 9: Place 2 sc in 1st st, 1 sc in each of the following 5 st across and 2 sc in last st. Ch 1 and turn. (9 sc)
Row 10: Sl st in 2nd st, leaving 1 st unworked, ch 1 before placing 1 sc in next 5 st and sl st in next st. Ch 1 and turn, leaving last st unworked. (5 sc)
Row 11. Sl st in 1st st. Pick up golden yellow yarn and fasten off black yarn. Ch 1 and place 1 sc in next st and each of the following 4 st. Ch 1 and turn. (5 sc)
Row 12: Place 1 sc in each of the 5 st across. In last pull through on final sc of row, drop the golden yellow yarn and reattach new strand of black yarn by pulling it through last st. Ch 1 and turn. (5 sc)
Row 13: Place 1 sc each of the 5 st across. Ch 2 and turn. (5 sc)
Row 14: Place 1 hdc in 2nd st, leaving 1st unworked, make 1 hdc in next st and hdctog that last 2 st in row. Ch 2 and turn. (3 hdc)
Row 15: Hdctog 2nd and 3rd st, skipping 1st st. Ch 1 and turn. (1 hdc)
Row 16: Place 3 sc in st, sl st down side of lighthouse, one sl st per stitch, when you reach black row 9 place 3 sc, continue 1 sl st per st down until bottom corner placing 2 sc, sl st around to second bottom corner placing 2 sc there as well, continue up last side of lighthouse working 1 sc in each st until Row 9 black row reached placing another 3 sc on this side, sl st up to the first st worked in placing 3 more sc and sl st to the top of the 1st st in round.
Note:  You want want to work the stitches along the edgingaround the yarn run up the side from dropping and picking up the colors so they are hidden in your trim. :)
Leave an extra long black yarn tail so that you can sew your completed applique on to your desired project when you are ready to attach it. Pull any other loose tails or yarn ends to the back of your lighthouse applique and finish off. You should only have the long black yarn tail to attach to your project left. All done.

Large Lighthouse Nautical Applique Crochet Pattern (4)

Decided where you want to attach your lighthouse applique?  Take your yarn needle and extra long black yarn tail left on your applique during assembly to secure your piece on to your project.  Once completely sewn on, pull your yarn to the inside or back side of your project and fasten off. That’s it.

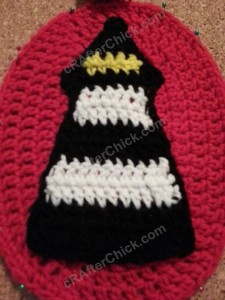
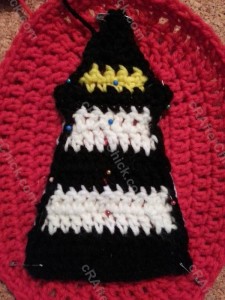
Note:  If you are a bit OCD about lining your applique up or keeping it even like me, try using some straight pins or safety pins to lock it in place while you are sewing. Once you do this you can take most of the stress out of sewing it and checking it multiple times. Trust me, it saves me a lot of time and second guessing.  Here is what my process looks like before sewing it in place.

Large Lighthouse Nautical Applique Crochet Pattern

Want more free patterns? Follow cRAfterChick on Facebook or Pinterest to get updates on patterns as they are added.

Large Lighthouse Nautical Applique Crochet Pattern (5)

Note: All the cRAfterChick patterns shared on this site are free of charge. Please feel free to use them to make your own items. If you use it to make items to sell please credit cRAfterChick for the pattern and provide link to our site. Please do not copy and paste my pattern or try to use my images as your own. You can link to any of my patterns. Happy crafting!

Reversible Coasters with Contrast Stitching Crochet Pattern

Reversible Coasters with Contrast Stitching Crochet Pattern_ a chick crafting through Rheumatoid Arthritis cRAfterChick.com

Reversible Coasters with Contrast Stitching Crochet Pattern

free coasters crochet pattern from cRAfterChick.com

Reversible Coasters with Contrast Stitching Free Crochet Pattern

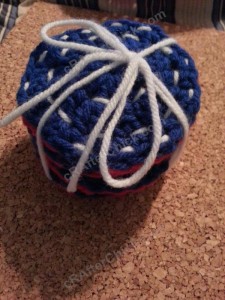
For my Gran’s birthday (4th of the July as you may guess due to the red, white and blue) I made her up with festive set of coasters to use with the new nautical set I have been working on for her and my grandfather, who shares the same birthday. Oh yeah and it’s their anniversary too. Guaranteed not to forget those dates ever. 😉

Coasters are an awesome little personalized gift you can make at the last minute, for basket stuffers, hostess gifts or just to jazz up your personal space. I used them on my computer desk to keep my drinks off the wood all the time.

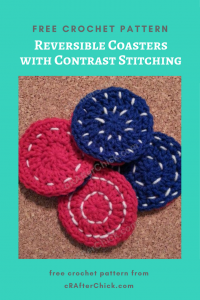
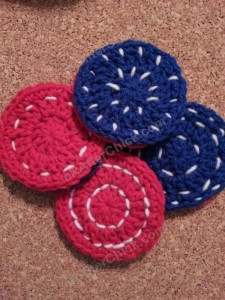
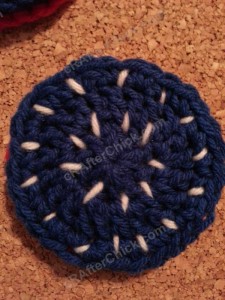
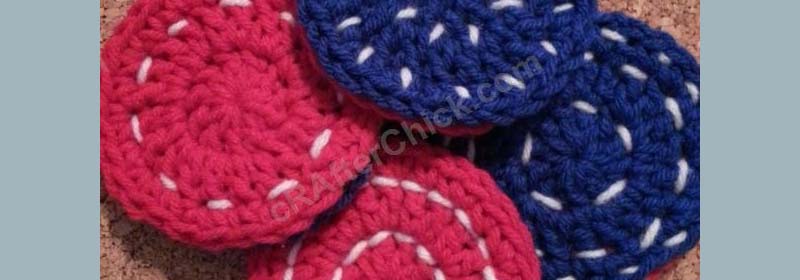
For this coasters I made 2 sides (1 red and 1 blue) to each coaster before using white to stitch them in place.  I wanted to make them fun and a bit reminiscent of fireworks so I played around with different stitching patterns for each.  I kind of like how they turned out in the end.   It’s also a great example on the fact that there is no wrong way to stitch this pattern together, you do what you like the best.   Here is the crochet pattern for this set of coasters. Happy crafting!

Reversible Coasters with Contrast Stitching Crochet Pattern (14)

Reversible Coasters with Contrast Stitching Crochet Pattern Notes

Reversible Coasters with Contrast Stitching Crochet Pattern

Project requires:
Desired color(s) yarn for your coasters (You will want 2 main colors and a contrast color for stitching)
I used red, white and blue yarn for the set in the pictures
(I use a lot of Red Heart Saver yarn but any medium to normal weight yarn will do)
“J” hook (6.0 mm)
Scissors or Yarn Cutter
Blunt large eye yarn / tapestry needle to weave in ends

Abbreviations used in this pattern (US crochet stitches):
ch – chain
st – stitch
sl st – slip stitch
sc – single crochet (US)
dc – double crochet (US)

Pattern Instructions:

*Note: This project is worked in the round on the base of a magic ring. If you do not know how to do this, please see tutorial here from: yarntomato on CrochetMe

The instructions are for a set of 4 coasters but you can change the amount to whatever you want. :)

Coaster Side A (Make 4): using main color A yarn (I used red)
Round 1: In a magic circle, ch 2 before placing 10 dc in to the circle. Pull circle tightly closed and sl st in the top of the 1st st in round. (10 dc)
Round 2:  Ch 2 before placing 2 dc in 1st st and in each of the following 9 st around. Sl st in the top of the 1st st in round. (20 dc)
Round 3: Ch 1 before placing  *2 sc in 1st st, 1 sc in next*  repeating * process for remaining 18 st around.  Sl st in top of 1st st.  (30 sc)
Fasten off and place to side until assembly.

Coaster Side B (Make 4): using main color B yarn (I used blue)
Round 1: In a magic circle, ch 2 before placing 10 dc in to the circle. Pull circle tightly closed and sl st in the top of the 1st st in round. (10 dc)
Round 2:  Ch 2 before placing 2 dc in 1st st and in each of the following 9 st around. Sl st in the top of the 1st st in round. (20 dc)
Round 3: Ch 1 before placing  *2 sc in 1st st, 1 sc in next*  repeating * process for remaining 18 st around.  Sl st in top of 1st st.  (30 sc)
Fasten off and place to side until assembly.

Reversible Coasters with Contrast Stitching Crochet Pattern

Finishing off coasters: using assembled sides and contrast stitching yarn (I used white)
Place 1 coaster side A and 1 coaster side B back to back with front sides facing out. You want to line up your stitches. I often just pop a safety pin to hold the pieces together so I can just concentrates on my contrast stitching instead of worrying about missing stitches etc. No worries if you get off one or two though as this pattern is very forgiving.
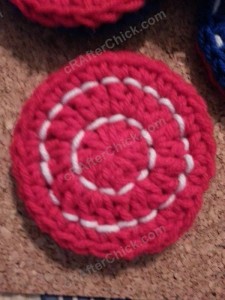
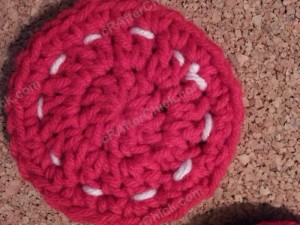
Now you want to take a long piece of your contrast yarn for stitching (I used white on the coaster set in my pictures for this pattern) and use your yarn needle to sew through both pieces at once, securing them together.  There is no right way or wrong way to do this.  Because I was making these 4th of July set to resemble fireworks in a way, it’s a good way for you to see the different ways I stitch mine together. Again there is no right or wrong way to do this.  You just want to make sure you work between Rounds 2 and 3 at the minimum so your ends aren’t all floppy.  This will also make them lay more flat when not in use.  I often also stitch between Rounds 1 and 2 but it isn’t necessary.  I attached pictures of how the different stitching methods I used look when done.  I’m far from good at sewing so if I can do this, any beginner can.  Give it a try!

Here are some additional pictures I took of these coasters before gifting them:

Reversible Coasters with Contrast Stitching Crochet Pattern (4)
Reversible Coasters with Contrast Stitching Crochet Pattern (13)

Reversible Coasters with Contrast Stitching Crochet Pattern (12)

Reversible Coasters with Contrast Stitching Crochet Pattern (5)

Reversible Coasters with Contrast Stitching Crochet Pattern (7)

Want more free patterns? Follow cRAfterChick on Facebook or Pinterest to get updates on patterns as they are added.

Note: All the cRAfterChick patterns shared on this site are free of charge. Please feel free to use them to make your own items. If you use it to make items to sell please credit cRAfterChick for the pattern and provide link to our site. Please do not copy and paste my pattern or try to use my images as your own. You can link to any of my patterns. Happy crafting!
Star Shaped Face Scrubbies with Strap Crochet Pattern

Star Shaped Face Scrubbies with Strap Crochet Pattern_ a chick crafting through Rheumatoid Arthritis cRAfterChick.com

Star Shaped Face Scrubbies with Strap Crochet Pattern

 free crochet pattern from cRAfterChick.com

Star Shaped Face Scrubbies with Strap Free Crochet Pattern

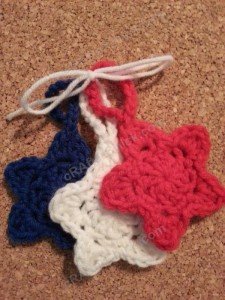
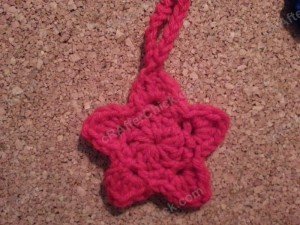
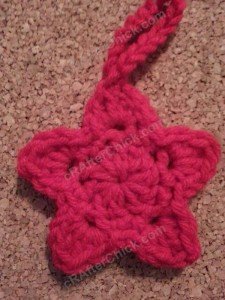
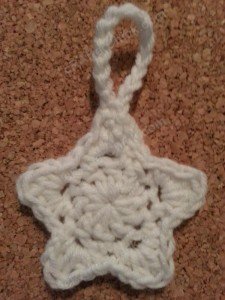
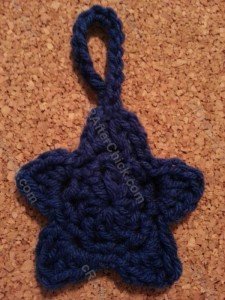
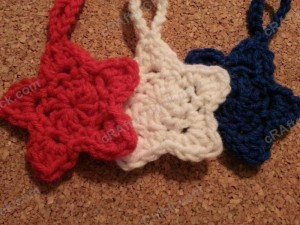
For this batch of star shaped face scrubbies, I made them as part of a 4th of July gift for my Gran as it is also her birthday and wedding anniversary. So I used red, white and blue yarn to make three star scrubbies in her gift set.

They are super easy to make and quick so you can make up a set in one sitting. They make great hostess or basket stuffing gifts even at the last minute. I know I can’t be the only one that often puts off gift making to the last minute.  You can make a set in one color, many colors, or just have fun with them.  :)

Star Shaped Face Scrubbies with Strap Crochet Pattern Notes

3 Star Shaped Face Scrubbies with Strap Crochet Pattern (20)


Project requires:

Desired color(s) yarn for your scrubbie
I used red, white and blue yarn for the set in the pictures
(I use a lot of Red Heart Saver yarn but any medium to normal weight yarn will do)
“J” hook (6.0 mm)
Scissors or Yarn Cutter
Blunt large eye yarn / tapestry needle to weave in ends

Abbreviations used in this pattern (US crochet stitches):
ch – chain
st – stitch
sl st – slip stitch
sc – single crochet (US)
dc – double crochet (US) 
hdc- half double crochet (US) 

3 Star Shaped Face Scrubbies with Strap Crochet Pattern (5)

Pattern Instructions:

*Note: This project is worked in the round on the base of a magic ring. If you do not know how to do this, please see tutorial here from: yarntomato on CrochetMe

Round 1: In magic circle, ch 2 before placing 10 dc in to the circle. Pull circle closed and sl st in the top of the 1st st in round. (10 dc)
Round 2: Ch 1 before placing 1 sc in 1st st, ch 1, 1 sc in next 2 st, ch 1, 1 sc in next 2 st, ch 1, 1 sc in next 2 st, ch 1, 1 sc in next 2 st, ch 1 and sc in last st. Sl st in the top of the 1st st in round. (10 sc, 5 ch-1 sp)
Round 3: Ch 1. Sl st in 1st st. In *ch-1 sp do the following : sl st, 1 sc, 1 hdc, 1 dc, 1 hdc, 1 sc, 1 sl st, then sl st in to the next st*, repeat * process around sl st in top of the 1st st in round. (5 worked ch-1 sp into 5 points)
Strap: Sl st up to tip of first star point. Once you reach that tip, ch 16 and sl st back in to the same stitch you started chain from. Leave a short yarn tail to finish off.
Fasten off beginning yarn tail and ending yarn tail securely in the back of the face scrubbie.

All done. :) Ready to start scrubbing your face or a lucky gift recipient’s face.

Here are some additional pictures I took along the way:

3 Star Shaped Face Scrubbies with Strap Crochet Pattern (10)

3 Star Shaped Face Scrubbies with Strap Crochet Pattern (12)

3 Star Shaped Face Scrubbies with Strap Crochet Pattern (11)

3 Star Shaped Face Scrubbies with Strap Crochet Pattern (3)

Want more free patterns? Follow cRAfterChick on Facebook or Pinterest to get updates on patterns as they are added.

Note: All the cRAfterChick patterns shared on this site are free of charge. Please feel free to use them to make your own items. If you use it to make items to sell please credit cRAfterChick for the pattern and provide link to our site. Please do not copy and paste my pattern or try to use my images as your own. You can link to any of my patterns. Happy crafting!
Evil Bunny Beanie Hat Crochet Pattern

Evil Bunny Beanie Hat Crochet Pattern_ a chick crafting through Rheumatoid Arthritis cRAfterChick.com

Evil Bunny Beanie Hat Crochet Pattern

free hat crochet pattern from cRAfterChick.com

Evil Bunny Beanie Hat Free Crochet Pattern

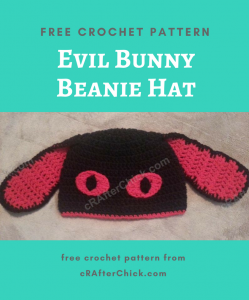
This crochet pattern was a special design at the request of one of our guy friends. An evil bunny? in his favorite colors black and red? Why not? So I made up this hat just for him but had to keep the pattern to share with everyone of course. :)

This is an advanced beginner crochet project with very few pieces for a character or animal hat so it’s not that hard to do in one sitting even. It makes a perfect fun gift for those that are a little into the darker sides of things, males and even Halloween costumes. This little guy kind of grew on me while I was making him up. I think he may be leaning more to cute than evil though. Oops.

Evil Bunny Beanie Hat Crochet Pattern Notes

Evil Bunny Beanie Hat Crochet Pattern (13)

Project requires:

Black yarn for beanie hat (main color) and logo
Red yarn for white logo circle and trim
“J” hook (6.0 mm)
Scissors or Yarn Cutter
Blunt large eye yarn / tapestry needle to weave in ends
(I use a lot of Red Heart Saver yarn but any medium to normal weight yarn will do)

Abbreviations used in this pattern (US crochet stitches):
ch – chain
st – stitch
sl st – slip stitch
sc – single crochet (US)
dc – double crochet (US)
dctog – double crochet two stitches together (US)
hdc – half double crochet (US) 
hdctog- half double crochet together (infant sizes only) (US)

Evil Bunny Beanie Hat Crochet Pattern (2)

Pattern Instructions:
*Note: This project is worked in the round on the base of a magic ring. If you do not know how to do this, please see tutorial here from: yarntomato on CrochetMe
The hat in this picture is made with my free Easy Peasy Large Adult / Men Sized Double Crochet Beanie Pattern, which you can find here as a foundation for the projectWant it in another size? No worries. Head over to Easy Peasy All Family Sizes Free Double Crochet Beanie Patterns to select the size of the free pattern you want for your project.

Hat Base: in main color yarn and contrast color trim
Use Easy Peasy Crochet Beanie Size of your choice
In order to make the contrast trim, once you have completed your beanie base, attach the red yarn to the last st worked with a sl st. Ch 1 before placing 1 sc in 1st st and in each of the following st around. Sl st back in top of the 1st st worked before fastening off.
Now that you have finished your beanie for the base you are ready to start making the pieces for your own evil bunny hat.

Inner Ear (Make 2): using red contrasting yarn
Row 1: Ch 9, 1 dc in 3rd ch from hook and each of the following 6 ch. Ch 2 and turn. (7 dc)
Rows 2-7: Make 1 dc in 1st st and each of the following 6 st across. Ch 2 and turn.  (7 dc)
Row 8:  Place 2 dc in 1st st and 1 dc in each of the following 6 st across. Ch 2 and turn.  (8 dc)
Row 9: Place 2 dc in 1st st and 1 dc in each of the following 7 st across.  Ch 2 and turn.  (9 dc)
Rows 10-11: Make 1 dc in 1st st and each of the following 8 st across.  Ch 2 and turn.  (9 dc)
Row 12: Place 1 dc in the 2nd st, skipping the 1st st in the row, 1 dc in each of the following 5 st, and dctog the last 2 st in row. Ch 2 and turn. (7 dc)
Row 13: Place 1 dc in the 2nd st, skipping the 1st st in the row, 1 dc in each of the following 3 st, and dctog the last 2 st in row. Ch 2 and turn.  (5 dc)
Fasten off.
Repeat for second ear.

*The feature above works great for toddler, youth, preteen, teen, womens and mens sized hats. For newborn to 12 month sized hats, do the following steps instead of those above:
Row 1: Ch 7, 1 hdc in 3rd ch from hook and each of the following 4 ch. Ch 2 and turn. (5 hdc)
Rows 2-5: Make 1 dc in 1st st and each of the following 4 st across. Ch 2 and turn.  (5 hdc)
Row 6:  Place 2 hdc in 1st st and 1 dc in each of the following 4 st across. Ch 2 and turn.  (6 hdc)
Row 7: Place 2 hdc in 1st st and 1 dc in each of the following 5 st across.  Ch 2 and turn.  (7 hdc)
Rows 8-9: Make 1 hdc in 1st st and each of the following 6 st across.  Ch 2 and turn.  (8 hdc)
Row 10: Place 1 hdc in the 2nd st, skipping the 1st st in the row, 1 hdc in each of the following 4 st, and hdctog the last 2 st in row. Ch 2 and turn. (6 hdc)
Row 11: Place 1 hdc in the 2nd st, skipping the 1st st in the row, 1 hdc in each of the following 2 st, and hdctog the last 2 st in row. Ch 2 and turn.  (4 hdc)
Fasten off.
Repeat for second ear.

Outer Ear (make 2): using black main color yarn
Repeat Rows 1 -13 or Inner Ear as above.
Fasten off.
Repeat for second ear.

Ear Assembly (Make 2): using black yarn, 2 finished inner ear and 2 finished outer ear pieces from previous step.
Placing 1 completed ear front in front of a finished ear back, line up the st. Attach black yarn to top left corner stitch. Ch 1 before making 1 sc in each st down ear towards bottom, working through both pieces at same time counterclockwise around ear. When you reach the bottom 7 st, place 2 sc in each of these st to give the ear a more rounded bottom. Resume making 1 sc in each st up to top right corner, place (3 sc in corner), 1 sc in each of the st across to you reach 1st st worked. Place 2 more sc in same st as 1st st before sl st in to the top of the 1st st in round.
Before you cut the yarn, make sure you leave a long enough of a tail of yarn to be able to secure your ear in place on your beanie hat during assembly. Put to side until needed for assembly.
Repeat process for second ear.

Eye Color (Make 2): using red contrasting yarn
Round 1: In a magic circle, ch 1 before placing the following st in this order in to the circle: 2 sc, 1 hdc, 2 dc, 1 hdc, 3 sc, 1 hdc, 2 dc, 1 hdc, 1 sc. Pull oval shaped circle closed and sl st in top of the 1st st in round. (14 st total)
Round 2: Ch 1 before placing 1 sc in 1st 2 st, 2 hdc in next st, 2 dc in next st, ch 1, 2 dc in next st, 2 hdc in next, 1 sc in next 3 st, 2 hdc in next st, 2 dc in next st, ch 1, 2 dc in next st, 2 hdc in next st and 1 sc in remaining st. Sl st in the top of the 1st st in round. ( st total)
Before you cut your yarn, make sure you leave a long enough of a tail of yarn to be able to secure your assembled eye in place on your beanie hat during eye assembly. Place to side until needed in finishing steps.
Repeat process for second eye color piece.

*The feature above works great for toddler, youth, preteen, teen, womens and mens sized hats. For newborn to 12 month sized hats, skip Round 2 only doing Round 1 of above instructions.

Eye pupils (Make 2): using black main color yarn
Ch 4. Make 1 sc in 2nd ch from hook, 1 sc in next ch and sl st in remaining ch. Ch 1 and turn to work backside of chain. Work 1 sc in 1st 2 st and sl st in to the last st of chain.
Make sure you leave a short yarn tail that is long enough to secure your eye pupil in place on your evil bunny’s eye before you cut the yarn, pull through last st and place to side for now.
Repeat for second eye pupil.

*The feature above works great for toddler, youth, preteen, teen, womens and mens sized hats. For newborn to 12 month sized hats, do the following steps instead of those above:
 Ch 4.  Make a sl st in the 3rd ch from the hook and sl st in last ch from hook.  Leave a short enough yarn tail to be able to sew this little piece in to an elongated oval during eye assembly steps.

Now that all your features are made, you are now ready to move on to the finishing off steps up next.

Evil Bunny Beanie Hat Crochet Pattern (15)

Finishing off:
Starting with your eyes, we are going to assemble the eye pupils and eye colors together into completed eyes before attaching them to the evil bunny hat. Take the leftover black (main color) yarn tail from one eye pupil and your yarn needle to sew your pupil in place in the center of one red (contrast color) eye color piece. You want to place it so that it is long wise, up and down, vertical. Once it is securely in place, pull your yarn to the back of the assembled eye before fastening off. Repeat this process for your second eye.
Next take the leftover red (contrast color) yarn tail from your assembled eye and using your yarn needle sew the bunny’s eye directly on to the beanie. Since these are the only beanie feature, feel free to play around with the placement. You may like it more down low on the hat, in the middle or even up high. You can reference my pictures on where I placed the eyes on my evil bunny hat. Once you have sewn it in place, pull yarn to inside of beanie hat and fasten off. Repeat this process for your second eye.
Now take the leftover black (main color) yarn tail from one assembled ear and sew it on to the desired location with the yarn needle on your evil bunny hat. If you want longer hanging ears, place lower on the hat. If you want shorter hanger ears, place higher on hat. For head top floppy ears, place on top of hat with contrast color piece facing forward. You can also place the ears on the side of the head with the red facing forward more towards the top so that they will flop forward with peeks at the red also. You can see how I placed the ears on this evil bunny hat as requested by our male friend in my pictures. Once you have secured the ear fully in place, pull the leftover yarn tail to the inside of the hat before fastening off. Repeat for second ear.
*Tip from cRAfterChick: I normally mark the start and finish of my second ear with safety pins so that I get the ears perfectly symmetrically placed but I’m a bit OCD about them being even. It will drive me crazy if they are slightly off but it by no means is a necessary step. *
Take the time now to look over your assembled hat to check for any loose ends or tails you might of missed during assembly process. Take the time now to sew them in and fasten off.
All done! One super evil looking bunny hat ready to wear. I told you it wasn’t too complicated. :) Happy crafting!

Evil Bunny Beanie Hat Crochet Pattern (16)

Here are some of the pictures  taken to show how this evil bunny crocheted hat looks like worn once it is fully completed:

Evil Bunny Beanie Hat Crochet Pattern (7)

Evil Bunny Beanie Hat Crochet Pattern (6)

Evil Bunny Beanie Hat Crochet Pattern (9)

Evil Bunny Beanie Hat Crochet Pattern (8)

Want more free patterns? Follow cRAfterChick on Facebook or Pinterest to get updates on patterns as they are added.

Note: All the cRAfterChick patterns shared on this site are free of charge.  Please feel free to use them to make your own items.  If you use it to make items to sell please credit cRAfterChick for the pattern and provide link to our site.  Please do not copy and paste my pattern or try to use my images as your own.  You can link to any of my patterns.  Happy crafting!

Cute and Easy Frog Beanie Hat Crochet Pattern

Cute and Easy Frog Beanie Hat Crochet Pattern_ a chick crafting through Rheumatoid Arthritis cRAfterChick.com

Cute and Easy Frog Beanie Hat Crochet Pattern

 free animal hat crochet pattern by cRAfterChick.com

Cute and Easy Frog Beanie Hat Free Crochet Pattern

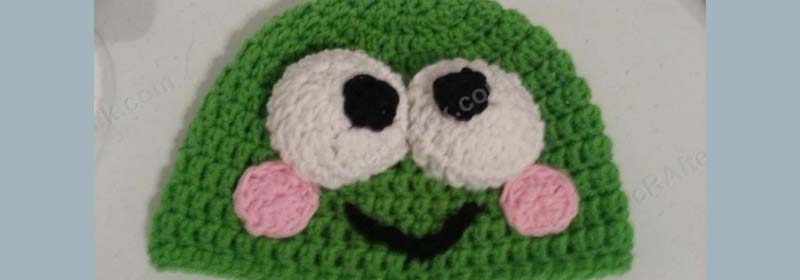
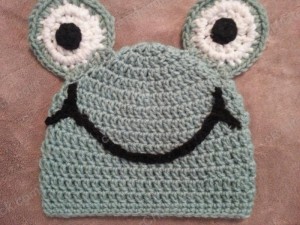
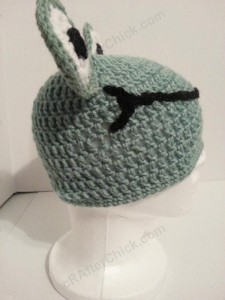
This a super easy and cute frog hat crochet pattern.  It works up really fast and is great for last minute gift ideas or to work on project when you don’t have much time to fill.  I tried to make it as easy as possible and I think it’s very beginner friendly so give it a try.  Please let me know if you have any questions about the pattern at all. Happy crafting!

Cute and Easy Frog Beanie Hat Crochet Pattern Notes

Cute and Easy Frog Beanie Hat Crochet Pattern (2)

Project requires:
Light to medium green yarn for beanie main color and ear backs
Black yarn for eye pupils and smile
White yarn for eye whites
“J” hook (6.0 mm)
Scissors or Yarn Cutter
Blunt large eye yarn / tapestry needle to weave in ends and sew pieces together

Abbreviations used in this pattern (US crochet stitches):
ch – chain
st – stitch
sl st – slip stitch
sc – single crochet (US)
dc – double crochet (US)
hdc – half double crochet (for smaller sizes only) (US)

Cute and Easy Frog Beanie Hat Crochet Pattern (4)

Pattern Instructions:
*Note: This project is worked in the round on the base of a magic ring. If you do not know how to do this, please see tutorial here from: yarntomato on CrochetMe
The hat in this picture is made with my free Easy Peasy Youth Sized (Age 3-10 years old) Double Crochet Beanie  Hat Pattern which you can find  here as a foundation for the project. Want it in another size? No worries. Head over to Easy Peasy All Family Sizes Free Double Crochet Beanie Patterns to select the size of the free pattern you want for your project.

Hat Base: in main color light to medium green yarn 

Use Easy Peasy Crochet Beanie Size of your choice

Once you have completed your beanie for the base you are ready to start building your cute frog hat. :)

Eye Whites (Make 2):  using white yarn
Round 1: In a magic circle, ch 2 before placing 12 dc in to the circle. Pull circle fully closed. Sl st in top of the 1st st in round. (12 dc)
Round 2:  Ch 1 before placing 2 sc in 1st st and each of the following 11 st. Sl st in the top of the 1st st in round.  Fasten off. (24 sc)
Repeat above process for the second eye white

*This feature works well for toddler to adult male sized hats. For newborn to 12 month sized hats, do the following steps instead of above:
Round 1: In a magic circle, ch 2 before placing 10 hdc in to the circle. Pull circle fully closed. Sl st in top of the 1st st in round. Fasten off.  (10 hdc)

Eye Pupils (Make 2): using black yarn
Round 1: In a magic circle, ch 1 before placing 6 sc in circle. Pull circle closed and sl st in the top of the 1st st in round. (6 sc)
Leave a long enough yarn tail to be able to sew it on to the eye white in following step before cutting yarn and pulling through loop.
Repeat process for second eye pupil.

*This feature works well for toddler to adult male sized hats. For newborn to 12 month sized hats, make 3 sc in circle instead of 6 sc pattern calls for above.

Eye Front Assembly: using eye whites and eye pupils
Take the black yarn tail from one eye pupil from previous step and your yarn needle to sew the pupil on to one of the eye white pieces.  I centered mine on Round 1 of the eye white but you can place it wherever you desire.  Once secure, pull yarn to back of eye white and fasten off.
Repeat process for second eye.

Eye Backs and Assembly (Make 2): using main color yarn and assembled eye fronts from previous steps.
Repeat Rounds 1 and 2 from eye whites above but do not fasten off at the end of round 2.
Round 3. Ch 1 and turn. Place one completed eye front in front of the eye back you are working on, lining up the stitches.  Working through both pieces at the same time.  Place *2 sc in 1st st, 1 sc in next st* repeating * until 4 st are left.  Sl st in last 4 st. Sl st in top of 1st st in round.
Make sure you leave a nice long yarn tail to sew the frog eye on top of the beanie hat before cutting it and pulling through loop.
Repeat process for second eye.

*For newborn to 12 month sized hats, do the following steps instead of above:
Round 3. Ch 1 and turn. Place one completed eye front in front of the eye back you are working on, lining up the stitches.  Working through both pieces at the same time.  Place 2 sc in 1st st and in next 6 st. Place 1 sc in next st, and sl st in last 2 st.  Sl st in last 4 st. Sl st in top of 1st st in round.
Make sure you leave a nice long yarn tail to sew the frog eye on top of the beanie hat before cutting it and pulling through loop.
Repeat process for second eye.

Mouth / Smile: using black yarn
Main Smile piece:
Using black yarn, make a chain of 25.  Leave a nice long yarn tail so you can sew this on to the beanie hat during assembly.  Cut yarn, pull through last loop and place to side for now.

*This feature works well for toddler to adult male sized hats. For newborn to 12 month sized hats, make a chain of  16 for newborn or 18 for other infant sizes instead of 25 pattern calls for above.

Smile Sides (Make 2):
Using black yarn, make a chain of 6.  Leave a short yarn tail so you can sew this on to the beanie hat during assembly.  Cut yarn, pull through last loop and place to side for now.  Repeat process for second smile side.

*This feature works well for toddler to adult male sized hats. For newborn to 12 month sized hats, make two chains of 3 ch instead of 6 pattern calls for above.

Now you can move on to assembly steps below.

Finishing off:
Take the tail from one completed frog eye and your yarn needle to attach to one side of the top of your frog hat.  Stitch it on securely.  When I place features like this on top of hats I stitch on top of beanie and reinforce with another set of stitches inside but it’s not necessary.  Once secure, pull yarn to inside of beanie hat and fasten off.  Repeat process for the second frog eye.
Using your yarn needle take the black yarn tail from the mouth / smile chain and sew it in desired location on hat front. I sewed mine in a wide “u” shape but feel free to change it up on yours. Once sewn in place, pull yarn to inside of hat and fasten off.
Using your yarn needle, take the black yarn tail from the smile side chain and sew it in desired location on one side of the smile you stitched on in previous step. I attached mine in a bit of a curve. You can reference my pictures to see how I placed them on my hat.  Once sewn in place, pull yarn to inside of hat and fasten off. Repeat this process on the other side of the smile for the second smile side.
Now take a few moments to double check over your work for any loose ends or tails you may not of fastened off during assembly of your frog hat.  If you find any, go ahead and fasten off.
All done! One easy and cute frog hat. :)

Here are some of the additional pictures taken to show how the completed easy and cute frog hat looks like when worn:

Cute and Easy Frog Beanie Hat Crochet Pattern (17)

Cute and Easy Frog Beanie Hat Crochet Pattern (6)

Cute and Easy Frog Beanie Hat Crochet Pattern (7)

Cute and Easy Frog Beanie Hat Crochet Pattern (16)

Cute and Easy Frog Beanie Hat Crochet Pattern (8)

Cute and Easy Frog Beanie Hat Crochet Pattern (14)

Cute and Easy Frog Beanie Hat Crochet Pattern (10)

Cute and Easy Frog Beanie Hat Crochet Pattern (11)

Cute and Easy Frog Beanie Hat Crochet Pattern (12)

Want more free patterns? Follow cRAfterChick on Facebook or Pinterest to get updates on patterns as they are added.

Note: All the cRAfterChick patterns shared on this site are free of charge.  Please feel free to use them to make your own items.  If you use it to make items to sell please credit cRAfterChick for the pattern and provide link to our site.  Please do not copy and paste my pattern or try to use my images as your own.  You can link to any of my patterns.  Happy crafting!

Lorax Dr Suess Character Hat Crochet Pattern

Lorax Dr Suess Character Hat Crochet Pattern_ a chick crafting through Rheumatoid Arthritis cRAfterChick.com

Lorax Dr Suess Character Hat Crochet Pattern

free book character hat crochet pattern from cRAfterChick.com

Lorax Dr Suess Character Hat Free Crochet Pattern

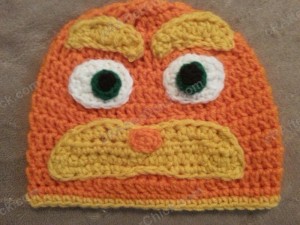
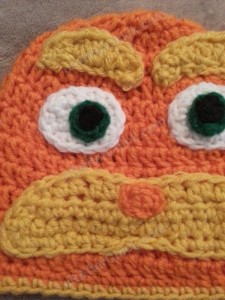
This was a requested hat for my Mom, who is a teacher, to wear during reading this book to her classroom. The kids love seeing all the hats for each book or project so it’s fun for me to make these book characters come to life in crochet. :) This is my crochet interpretation of the Lorax based on the movie character instead of the book character from Dr. Suess.

It’s a fun hat to make, wear or give as a gift to the Dr Suess lover in your life. I tried to make it simple and easy for even beginners but if you have any questions, please don’t hesitate to reach out to me. Happy crafting!

the lorax book character hat crochet pattern inspiration picture

Lorax Dr Suess Character Hat Crochet Pattern Notes

Lorax Dr Suess Character Hat Crochet Pattern

Project requires:

Orange yarn for Beanie Hat main color and nose
(I use a lot of Red Heart Saver yarn but any medium to normal weight yarn will do)
Golden yellow yarn for whiskers / mustache area, eyebrows and hat’s trim
Green yarn for eye color
Black Yarn for eye pupils
White yarn for eye whites
“J” hook (6.0 mm)
Scissors or Yarn Cutter
Blunt large eye yarn / tapestry needle to weave in ends

Abbreviations used in this pattern (US crochet stitches):
ch – chain
st – stitch
sl st – slip stitch
sc – single crochet (US)
dc – double crochet (US)
hdc – half double crochet (US)
dctog- double crochet two stitches together (US)
sctog- single crochet two stitches together (US)

Lorax Dr Suess Character Hat Crochet Pattern (3)

Pattern Instructions:
*Note: This project is worked in the round on the base of a magic ring. If you do not know how to do this, please see tutorial here from: yarntomato on CrochetMe

The hat in this picture is made with my free Easy Peas Pre-Teen / Teen / Women Double Crochet Beanie Pattern, which you can find  here as a foundation for the projectWant it in another size? No worries. Head over to Easy Peasy All Family Sizes Free Double Crochet Beanie Patterns to select the size of the free pattern you want for your project.

Hat Base: in main color yarn
Use Easy Peasy Crochet Beanie Size of your choice
To make the contrast trim, once you have completed your beanie base, attach the golden yellow yarn to the last st worked with a sl st. Ch 1 before placing 1 sc in 1st st and in each of the following st around. Sl st back in top of the 1st st worked before fastening off.
Once you have completed your beanie for the base you are ready to start making the pieces for your Lorax character hat. :)

Eye whites (Make 2): using white yarn
Round 1: In magic circle, Ch 1 before placing following (1 sc, 1 hdc, 1 dc, 1 hdc, 2 sc, 1 hdc, 1 dc, 1 hdc, 1 sc). Pull ovalish circle closed. Sl st in to the top of the 1st st in round. (10 st total)
Round 2: Ch 1, place 1 sc in 1st st, 2 sc in next 3 st, 1 sc in next 2 st, 2sc in next 3 st, 1 sc in next st. Sl st in to the top of the 1st st in round. (16 sc)
Leave a nice long yarn tail before cutting yarn and pulling through. You will be using this tail to secure your assembled eyes on to your beanie hat during finishing process.
Repeat for second eye white.

*The feature above works well on toddler, youth, preteen / teen, womens and men sized hats. For newborn to 12 month sizes, skip Round 2 of above instructions.

Eye color (Make 2): using dark green yarn
Round 1: In a magic circle, ch 1 before placing 6 sc in circle. Pull circle closed. Sl st in top of the 1st st in round.
Leaving a long enough tail to be able to sew your eye color on to your eye white during assembly, cut yarn and pull through loop. Place to side until needed in finishing steps.
Repeat process above for second eye color.

*The feature above works well on toddler, youth, preteen / teen, womens and men sized hats. For newborn to 12 month sizes, make 4 sc instead of 6 sc in instructions above.

Eye pupils (Make 2): using black yarn
Ch 3. Sl st in last ch from hook. Cut yarn leaving a short tail long enough to attach to eye color during eye assembly before pulling through. Place to side until needed in future steps.
Repeat process for the second eye pupil.

*The feature above works well on toddler, youth, preteen / teen, womens and men sized hats.  For newborn to 12 month sizes, skip making a chain and just make a large knot to sew in to place.

Nose: using orange yarn
Round 1: In a magic circle, ch 1 before placing the following st in this order in to the circle: 1 sc, 2 hdc, 2 sc, 2 hdc, 1 sc. Sl st in the top of the 1st st in round. (8 st total)
Leave a yarn tail long enough to be able to sew the nose in place on the beanie hat during assembly before cutting yarn, pull through loop and placing to the side until needed.

*The feature above works well on toddler, youth, preteen / teen, womens and men sized hats.  For newborn to 12 month sizes, do the following stitches instead of those above in magic circle. Ch 1 before placing 1 sc, 1 hdc, 1 sc, 1 hdc. Sl st in top of 1st st in round. (4 st total)

Eyebrows (Make 2): using gold / yellow yarn
Row 1: Ch 8. Place 1 sc in 2nd ch from hook, 2 hdc in next ch, 1 dc in next ch, 2 dc in next ch, 1 dc in next ch, 2 hdc in next ch and 1 sc in last ch. Sl st in the base of last st worked.
Make sure you leave an extra long tail as you will be using it sew your eyebrows in place and freehand stitch on eyebrow edges if wanted like I did in my hat to look more like the Lorax movie character. Once you leave a tail, cut yarn, pull through loop and place to side until needed in assembly.
Repeat for second eyebrow.

*The feature above works well on toddler, youth, preteen / teen, womens and men sized hats.   For newborn to 12 month sizes, do the following for Row 1 instead of instructions above:
Row 1: Ch 6. Place 1 sc in 2nd ch from hook, 2 hdc in next ch, 2 dc in next ch, 2 hdc in next ch and 1 sc in last ch. Sl st in the base of last st worked. (8 st total)

Mustache / whiskers area: using gold / yellow yarn
Row 1: Ch 22. Make 1 hdc in 3rd ch from hook and 1 hdc in each of the following 19 ch. Ch 2 and turn. (20 hdc)
Row 2: Place 1 hdc in 2nd st, skipping 1st st, make 1 hdc in each of the following 16
st and hdctog last 2 st in row. Ch 1 and turn. (18 hdc)
Row 3: Place 1 sc in 2nd st, skipping 1st st in round, before making
1 sc in next st, 1 hdc in next st, 1 dc in next st, 1 hdc in next st, 1 sc in next st, sl st in each of next 3 st, 1 sc in next st, 1 hdc in next st, 1 dc in next st, 1 hdc in next st, 1 sc in next st and sctog last 2 st. Do not stop row here continue to work 1 sc in each st down the side of this area, placing 3 sc in bottom corner, 1 sc in next st until middle 4 st of bottom reached, sl st in each of the 4 middle st before resuming 1 sc in each st, 3 sc in other bottom corner, 1 sc in each st up to 1st st worked.  1 sc in same sp as 1st st and sl st in top of the 1st st in round.
Leave a tail that is long enough to be able to secure this feature on to your beanie hat during assembly before cutting yarn and pull through loop.

*The feature above works well on toddler, youth, preteen / teen, womens and men sized hats.  For newborn to 12 month sizes, do the following instead of instructions for this feature above: 
Row 1: Ch 16. Make 1 hdc in 3rd ch from hook and 1 hdc in each of the following 13 ch. Ch 2 and turn. (14 hdc)
Row 2: Place 1 hdc in 2nd st, skipping 1st st, make 1 hdc in each of the following
10 st and hdctog last 2 st in row. Ch 1 and turn. (12 hdc)
Row 3: Place 1 sc in 2nd st, skipping 1st st in round, before making
1 sc in next st, 1 hdc in next 2 st, 1 sc in next st, sl st in next st, 1 sc in next st, 1 hdc in next 2 st, 1 sc in next st and sctog last 2 st. Do not stop row here continue to work 1 sc in each st down the side of this area, placing 3 sc in bottom corner, 1 sc in next st until middle 2 st of bottom reached, sl st in each of the 2 middle st before resuming 1 sc in each st, 3 sc in other bottom corner, 1 sc in each st up to 1st st worked.  1 sc in same sp as 1st st and sl st in top of the 1st st in round.
Leave a tail that is long enough to be able to secure this feature on to your beanie hat during assembly before cutting yarn and pull through loop.

Now you have all the pieces created. Time to move on to assembly.

Lorax Dr Suess Character Hat Crochet Pattern (6)

Finishing off:
We will start from the bottom up on adding our features to this Lorax character hat. I find it is better to do it this way so that you take the worry out of running out of room and scrunching features together if you run tight on space. You can always move the next feature up but there is no moving down.
Taking the tail from your Lorax’s mustache whiskers area and your
sew the mustache securing in place a little above the bottom of the hat. You can reference my pictures to see where I placed my own. Once that is completed, pull your yarn to the inside of the hat and finish off.
Taking the tail left on his nose piece and using your yarn needle sew the nose in place on the top center of his attached mustache / whiskers area that you sewed on in previous step. Once sewn in place completely, pull yarn to inside of beanie hat and fasten off.
You now want to take the yarn tail left on one eye pupil and sew it in place with your yarn needle onto one green eye color. After attached, pull yarn to back of eye color and fasten it off. Repeat this process for the second pupil.
Take the green yarn tail from one of his eye color pieces and secure it in desired place on one eye white sewing it together with your yarn needle. Once done, pull yarn to the back of the eye white and fasten off. Repeat this process for the second eye color.
Taking the white yarn tail from one assembled eye use your yarn needle to sew the eye in place off to one side of nose above the whisker area. Once secured in place, pull yarn to inside of hat and fasten off. Repeat process for second eye, equal distance on the opposite side of the nose.
Taking the tail from one your Lorax’s eyebrows and your yarn needle to sew the eyebrow securing in place a little above one attached eye. You can reference my pictures to see where I placed my own. Once that is completed, pull your yarn to the inside of the hat and finish off. Repeat this process for the second eyebrow placing it over the second eye.
Now take the time to check over your work for any yarn tails or loose ends you may have missed during assembly. If you find any, go ahead and fasten them off.
All done. :) One cool Lorax hat ready to wear.

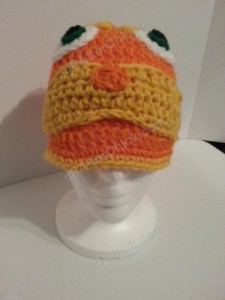
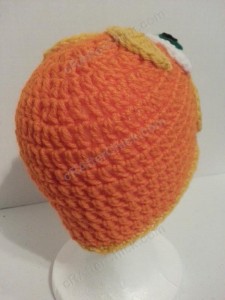
Here are some pictures I have taken to show how the Lorax looks worn once it is completed:

Lorax Dr Suess Character Hat Crochet Pattern (3)

Lorax Dr Suess Character Hat Crochet Pattern (2)

Lorax Dr Suess Character Hat Crochet Pattern (7)

Lorax Dr Suess Character Hat Crochet Pattern (10)

Lorax Dr Suess Character Hat Crochet Pattern (11)

Lorax Dr Suess Character Hat Crochet Pattern (5)

Lorax Dr Suess Character Hat Crochet Pattern (9)

Lorax Dr Suess Character Hat Crochet Pattern (12)

Lorax Dr Suess Character Hat Crochet Pattern (4)

Want more free patterns? Follow cRAfterChick on Facebook or Pinterest to get updates on patterns as they are added.  

Note: All the cRAfterChick patterns shared on this site are free of charge.  Please feel free to use them to make your own items.  If you use it to make items to sell please credit cRAfterChick for the pattern and provide link to our site.  Please do not copy and paste my pattern or try to use my images as your own.  You can link to any of my patterns.  Happy crafting!
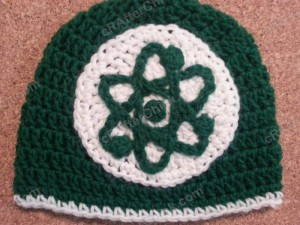
Big Bang Theory Show Atom Logo Inspired Beanie Hat Crochet Pattern

Big Bang Theory Show Atom Logo Inspired Beanie Hat Crochet Pattern_ a chick crafting through Rheumatoid Arthritis cRAfterChick.com

Big Bang Theory Show Atom Logo Inspired Beanie Hat Crochet Pattern

 free crochet pattern from cRAfterChick.com

Big Bang Theory Show Atom Logo Inspired Beanie Hat Free Crochet Pattern

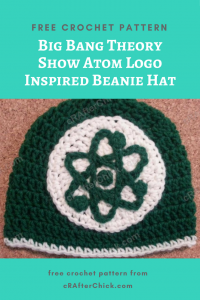
If you haven’t guessed by now I’m a self proclaimed geek and totally nerd out over anything geeky, math, science… Big Bang Theory. 😉 So when I saw this hoodie online I thought I would see how it translated in to a crocheted hat. I had to make the applique a bit bigger than I wanted to fit all the details that needed to be sewn on and it was a big pain for someone like me that hates to sew pieces together. However that being said, you just need basic beginner crocheting skills to make this hat design so give it a try. I do recommend using safety pins or straight pins during making the logo so it takes a lot of the guesswork out while you are stitching.  Now I just have to find something in my mostly black wardrobe to wear this hat with.  Happy crafting!

Big Bang Theory Atom Logo inspiration picture for crochet hat  

Big Bang Theory Show Atom Logo Hat Crochet Pattern Notes

Big Bang Theory Show Atom Logo Inspired Beanie Hat Crochet Pattern (11)

Project requires:

Medium to dark green yarn for beanie hat (main color) and logo
White Yarn for white logo circle and trim
“J” hook (6.0 mm)
Scissors or Yarn Cutter
Blunt large eye yarn / tapestry needle to weave in ends
(I use a lot of Red Heart Saver yarn but any medium to normal weight yarn will do)

Abbreviations used in this pattern (US crochet stitches):
ch – chain
st – stitch
sl st – slip stitch
sc – single crochet (US)
dc – double crochet (US)

Big Bang Theory Show Atom Logo Inspired Beanie Hat Crochet Pattern (3)

Pattern Instructions:
*Note: This project is worked in the round on the base of a magic ring. If you do not know how to do this, please see tutorial here from: yarntomato on CrochetMe

Once your beanie base is completed, take your white yarn and attach it to last st worked with a sl st.  Ch 1 before placing 1 sc in 1st st and in each of the st around.  Sl st in top of the 1st st in round.  Fasten off.
Now you are ready to start making the front logo for this hat.

White Logo Circle: using white yarn
Round 1:  Starting off with your white yarn in a magic circle, ch 2 (does not count as a st throughout pattern) before placing 12 dc in a magic circle. Pull circle tight before sl st in top of beginning st.  (12 dc)
Round 2:  Ch 2 before placing 2 dc in first st and 2 dc in the next 11 st. Sl st in top of 1st st in round. (24 dc)
Round 3: Ch 2 before placing  *2 dc in 1st st, 1 dc in next st * repeat * around. Sl st in top of 1st st in beginning of round. (36 dc)
Round 4: Ch 2 before placing  *2 dc in 1st st, 1 dc in next 2 st * repeat * around. Sl st in top of 1st st in beginning of round. (48 dc)
Cut yarn leaving a long tail in order to sew your eye on to the beanie during assembly process. Pull yarn through and put to side until needed.

The feature above works well on toddler through adult sized hats. For sizes 6 to 12 months, leave off Round 4.  For sizes newborn to 6 months, leave off Round 3 and 4.

Logo Pieces:

Atom orbit lines (Make 3): using main color green yarn
Make a chain of 30. Sl st in last ch from hook.
Make sure you leave an extra long tail to sew in to place during logo assembly. I normally judge between 3 to 4 times the length I will be stitching in place when doing this kind of piecework in my crochet.
Cut yarn, leaving tail, on hook and place to side until needed in assembly.
Repeat process for other two.

This feature above works well for toddler to adult sized hats.  For sizes 6 to 12 months, make a chain of  25 instead.  For sizes newborn to 6 months, make a ch of 20.

Atom nucleus and electrons (Make 4): using main color green yarn
Round 1: In a magic circle, ch 1 before placing 3 sc in circle. Pull circle closed. Sl st in top of 1st st in round. (3 sc)
Leaving a long enough of a yarn tail to be able to sew these in place for your logo during assembly, cut yarn, pull through loop and place to side until needed.
Repeat process for next 3 pieces.

This feature works well for toddler to adult sized hats.  For newborn to 12 month sizes,  ch 3 and sl st in last chain for these pieces instead of above instructions.

Big Bang Theory Show Atom Logo Inspired Beanie Hat Crochet Pattern

Logo Circle Assembly and Finishing off Steps:
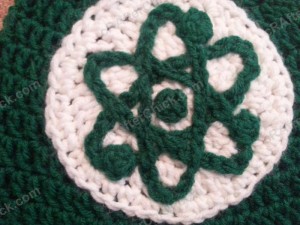
Taking the chain loop from one of the atom orbit lines you made earlier and use your yarn needle stitch it in to place to start making your atom logo shape. See pictures above to see logo layout and how I placed my own. Once secure in place, pull yarn to back of logo circle and fasten off.
Repeat this process for the other two atom orbit lines.
Tip: I use straight pins or safety pins to attach where I want my lines to go before I start stitching. Then I don’t have to keep stopping to check my lines etc.
Now take one of the nucleus and electron circles you created in earlier step. Use the leftover yarn tail and yarn needle to sew this one in place in dead center of your atom orbit lines. Once secure, pull yarn to back of logo circle and fasten off.
Taking the tail from one of the electrons, place on orbit line trail as seen in pictures. Use your yarn needle to sew it in place. Once attached, pull yarn to back of logo circle before fastening off. Repeat process for remaining two electrons.
At this point you should only have 1 yarn tail left, an extra long white tail from your assembled logo circle. If you have any others, fasten them off now.
Next take this remaining tail and use your yarn needle to sew your logo circle securely in place on the front of your beanie hat in desired location. I just use a basic in and out stitch as my sewing skills are sadly lacking. 😉 Once you have sewn it on fully and secured it in place, pull your tail in to the inside of your beanie hat and fasten off.
Now double check over your hat for any loose yarn tails or ends you may have missed in process. If you find any, take the time now to sew them in and fasten off.
All done. :) I hope you enjoy my patterns and find everything easy enough to understand. I’m still new at this so feel free to drop me a line or comment if you have any questions or see crazy typo. Happy crafting!

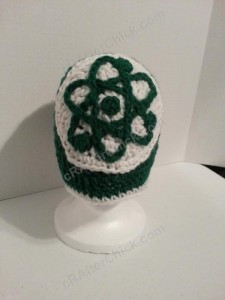
Here are some pictures to show this Big Bang Theory logo inspired hat looks once completed and worn:

Big Bang Theory Show Atom Logo Inspired Beanie Hat Crochet Pattern (2)

Big Bang Theory Show Atom Logo Inspired Beanie Hat Crochet Pattern (5)

Big Bang Theory Show Atom Logo Inspired Beanie Hat Crochet Pattern (7)

Big Bang Theory Show Atom Logo Inspired Beanie Hat Crochet Pattern (8)

Big Bang Theory Show Atom Logo Inspired Beanie Hat Crochet Pattern (4)

Big Bang Theory Show Atom Logo Inspired Beanie Hat Crochet Pattern (6)

Big Bang Theory Show Atom Logo Inspired Beanie Hat Crochet Pattern (14)

Big Bang Theory Show Atom Logo Inspired Beanie Hat Crochet Pattern (9)

Want more free patterns? Follow cRAfterChick on Facebook or Pinterest to get updates on patterns as they are added.

Note: All the cRAfterChick patterns shared on this site are free of charge.  Please feel free to use them to make your own items.  If you use it to make items to sell please credit cRAfterChick for the pattern and provide link to our site.  Please do not copy and paste my pattern or try to use my images as your own.  You can link to any of my patterns.  Happy crafting!

Happy Icecream Cone Applique Crochet Pattern

Happy Icecream Cone Applique Crochet Pattern_ a chick crafting through Rheumatoid Arthritis cRAfterChick.com

Happy Icecream Cone Applique Crochet Pattern

free crochet pattern from cRAfterChick.com

Happy Icecream Cone Applique Free Crochet Pattern

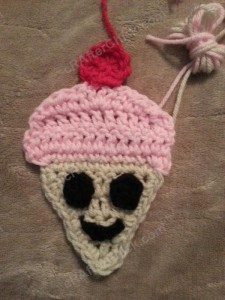
Although this happy icecream applique came out a bit bigger than I originally planned for it to be I still like it.  It’s going to make a fun add for a baby bib with my Easy Baby Bib pattern and baby granny square blanket I’m making with food appliques. :)

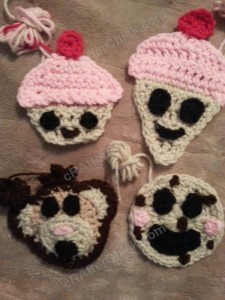
I made this crocheted icecream applique on a whim one day when bored. I actually made a little set which you can below that so far includes  Happy Cupcake Applique Crochet PatternHappy Chocolate Chip Cookie Applique Crochet Pattern and Silly Monkey Face pattern that I still have to type up.  I’m hoping once I catch up on all of my projects in progress I can make a few more to get the blanket complete.

Let me know if you have any questions. I tried to make it as easy to understand as possible. I don’t have the patience for very complicated patterns. 😉

Here is a picture below of the little set all together plus a silly monkey one I made up at the same time.

Happy Icecream Cone Applique Crochet Pattern (7)

Happy Icecream Cone Applique Crochet Pattern Notes

Happy Icecream Cone Applique Crochet Pattern

Project requires:
Tan or light brown yarn for icecream cone color (or desired color)  (I use a lot of Red Heart Saver yarn but any medium to normal weight yarn will do)
Pink yarn for icecream scoop topper
Red yarn for cherry on top
Black yarn for eyes and mouth
“J” hook (6.0 mm)
Scissors or Yarn Cutter
Blunt large eye yarn / tapestry needle to weave in ends

Abbreviations used in this pattern(US crochet stitches):
ch – chain
st – stitch
sl st – slip stitch
sc – single crochet (US)
dc – double crochet (US)
hdc – half double crochet (US) 
dctog- double crochet two stitches together (US) 

Pattern Instructions:
*Note: This project is worked in the round on the base of a magic ring. If you do not know how to do this, please see tutorial here from: yarntomato on CrochetMe

Icecream Cone Base: using tan or light brown yarn
Row 1: Ch 3.  Place 3 dc in last ch from hook. Ch 2 and turn. (3 dc)
Row 2: Place 2 dc in 1st st, 1 dc in next st and 2 dc in last st. Ch 2 and turn. (5 dc)
Row 3: Place 2 dc in 1st st, 1 dc in next 3 st and 2 dc in last st. Ch 2 and turn. (7 dc)
Row 4: Place 2 dc in 1st st, 1 dc in next 5 st and 2 dc in last st. Ch 1 and turn. (9 dc)
Row 5: Make 2 sc in 1st st, 1 sc across to other top corner of cone placing 3 sc in corner, 1  sc down the side of the corner, 3 sc in bottom of cone st, 1 sc in each st up the last side of cone triangle, placing 1 sc in same st as 1st worked. Sl st in to the top of the 1st st in round.
Make sure you leave a long enough yarn tail to be able to sew your icecream cone base part of the applique on to your desired project before cutting yarn and pulling through before you cut the yarn and pull through loop.

Icecream Scoop Topper: using pink yarn
Row 1: Attaching your pink yarn (or desired icecream color) with a sl st in st last left off at in cone base, ch 1 before placing 3 sc in 1st st, 1 sc across to last st, and placing 3 sc in last st. Ch 2 and turn. (14 sc)
Row 2: Make 1 dc in each st across. Ch 2 and turn. (14 dc)
Row 3: Place 1 dc in 2nd st, skipping 1st st in row, place 1 dc in each of the next 10 st, dctog last two st together. Ch 1 and turn. (12 dc)
Row 4: Skipping 1st st in row, place 1 sc in next st, 1 hdc in next 2 st, 1 dc in following st, 3 dc in next st, 1 dc in next st, 1 hdc in the next 2 st and sctog last two st together.  Sl st back in to the base of the last st.  (10 st total)
Leaving a long enough yarn tail to be able to sew your icecream scoop part of the applique on to your desired project before cutting yarn and pulling through.

Cherry: using red yarn
Round 1: In a magic circle, ch 1 before placing 8 sc in to the circle. Pull circle tightly closed. Sl st in to the top of the 1st st in round. (8 sc)
Leaving a long enough of a yarn tail to be able to sew your cherry part of the icecream cone applique on to the top of your applique and on to your desired project before cutting yarn and pulling through.

Eyes (Make 2): using black yarn
Round 1: In a magic circle, ch 1 before placing following st in this order: (1 sc, 1 hdc, 1 sc, 1 hdc).  Pull circle closed and sl st in to the top of the 1st st.  (4 st total)
Leave a long enough yarn tail to be able to sew your eye on icecream cone applique during assembly before you cut yarn, pull it through and place to side until needed in steps below.
Repeat for second eye.

Mouth: using black yarn
Set aside a small amount of black yarn like you used for the eyes so you can freehand stitch on a smile during finishing steps.

Happy Icecream Cone Applique Crochet Pattern

Finishing off:
Taking the tail from your icrecream cone’s cherry and a yarn needle sew your cherry on top of the icecream topper (pink) part of your applique.  Pull extra tail through to back of applique and leave until attaching to your project.
Taking the tail from one of the assembled eyes and your yarn needle, sew your icecream cone’s eye in desired location. You can reference pictures to see how I placed my own.  It’s up to your personal preference though.  Once fully secure, pull yarn to back side of applique before fastening off. Repeat process for the second eye.
Taking your short length of black yarn to placed to the side for the mouth and the yarn needle, freehand stitch the mouth or smile in desired place on your applique. Again you can see my pictures on where I placed my own or play around with your own placement. Once stitched in place, pull yarn to back side of applique and fasten off.

Now that your applique is constructed you should still have three yarn tails left:
1. Red yarn tail from cherry
2. Pink (or desired color) yarn tail for icecream scoop
3: Tan or light brown yarn tail for icecream cone.

Why three tails?  You will be using each tail to sew on the coordinating color of your applique on to your desired project.  If we used just one tail you would have contrasting colors in stitches running around perimeter to secure your icecream cone applique in place.
Now check over your crochet project for any other tails or ends (besides those just mentioned above) that you may have missed in process to weave in and finish off. Do so if you find any.
All done! You just need to figure out what project you want to attach your chibi happy icecream cone applique to now.  Once you have decided and are ready to attach your applique to project. Proceed to following steps.

Attaching your applique to project:
Taking the tail left from your cherry and your yarn needle, sew your cherry part of your applique on to your desired project placement.  Once secure pull yarn through to inside or back of project before fastening off.
Next take the tail from your icecream topper (mine in pictures is pink) and yarn needle to sew the icecream scoop part of your applique securely in place.  Once done, pull yarn to back or inside of project and fasten off.
Now you just need to use your yarn needle and tail leftover for the icecream cone base to secure that part of the applique in place on to your project.  Once your applique is fully secured, pull yarn to back and fasten off.

That’s it. :) Now I just need to figure out what project I want to attach my happy icecream cone applique to!

Want more free patterns? Follow cRAfterChick on Facebook or Pinterest to get updates on patterns as they are added.

Note: All the cRAfterChick patterns shared on this site are free of charge.  Please feel free to use them to make your own items.  If you use it to make items to sell please credit cRAfterChick for the pattern and provide link to our site.  Please do not copy and paste my pattern or try to use my images as your own.  You can link to any of my patterns.  Happy crafting!

Tolee the Koala Bear from Ni Hoa, Kai-Lan Character Hat Crochet Pattern

Tolee the Koala Bear from Ni Hoa, Kai-Lan Character Hat Crochet Pattern_ a chick crafting through Rheumatoid Arthritis cRAfterChick.com

Tolee the Koala Bear from Ni Hoa, Kai-Lan Character Hat Crochet Pattern

 free character hat crochet pattern from cRAfterChick.com

Tolee the Koala Bear from Ni Hoa, Kai-Lan Character Hat Free Crochet Pattern

This character hat was inspired by Tolee the Koala. He is the adorable koala bear friend in Ni Hoa, Kai-Lan television show. I couldn’t resist making him in to this hat for my youngest niece. I like how it turned out so much I just might have to make Kai-Lan, Rinto (tiger friend), Hoho (monkey friend) and Lulu (rhino friend) too. I most definitely need to make his stuffed panda bear, Pandy! :)

Never heard of Tolee? You can learn more about him here.

Tolee the Koala character hat crochet pattern inspiration picture

Tolee the Koala Bear from Ni Hoa, Kai-Lan Character Hat Crochet Pattern Notes

Tolee the Koala Bear from Ni Hoa, Kai-Lan Character Hat Crochet Pattern

Project requires:
Light to medium gray colored yarn for Beanie Hat main color (or desired color)
(I use a lot of Red Heart Saver yarn but any medium to normal weight yarn will do)
Lightest gray or light khaki colored yarn for contrast inner ear
Black yarn for face features
White yarn for shining light spots on features
Pink yarn for blush circles
“J” hook (6.0 mm)
Scissors or Yarn Cutter
Blunt large eye yarn / tapestry needle to weave in ends

Abbreviations used in this pattern (US crochet stitches):
ch – chain
st – stitch
sl st – slip stitch
sc – single crochet (US)
dc – double crochet (US)
hdc – half double crochet (US) 

Tolee the Koala Bear from Ni Hoa, Kai-Lan Character Hat Crochet Pattern (4)

Pattern Instructions:

*Note: This project is worked in the round on the base of a magic ring. If you do not know how to do this, please see tutorial here from: yarntomato on CrochetMe

The hat in this picture is made with my free Easy Peasy Toddler Sized (Age 1 – 3 Years Old) Double Crochet Beanie Pattern which you can find here as a foundation for the project. Want it in another size? No worries. Head over to Easy Peasy All Family Sizes Free Double Crochet Beanie Patterns to select the size of the free pattern you want for your project.

Hat Base: in main color light to medium gray yarn
Use Easy Peasy Crochet Beanie Size of your choice. The hat in these pictures are of the Toddler size of my Easy Peasy double crochet beanie pattern set.
Once you have completed your beanie for the base you are ready to start making your hat into Tolee the koala. :)

Ear Fronts (make 2): using lightest gray or light khaki contrast color yarn
Round 1: In a magic circle, ch 2 before placing 12 dc in to the circle. Pull circle tightly closed. Sl st in to the top of the 1st st in round. (12 dc)
Round 2: Ch 2 before placing 2 dc in 1st st and the following 8 st around. Leave the last 3 st unworked. (18 dc)
Fasten off.
Repeat process for second Ear Front.

The feature above works well on toddler, youth, preteen, teen and adult sized beanie hats in the Easy Peasy collection. For newborn to 12 month sized hats, do following steps instead for smaller feature:
Round 1: In a magic circle, ch 2 before placing 10 hdc in to the circle. Pull circle tightly closed. Sl st in to the top of the 1st st in round. (10 hdc)
Round 2: Ch 2 before placing 2 hdc in 1st st and the following 6 st around. Leave the last 3 st unworked. (14 hdc)
Fasten off.
Repeat process for second Ear Front.

Ear Backs and Ear Assembly (make 2): using light to medium gray main color yarn
Repeat rounds 1 and 2 from Ear Fronts in light gray main color yarn but do not fasten off at end of Round 2.
Now place one completed Ear Front in front of the Ear Back you are working on right now for Tolee. Line up the stitches on both.
Round 3: Working through both ear pieces at once, ch 1 before making *2 sc in 1st st, 1 sc in next st* repeating * process around rim of ear until first bottom corner of ear reached , place (1 sc, ch 1, 1 sc) in corner than continue making 1 sc in 1st st and placing 1 sc in each st across for bottom edge. In second bottom corner of ear place 1 sc, ch 1 and sl st in to the top of the 1st st worked in round.
Leave a long enough yarn tail to be able to secure your ear in place when sewing it on during finishing steps before cutting yarn, pulling through last stitch and placing to side until needed in finishing off instructions.
Repeat process for second ear.

Nose: using black yarn
Round 1: In a magic circle, ch 1 before placing the following st in this order in circle: 2 sc, 1 hdc, 1 dc, 1 hdc, 3 sc, 1 hdc, 1 dc, 1 hdc, and 1 sc. Pull ovalish circle closed and sl st in the top of the 1st st in round. (12 st total)
Round 2: Ch 1 before placing 1 sc in 1st 2 st, 2 hdc in next st, 2 dc in next st, 2 hdc in next st, 1 sc in following 3 st, 2 sc in next st, 1 sc in next, 2 sc in next st and 1 sc in last st. Sl st in to the top of the 1st st in round.
Leave a long yarn tail so you can attach Tolee’s nose to the beanie hat during assembly before cutting yarn, pulling through last st and place to side for now.

The feature above works well on toddler, youth, preteen, teen and adult sized beanie hats in the Easy Peasy collection. For newborn to 12 month sized hats, do following steps instead for smaller feature:
Round 1: In a magic circle, ch 1 before placing the following st in this order inside the circle: 2 sc, 2 hdc, 4 sc. Sl st in the top of the 1st st in round. (8 st total)

Shining Light Spot on Nose: using white yarn
Ch 4. Sl st in last ch from hook.
Leave a long enough tail to be able to sew your light spot in place on the nose before cutting yarn, pulling through yarn and placing to side until assembly.

The feature above works well on toddler, youth, preteen, teen and adult sized beanie hats in the Easy Peasy collection. For newborn to 12 month sized hats, do following steps instead for smaller feature:
Ch 2. Sl st in last ch from hook.
Leave a long enough tail to be able to sew your light spot in place on the nose before cutting yarn, pulling through yarn and placing to side until assembly.

Eyes (Make 2): using black yarn
Round 1: In a magic circle ch 1 before placing the following st in this order in to the circle: 1 sc, 3 hdc, 2 sc, 1 hdc, 1 dc, 1 hdc, 1 sc. Pull magic circle closed and sl st in the top of the 1st st in the round. (10 st total)
Leave a long enough tail to be able to sew his eyes on to the beanie hat during finishing off steps before cutting your yarn. Pull yarn through last st worked and place to side until needed for hat assembly.
Repeat for second eye.

The feature above works well on toddler, youth, preteen, teen and adult sized beanie hats in the Easy Peasy collection. For newborn to 12 month sized hats, do following steps instead for smaller feature:
Round 1: In a magic circle, ch 1 before making the following into circle: 1 sc, 1 hdc, 2 sc. Sl st in to the top of the 1st st in round. (4 st total)
Leave a long enough tail to be able to sew his eyes on to the beanie hat during finishing off steps before cutting your yarn. Pull yarn through last st worked and place to side until needed for hat assembly.
Repeat for second eye.

Shining Light Spot on Eyes (Make 2): using white yarn
Ch 2. Sl st in last ch from hook.
Leave a long enough tail to be able to sew your light spot in place on the nose before cutting yarn, pulling through yarn and placing to side until assembly.
Repeat for second eye spot.

The feature above works well on toddler, youth, preteen, teen and adult sized beanie hats in the Easy Peasy collection. For newborn to 12 month sized hats, do following steps instead for smaller feature:
Just make a large double or triple knot to be the small round light spot for Tolee’s eyes. Repeat for second eye.

Eyebrows (Make 2): using black yarn
Make a ch of 4. Leave a short tail to be able to sew Tolee’s eyebrows in place on hat during assembly before cutting yarn, pulling though and placing to side until needed.
Repeat for second eyebrow.

The feature above works well on toddler, youth, preteen, teen and adult sized beanie hats in the Easy Peasy collection. For newborn to 12 month sized hats, do following steps instead for smaller feature:
Do not make a chain. Place short length of black yarn to side for both eyebrows to be freehand stitched on.

Smile: using black yarn
Make a ch of 7. Leave a short tail to be able to sew Tolee’s smile in place on hat during assembly before cutting yarn, pulling though and placing to side until needed.

The feature above works well on toddler, youth, preteen, teen and adult sized beanie hats in the Easy Peasy collection. For newborn to 12 month sized hats, do following steps instead for smaller feature:
Make a ch of 4. Leave a short tail to be able to sew Tolee’s smile in place on hat during assembly before cutting yarn, pulling though and placing to side until needed.

Blush Area on Cheeks (Make 2): using pink yarn
Round 1: In a magic circle, ch 1 before placing the following st in the circle in this order: 1 sc, 2 hdc, 2 sc, 2 hdc, 1 sc. Pull ovalish circle closed. Sl st in to the top of the 1st st in round. (8 st total)
Leave a yarn tail long enough to be able to secure his blush areas on beanie hat during assembly before cutting yarn. Pull yarn tail through last st and place to side until needed in finishing steps.
Repeat process for second blush area.

The feature above works well on toddler, youth, preteen, teen and adult sized beanie hats in the Easy Peasy collection. For newborn to 12 month sized hats, do following steps instead for smaller feature:
Round 1: In a magic circle, ch 1 before placing the following st in the circle in this order: 1 sc, 1 hdc, 1 sc, 1hdc. Pull ovalish circle closed. Sl st in to the top of the 1st st in round. (4 st total)
Leave a yarn tail long enough to be able to secure his blush areas on beanie hat during assembly before cutting yarn. Pull yarn tail through last st and place to side until needed in finishing steps.
Repeat process for second blush area.

Now you are ready to start assembling your character hat.

Tolee the Koala Bear from Ni Hoa, Kai-Lan Character Hat Crochet Pattern (3)

Finishing off:
Taking tail from the shining light spot for the nose and your yarn needle sew the light spot on the top right side of nose in an oval shape angling with nose curve. The top of your nose is the skinnier side of the ovalish nose shape. You can reference my pictures to see how I placed the spot on my Tolee hat’s nose. Once sewn on, pull yarn to back of the nose and fasten off.Now take the black yarn tail from your assembled nose and sew it in desired place on your beanie hat. You want to center it on the front of your beanie as you will be working symmetrically around it for the most part of the following steps. Again the top of the nose is the skinnier side of the ovalish shaped nose. Once secure, pull your yarn to the inside of your beanie hat and finish off.Next take one shining light spot for an eye and your to sew the spot in the top right side of one eye. The skinnier of the two eye ends is the top part of the eye. Once you have sewn it completely in place, pull your leftover yarn tail to the back of the eye before fastening off. Repeat process for second eye and shining light spot.
Taking the black yarn tail from one assembled eye and your yarn needle sew your eye in desired place on one side of the nose and slightly up from where nose starts on to your beanie hat. Once fully sewn in place, pull the tail inside the hat and fasten off. Repeat process above but place second eye, symmetrically on the other side of the nose from the first one.
Taking the tail from one small blush area, use your yarn needle to sew it in place below one eye and slightly offset to the side so it isn’t perfectly centered underneath attached eye. Once secure, pull yarn to inside of beanie hat and fasten off. Repeat this process with the second blush circle in same manner under the second eye.
Next up is the cute little off-center smile Tolee has in a lot of his images. You can reference his illustration picture near top of pattern or my own pictures to see how I placed mine. I just did a stretched “u” shape with one end up a round higher than the other end to get his uplifted smile. You can play around with this to find what makes you the most happy though. Once his smile is sewn in place, pull yarn to inside of beanie hat and fasten off.
Taking one of the small black chains for Tolee’s eyebrows and your yarn needle sew it in place above one eye in an upside down curve in your desired location. You can see in my pictures where I placed them on my Tolee hat. Once your eyebrow is stitched on, pull yarn to inside of beanie hat and fasten off. Repeat process with second eyebrow over second eye.
Taking the yarn tail left on one of your assembled ears, attach it by sewing it in desired place with your yarn needle. There is not right or wrong way to do this. Once I secure mine in place I pull yarn to inside and reinforce stitches with another set inside before fastening off. Repeat process with second ear on the other side of the hat. Since I’m a bit OCD about things being even I mark the start and end of where I want large features, like Tolee’s ears, before I sew them in place. That way I can stitch them without worrying above them being even once done.
Now take a few minutes to look over your work to check for any loose ends or tails you may have missed during assembly process. If you find any, go ahead and fasten them off now.
All done! I totally fell in love with this little Tolee hat I made for my niece while I was creating him. I definitely will have to make one again in the near future. I hope you liked my pattern and it was clear enough for you. If you have any questions or something doesn’t sound right, just drop me a line. I’m more than happy to answer any questions and I’m far from perfect so typos do happen. 😉 Happy crafting!
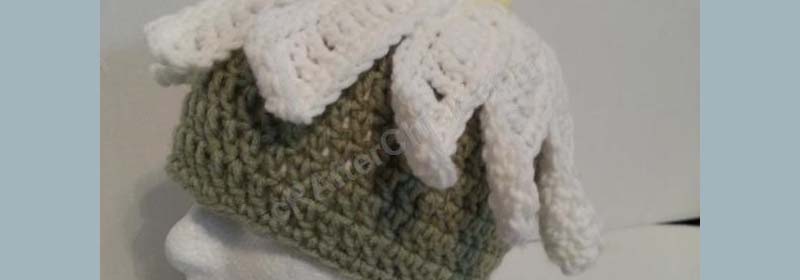
Here are some of the pictures I took to show how my Tolee the Koala Bear Character Beanie Hat looks like once completed: 

Tolee the Koala Bear from Ni Hoa, Kai-Lan Character Hat Crochet Pattern

Tolee the Koala Bear from Ni Hoa, Kai-Lan Character Hat Crochet Pattern (3)

Tolee the Koala Bear from Ni Hoa, Kai-Lan Character Hat Crochet Pattern (4)

Tolee the Koala Bear from Ni Hoa, Kai-Lan Character Hat Crochet Pattern (2)

Tolee the Koala Bear from Ni Hoa, Kai-Lan Character Hat Crochet Pattern (5)

Want more free patterns? Follow cRAfterChick on Facebook or Pinterest to get updates on patterns as they are added.

Note: All the cRAfterChick patterns shared on this site are free of charge.  Please feel free to use them to make your own items.  If you use it to make items to sell please credit cRAfterChick for the pattern and provide link to our site.  Please do not copy and paste my pattern or try to use my images as your own.  You can link to any of my patterns.  Happy crafting!