

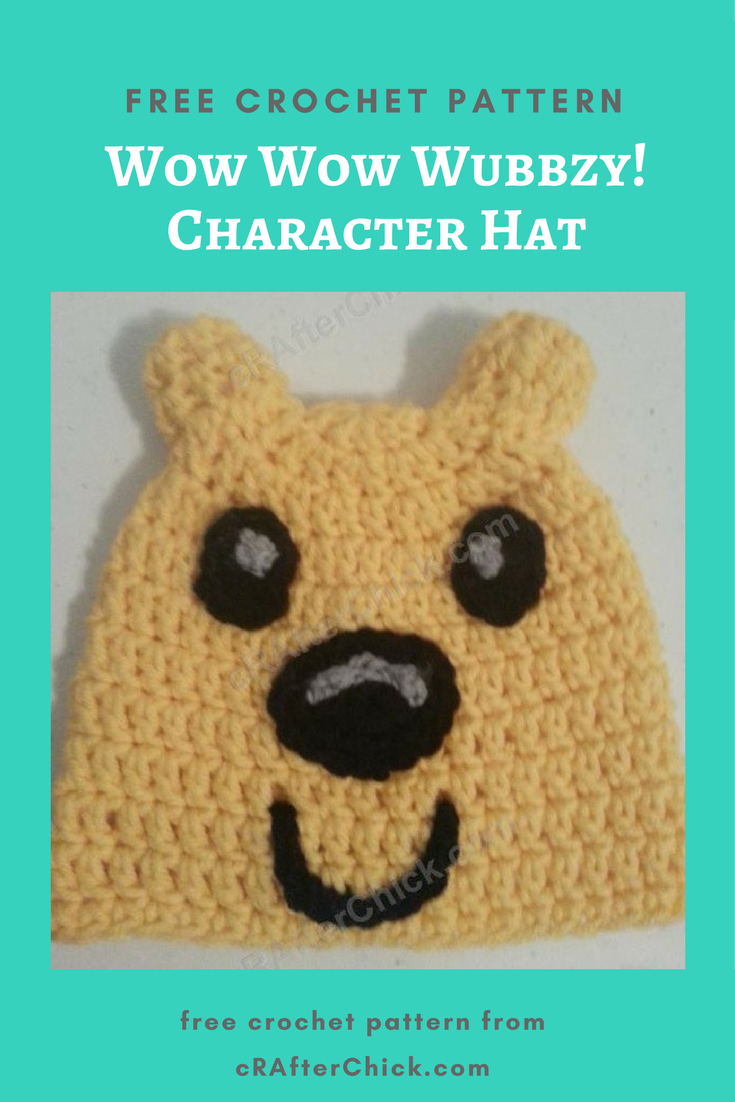
Wow Wow Wubbzy! Character Hat Crochet Pattern
free character hat crochet pattern from cRAfterChick.com
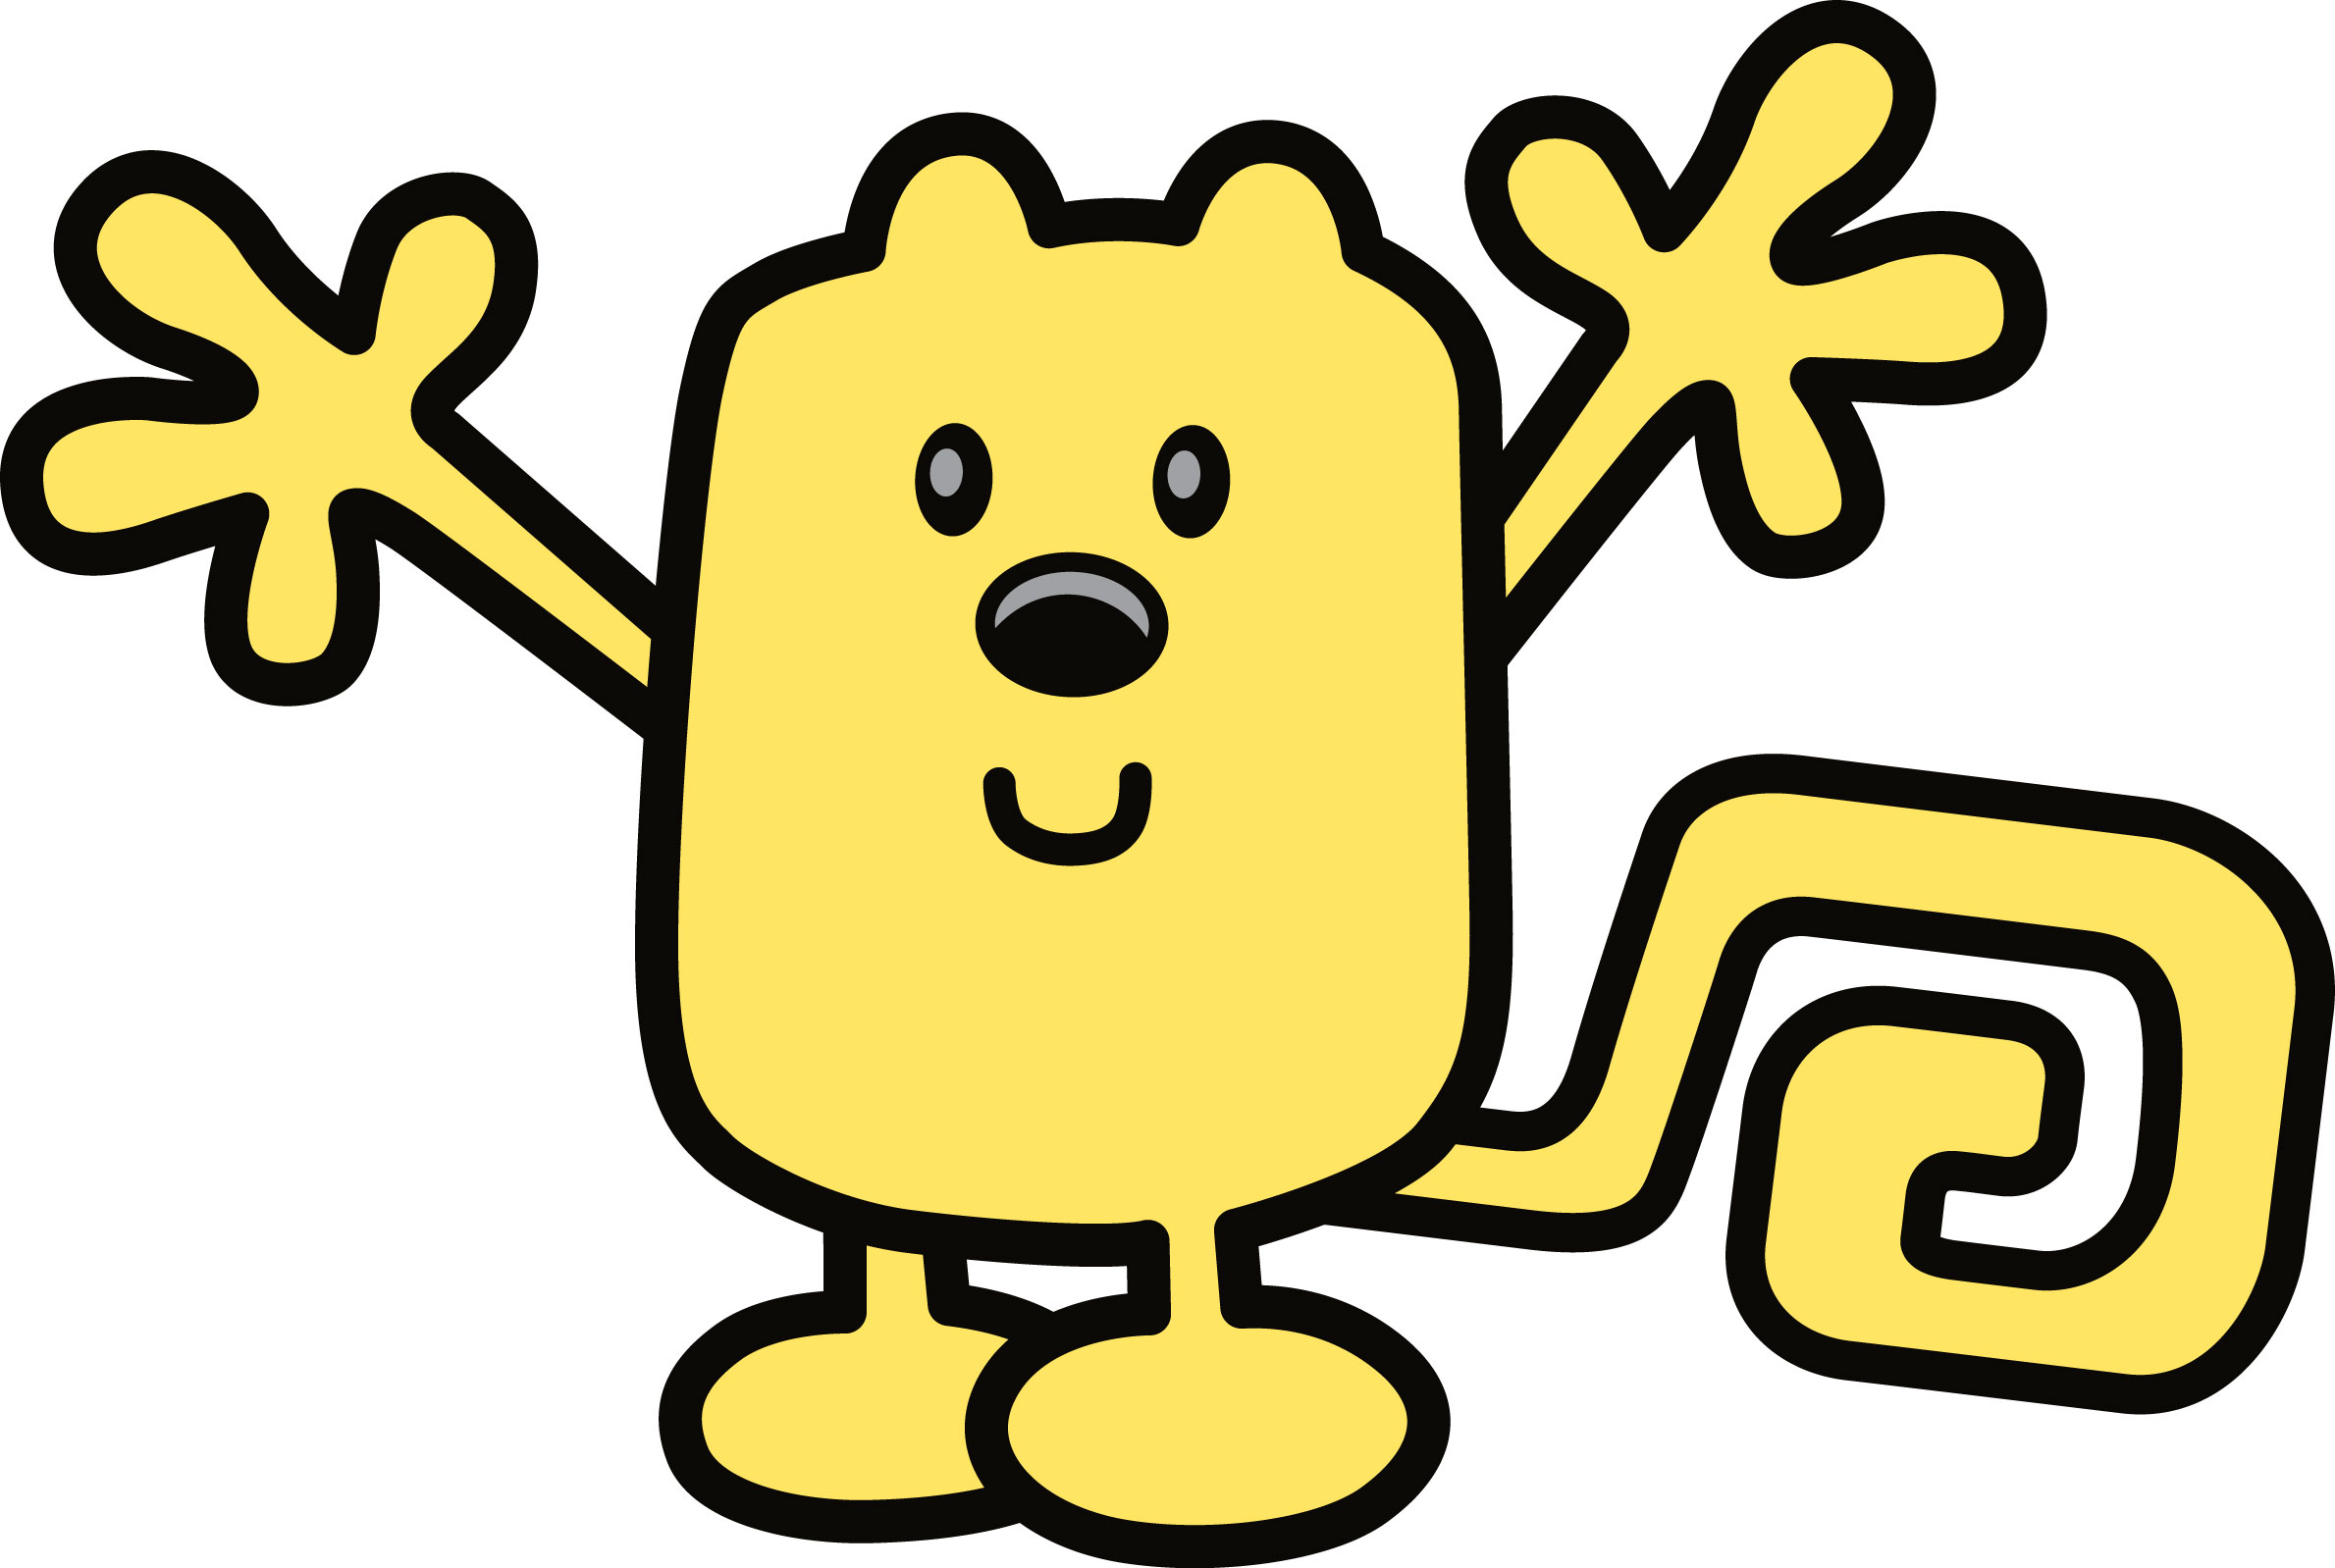
I have to admit I’ve never watched a single Wubbzy episode but have seen some ads or commercials. I thought he looked pretty cute and would make a darling addition to my niece’s growing hat collection.
This is one of less time consuming of the hats I have done recently so it makes a great last minute project or just a project if you want something to start to complete in a short amount of time. This is an advanced beginner and up recommended crochet pattern but don’t get discouraged if you are new to crochet or just character hat making. This is a good starter hat and looks more complicated than it actually is to make. Happy crafting!

If you have no idea who Wubbzy is, check out some additional information on him here.
Watch Wubbzy online here under “The Show” menu.
Get his DVDS here.
Wow Wow Wubbzy! Character Hat Crochet Pattern Notes
Project requires:
Bright yellow to golden yellow colored yarn for Beanie Hat main color and ears
(I use a lot of Red Heart Saver yarn but any medium to normal weight yarn will do)
Black yarn for face features
Gray or off-white yarn for shining light spots on features
“J” hook (6.0 mm)
Scissors or Yarn Cutter
Blunt large eye yarn / tapestry needle to weave in ends
Small amount of fiberfill stuffing for ears
Abbreviations used in this pattern (US crochet stitches):
ch – chain
st – stitch
sl st – slip stitch
sc – single crochet (US)
dc – double crochet (US)
hdc – half double crochet (US)
Pattern Instructions:
*Note: This project is worked in the round on the base of a magic ring. If you do not know how to do this, please see tutorial here from: yarntomato on CrochetMe
The hat in this picture is made with my free Easy Peasy Toddler Sized (Age 1 – 3 Years Old) Double Crochet Beanie Pattern which you can find here as a foundation for the project. Want it in another size? No worries. Head over to Easy Peasy All Family Sizes Free Double Crochet Beanie Patterns to select the size of the free pattern you want for your project.
Hat Base: in main color bright yellow to golden yellow yarn
Use Easy Peasy Crochet Beanie Size of your choice. The hat in these pictures are of the Toddler size of my Easy Peasy double crochet beanie pattern set.
Once you have completed your beanie for the base you are ready to start making your hat into Wubbzy. 🙂
Ear Bottom Base *optional* (Make 2): using main color yellow or golden yarn
This is an optional step but one I always recommend when making hats with features that are stuffed. Why? Well it keeps the stuffing from oozing in to the hat when it stretches while wearing it and off the wearers head while lengthening the life durability of your hat. It can be a bit itchy when it does. So taking the extra few minutes to make this feature will be worth it later on.
Round 1: In a magic circle, ch 2 before placing 10 hdc in to the circle. Pull the circle closed and sl st in the top of the 1st st in round. (10 hdc)
Cut yarn and pull through last loop on hook. Fasten off.
Repeat process for second ear bottom base.
The above feature works well on toddler, youth, preteen/teen, womens and mens sized beanie hats. For newborn to 12 month sized hats do the following steps instead of those above:
Round 1: In a magic circle, ch 1 before placing 10 sc in to the circle. Pull the circle closed and sl st in the top of the 1st st in round. (10 sc)
Cut yarn and pull through last loop on hook. Fasten off.
Repeat process for second ear bottom base.
Ears (Make 2): using main color yellow or golden yarn
Round 1: In a magic circle, ch 2 before placing 8 hdc in to the circle. Pull circle tightly closed. Make a sl st in the top of the 1st st in round. (8 hdc)
Round 2: Ch 2 before making 2 hdc in 1st st and 1 hdc in each of the following 7 st around. Sl st in top of 1st st in round. (9 hdc)
Round 3: Ch 2 before making 2 hdc in 1st st and 1 hdc in each of the following 8 st around. Sl st in the top of the 1st st in round. (10 hdc)
Before cutting yarn measure out a yarn tail long enough to sew Wubbzy’s ears in place on top of the beanie hat during assembly. If you Then cut yarn, pull through last loop on hook and place to side until needed. If you chose to make the optional ear bottom base feature above for this project, add a little extra length to sew this in place to the ear opening during assembly.
Repeat above process for second ear.
The above feature works well on toddler, youth, preteen/teen, womens and mens sized beanie hats. For newborn to 12 month sized hats do the following steps instead of those above:
Round 1: In a magic circle, ch 1 before placing 8 sc in to the circle. Pull circle tightly closed. Make a sl st in the top of the 1st st in round. (8 sc)
Round 2: Ch 2 before making 2 hdc in 1st st and 1 hdc in each of the following 7 st around. Sl st in top of 1st st in round. (9 hdc)
Round 3: Ch 1 before making 2 sc in 1st st and 1 sc in each of the following 8 st around. Sl st in the top of the 1st st in round. (10 sc)
Before cutting yarn measure out a yarn tail long enough to sew Wubbzy’s ears in place on top of the beanie hat during assembly. If you Then cut yarn, pull through last loop on hook and place to side until needed. If you chose to make the optional ear bottom base feature above for this project, add a little extra length to sew this in place to the ear opening during assembly.
Repeat above process for second ear.
Eyes (Make 2): using black yarn
Round 1: In a magic circle, ch 1 before placing the following st in this order in to the circle: (1 sc, 1 hdc, 1 dc, 1 hdc, 2 sc, 1 hdc, 1 dc, 1 hdc, 1 sc). Now pull ovalish circle tightly closed and make a sl st in the top of the 1st st in round. (10 st total)
Before cutting yarn measure out a yarn tail long enough to sew Wubbzy’s eyes in place on beanie hat during assembly. Then cut yarn, pull through last loop on hook and place to side until needed.
The above feature works well on toddler, youth, preteen/teen, womens and mens sized beanie hats. For newborn to 12 month sized hats do the following steps instead of those above:
Round 1: In a magic circle, ch 1 before placing the following st in this order in to the circle: (1 sc, ch 1, 2 sc, ch 1, 1 sc). Pull ovalish circle closed and sl st in the top of the 1st st in round.
Before cutting yarn measure out a yarn tail long enough to sew Wubbzy’s eyes in place on beanie hat during assembly. Then cut yarn, pull through last loop on hook and place to side until needed.
Nose: using black yarn
Round 1: In a magic circle, ch 1 before placing the following st in this order in to the circle: (2 sc, 1 hdc, 1 dc, 1 hdc, 3 sc, 1 hdc, 1 dc, 1 hdc, 1 sc). Now pull ovalish circle tightly closed and make a sl st in the top of the 1st st in round. (12 st total)
Round 2: Ch 1 before placing 1 sc in 1st 2 st, 2 sc in next 3 st, 1 sc in next 3 st, 2 sc in next 3 st and 1 sc in last st. Sl st in the top of the 1st st in round. (18 st total)
Before cutting yarn measure out a yarn tail long enough to sew Wubbzy’s nose in place on beanie hat during assembly. Then cut yarn, pull through last loop on hook and place to side until needed.
The above feature works well on toddler, youth, preteen/teen, womens and mens sized beanie hats. For newborn to 12 month sized hats only do Round 1 as specified above and skip Round 2.
Smile: using black yarn
Make a chain of 12.
Before cutting yarn measure out a yarn tail long enough to sew his smile securely in place on beanie hat during assembly. Then cut yarn, pull through last loop on hook and place to side until needed.
The above feature works well on toddler, youth, preteen/teen, womens and mens sized beanie hats. For newborn to 12 month sized hats make a chain of 8 instead of the 12 called for above.
Shining Light Area on Nose: using gray or off-white yarn
Make a chain of 8.
Before cutting yarn measure out a yarn tail long enough to sew the shining light chain securely in place on Wubbzy’s nose during assembly. Then cut yarn, pull through last loop on hook and place to side until needed.
Note: I only had very thin baby yarn in light gray so I made mine a ch 10 in hat pictures but ch 8 works with the regular thickness of yarn used in project.
The above feature works well on toddler, youth, preteen/teen, womens and mens sized beanie hats. For newborn to 12 month sized hats do the following steps instead of those above:
Place short length of your gray or off-white yarn to the side to freehand stitch on to the nose piece instead of sewing on a chain like above.
Shining Light Spots on Eyes (Make 2): using gray or off-white yarn
Make a chain of 4 and sl st in the last ch from hook.
Before cutting yarn measure out a yarn tail long enough to sew the shining light spot securely in place on one of Wubbzy’s eyes during assembly. Then cut yarn, pull through last loop on hook and place to side until needed. Repeat process for second eye light spot.
Note: I only had very thin baby yarn in light gray so I made mine a ch 6 as seem in pictures but ch 4 works with the regular thickness of yarn used in project
The above feature works well on toddler, youth, preteen/teen, womens and mens sized beanie hats. For newborn to 12 month sized hats do the following steps instead of those above:
For infant sized hats, just make a large knot with a short yarn tail to secure this in place on eye during assembly. Repeat for second light spot for eyes.

Finishing off:
Starting with his smile, take the yarn tail you left on the chain and use your yarn needle to sew his smile in place in a “U” shape near the bottom center of your beanie hat. I placed mine just above the last sc round so it wouldn’t look too scrunched and I would still have room for other features but feel free to play around to see what you like best. Once you have secured that in place, pull yarn to the inside of the beanie hat and fasten off.
Now take the take the yarn tail you left on the shining light area chain for his nose and use your yarn needle to sew the shining light area in an arc following the top curve of his nose like seen in his pictures. You can check my pics to see how I placed the ones my Wubbzy hat. Once you have secured that in place, pull yarn to the back side of the nose piece and fasten off.
Next you will use the black yarn tail left on his now assembled nose and your yarn needle to sew the nose in desired place centered above the smile on your beanie hat. I just left a little space between his mouth and nose but again feel free to mix it up to find what you like the most. Once it all sewn in place, pull the remaining yarn tail to the inside of the hat and fasten off.
Taking the tail from one shining light spot for his eyes and the yarn needle to sew one light spot on to an eye piece in your desired location. I placed mine just off the center but he is portrayed with them in different spots depending on his body position so there is no wrong way to place them. Once that is done, pull yarn to the backside of the eye and fasten off. Repeat this process for the second eye spot. I sewed mine in more of a loose oval shape than a circle but feel free to make a simple circle.
Now take the black yarn tail left on one assembled eye and use your yarn needle to sew it desired place above the nose. You can see his picture art and pictures of my completed hat to see how I place mine if you need some guidance on placement. Once it is fully sewn on, pull yarn to inside of beanie hat and fasten off. Repeat this process for the second eye.
Next up is his ears, if you chose to do the optional step of ear base bottoms work on this paragraph. If you chose to skip it, move on to next paragraph. You will want to line one ear base bottom with the stitches on the opening of one ear so you can close this feature up before attaching to hat. Taking your yarn needle and the yarn tail left on one ear, sew through both pieces at once attaching them together so that there will be no opening. You will want to stop 2/3 to 3/4 of the way around to add your fiberfill stuffing to your liking. Don’t overstuff the feature or the bottom will bubble making it sit awkwardly on top of the hat and it will weight it down. I just stuff mine until it has enough to keep it’s shape but is not hard or firm but my desired level of mushiness (yeah that’s my technical speak). Now you will use the remaining yarn to sew this completed ear in place on side of the top of the beanie hat. Once secured, pull yarn to the inside of the beanie hat and fasten off. I like to run an extra set of stitches along the inside of large features on the tops of my hats but it isn’t necessary. Just one of my tips. 😉 Now repeat process for second ear on opposite side of hat. You can skip next paragraph as it does not apply.
If you chose not to do the optional ear base bottom, you will be attaching the ears directly on to your beanie hat and stuffing while sewing it in place. So take your yarn needle and use the ear tail to secure one ear to the side of the top of the beanie hat. You will want to stop 2/3 to 3/4 of the way around to add your fiberfill stuffing to your liking. Don’t overstuff the feature or the bottom will bubble making it sit awkwardly on top of the hat and it will weight it down. I just stuff mine until it has enough to keep it’s shape but is not hard or firm but my desired level of mushiness (yeah that’s my technical speak). Once secured, pull yarn to the inside of the beanie hat and fasten off. I like to run an extra set of stitches along the inside of large features on the tops of my hats but it isn’t necessary. Just one of my tips. 😉 Now repeat process for second ear on opposite side of hat.

All done! One super cute crocheted Wubbzy hat. I can’t wait to see how it looks on my niece. 🙂
Here are some additional pictures I took to show how this Wubbzy Hat looks like once completed:


Want more free patterns? Follow cRAfterChick on Facebook or Pinterest to get updates on patterns as they are added.
Note: All the cRAfterChick patterns shared on this site are free of charge. Please feel free to use them to make your own items. If you use it to make items to sell please credit cRAfterChick for the pattern and provide link to our site. Please do not copy and paste my pattern or try to use my images as your own. You can link to any of my patterns. Happy crafting!
1 thought on “Wow Wow Wubbzy! Character Hat Crochet Pattern”