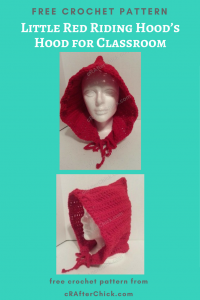
Little Red Riding Hood’s Crocheted Hood Crochet Pattern for Classroom Play
free crochet pattern from cRAfterChick.com
When my mother asked me to help out by making some hat and headwear costumes for her little students doing a class play on a mash up of fairy tale characters I couldn’t resist saying yes as I have so much fun making character hats.
I couldn’t find a pattern online that wasn’t too complicated or ornate. I just wanted a fast and easy hood to work up since I was doing so many of the costumed pieces in a short amount of time. So I decided to wing it and I thought it turned out pretty okay so I wrote down the pattern in case anyone ever needs a Little Red Riding Hood hood. You never know right? 😉
This crochet pattern will work on Youth sized (3 -10 yrs), preteen, young adult, and adult women. You can easily tailor it down in size for younger wearers or add some additional stitches to fit a larger woman or adult male. Just make sure you increase or decrease stitches in multiples of 2.
Little Red Riding Hood’s Crocheted Hood Crochet Pattern for Classroom Play Notes
Project requires:
Red Colored Yarn for Hood – the brighter the better 🙂
(I use a lot of Red Heart Saver yarn but any medium to normal weight yarn will be fine)
“J” hook (6.0 mm)
Scissors or Yarn Cutter
Blunt large eye yarn / tapestry needle to weave in ends
Abbreviations used in this pattern (US crochet stitches):
st – stitch
sl st – slip stitch
sc – single crochet (US)
dc – double crochet (US)
Pattern Instructions:
Crochet Hood:
Starting with a foundation chain of 28.
Round 1: Dc in third ch from hook (First 2 ch does not counts as first dc the first dc worked in first st is 1st in round throughout pattern). Work 1 dc in each of the following ch across until end. Ch 2 and turn. (26 dc)
Round 2-39: Dc in first st and each of the following 25 st across until end. Ch 2 and turn. (26 dc)
Round 40: Dc in first st and each of the next 25 st across until end. Ch 1 and turn. (26 dc)
Round 41: Fold your hood in half so that you can make seam for the back of the hood. You should have 20 rows on each side above / below your fold. Ch 1 and slip st through both pieces in first st and each st until the corner. Slip st back into last st, pull yarn through and fasten off
Front Trim and Ties:
Chain 40. Sl st to bottom right corner of hood front. This will be your first tie. Ch 2 and work 1 dc in each st around the front part of hood to bottom left corner. Sl st down side of last dc worked before ch 40 for last tie.
Cut yarn, pull through and fasten it off. Now you have one quick and easy Little Red Riding Hood’s crocheted hood. 🙂 In this case it is for Kindergarten class play but it can easily be used for a costume, part of a cosplay outfit or to use as a pattern for a hood to add to other projects.
If you are interested in adding a capelet or cape to the hood, just work a circle type of increase all the bottom back and forth until width of shoulders. Then just work 1 dc in each round until length desired. I may even give this a shot for next year’s class or Halloween even 🙂
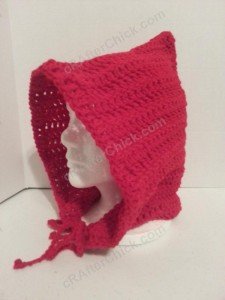
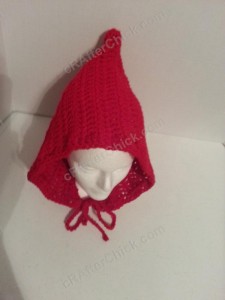
Here are some pictures to show how the Little Red Riding Hood’s crocheted hood looks like worn and from different angles:
Want more free patterns? Follow cRAfterChick on Facebook or Pinterest to get updates on patterns as they are added.
Note: All the cRAfterChick patterns shared on this site are free of charge. Please feel free to use them to make your own items. If you use it to make items to sell please credit cRAfterChick for the pattern and provide link to our site. Please do not copy and paste my pattern or try to use my images as your own. You can link to any of my patterns. Happy crafting!


Any possibility of getting this pattern in an adult size?
This pattern will work from toddler to adult female. The mannequin head it is on is traditional womens. For adult male you can go up 2 hooks from one in pattern to make it slightly larger or add 10 to 14 to beginning chain and amount of stitches in each row. 🙂
I really like this ..I made it and really nice thank you for sharing