
Winnie the Pooh Bear Beanie Hat Crochet Pattern
free crochet pattern from cRAfterChick.com

Oh bother! I know a lot of my friends love Winnie the Pooh as well as the children in my Mother’s school so I made this one up to be auctioned off to raise money for the school.
It’s actually a fairly easy crochet project and works up pretty fast. You will be sporting your own Winnie the Pooh Bear hat in a short amount of time. Happy crafting!

Winnie the Pooh Bear Beanie Hat Crochet Pattern Notes
Project requires:
Yellow / Gold Yarn for Beanie Hat main color- (I use a lot of Red Heart Saver yarn but any medium to normal weight yarn will do)
Black Yarn for face features
“J” hook (6.0 mm)
Scissors or Yarn Cutter
Blunt large eye yarn / tapestry needle to weave in ends
Small amount of fiberfill stuffing
Abbreviations used in this pattern (US crochet stitches):
ch – chain
st – stitch
sl st – slip stitch
sc – single crochet (US)
sctog – single crochet two st together
dc – double crochet (US)
hdc – half double crochet (US)

Pattern Instructions:
*Note: This project is worked in the round on the base of a magic ring. If you do not know how to do this, please see tutorial here from: yarntomato on CrochetMe
The hat in this picture is made with my free Easy Peasy Pre-Teen / Teen / Women Double Crochet Beanie Pattern which you can find here as a foundation for the project. Want it in another size? No worries. Head over to Easy Peasy All Family Sizes Free Double Crochet Beanie Patterns to select the size of the free pattern you want for your project.
Hat Base: in main color yarn
Use Easy Peasy Crochet Beanie Size of your choice
Once you have completed your beanie for the base you are ready to start on making your own Pooh beanie hat!
*Note: If you are going to do this in newborn / infant/ up to 1 year old sizes, switch to a G hook for the features instead of the J to scale them down in size or eliminate one increase row from each feature worked in the round.
Eyes (Make 2): Using black yarn
Round 1: In magic circle ch 1 before placing the following st in to the circle as follows: 1 sc, 3 hdc, 3 sc, 3 hdc, 2 sc. Pull circle closed. Sl st in to the top of 1st st in round. (12 st total)
Before you cut your yarn make sure you leave a tail long enough sew your eyes on to your beanie hat.
Eyebrows (Make 2): Using black yarn
Make 2 chains of 5 each. You want to make sure you leave a little bit of a tail on each to sew it into place with your yarn needle during assembly.
Smile: Using black yarn
Make 1 chain of 25 ch and leave tail to sew this main part of the smile in to place.
Make 2 chains of 5 ch and leave tail of yarn to sew the sides of the smile in to place on each end of the smile chain from previous step.
Black Nose: using black yarn
Round 1: In a magic circle, ch 1 before placing the following st in this order into the circle: 1 sc, 2 hdc, 3 sc, 2 hdc, 1 sc. Sl st in to top of 1st st in round. (9 st total)
Round 2: Ch 1, sc in 1st st, 2 sc in next 2 st, 1 sc in next 3 st, 2 sc in next 2 st, 1 sc in last st. Sl st in to top of 1st st in round. ( st total)
Before you cut your yarn make sure you leave a tail long enough sew your nose in place on to your beanie hat.
Nose back: in main color yarn
Note: This is an optional step but I do recommend doing this step as it keeps your stuffing in the snout and now falling through the stitches when the hat is worn since they stretch to conform to head.
Round 1: In magic circle, ch 2 before placing 10 dc. Pull the circle closed to line up in tight circle. Sl st in to top of 1st st. (10 dc)
Round 2: Ch 2 before placing 2 dc in first st and in each of the following 9 st. Sl st in to the top of the 1st st in round. (20 dc)
Round 3: Ch 2 before placing *2 dc in 1st st then 1 dc in next* repeat * pattern until end of round. (30 dc)
Pull yarn through and fasten off. Put to side until needed in nose assembly.
Nose/snout: in main color yarn
Round 1: In magic circle, ch 1 before placing 8 sc. Pull the circle closed to line up in tight circle. Sl st in to top of 1st st. (8 sc)
Round 2: Ch 1 before placing 2 sc in first st and in each of the following 7 st. Sl st in to the top of the 1st st in round. (16 sc)
Round 3: Ch 1 before placing *2 sc in 1st st then 1 sc in next* repeat * pattern until end of round. (24 sc)
Round 4: Ch 1 before placing *2 sc in 1st st then 1 sc in next 2 st* repeat * pattern until end of round. (32 sc)
Round 5-8: Ch 1 before placing 1 sc in 1st st and in each of the following 31 st. Sl st in to the top of the 1st st in round. (32 sc)
Pull yarn through leaving a long enough tail to sew the nose back (optional) on to the opening of snout and then directly on to the beanie hat.
Assembling Nose/ Snout:
Pick up your Black Nose, using tail and yarn needle secure it in to place on the top front of the snout. See my pictures for placement of mine.
Ear Fronts (Make 2): using main color gold / yellow yarn
Round 1: In magic circle, ch 1 before placing 8 sc. Pull the circle closed to line up in tight circle. Sl st in to top of 1st st. (8 sc)
Round 2: Ch 1 before placing 2 sc in first st and in each of the following 7 st. Sl st in to the top of the 1st st in round. (16 sc)
Round 3: Ch 1 before placing *2 sc in 1st st then 1 sc in next* repeat * pattern until end of round. (24 sc)
Cut yarn and fasten off
Ear Back (Make 2): using main color gold/ yellow yarn
Repeat rounds 1-3 of Ear Fronts in previous step but do not fasten off at end of round 3. Placing one ear front in front of your ear back you are working on, continue working the following through both pieces at same time.
Round 4: Ch 1 before working 1 sc in first 6 st, then alternate 1 sc then 2 sc repeatedly until back at first st in round. Sl st in to top of 1st st in round.
Leave a long enough tail to be able to sew your ear in place on the beanie hat before cutting yarn and pulling through.
Finishing off:
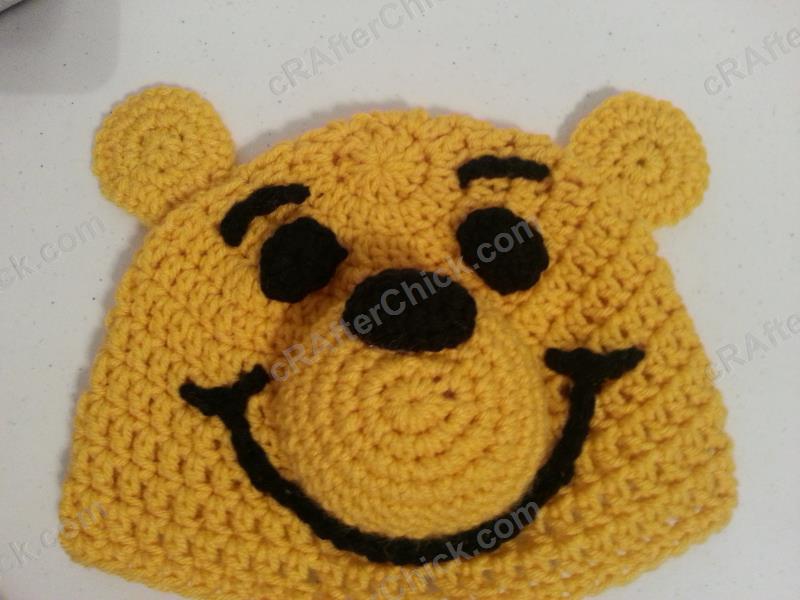
Since I like to start adding my features from the bottom up we will start with Winnie the Pooh’s smile. I find that by working from bottom up you get a better idea of how much space you have during the process. Otherwise you may find yourself scrunching up features at the bottom if you haven’t left enough space in your process. By working upwards you always have extra room as you can just move the next feature up a little higher if need be.
You are now going to use this the tail left on the large smile chain from before and your yarn needle to sew the main smile piece into the desired place on the hat. (You can reference my pictures to see how I placed my own.) Once you have secured it into place, bring the yarn into the inside of the beanie hat and finish off.
Next we will work on attaching the nose/snout that was assembled previously. Use the tail left behind and needle to secure the nose/snout piece in place on to the beanie hat. Pull yarn in to the inside of beanie once sewn on and fasten off.
Next we will work on the Winnie’s eyes. Take the yarn tail left from one eye and sew it into place on to the hat. Note that you want the oval of yes to have the narrow sides on top and bottom whereas the long ends facing sides. Once it’s sewn on, pull yarn in to the inside of the hat before finishing off. Repeat for second eye.
Next we will work on the Winnie’s eyebrows. Take the yarn tail left from one eyebrow chain and sew it into place on to the hat above the eyes you just attached. Once it’s sewn on, pull yarn in to the inside of the hat before finishing off. Repeat for second eyebrow.
Now all that is left is to attach Pooh’s ears on to the beanie. Sew each of the ears in place by using the leftover yarn tail from when you crocheted the ears before directly on to the top sides of the beanie in your desired position. Once secure, pull yarn in to inside of your hat before finishing off. Repeat process for second ear.
Check for any tails or ends that you may have missed in process to weave in and finish off. Do so if you find any. Then you are all done. 🙂 One completed Pooh Bear hat! Enjoy your crocheted creation.
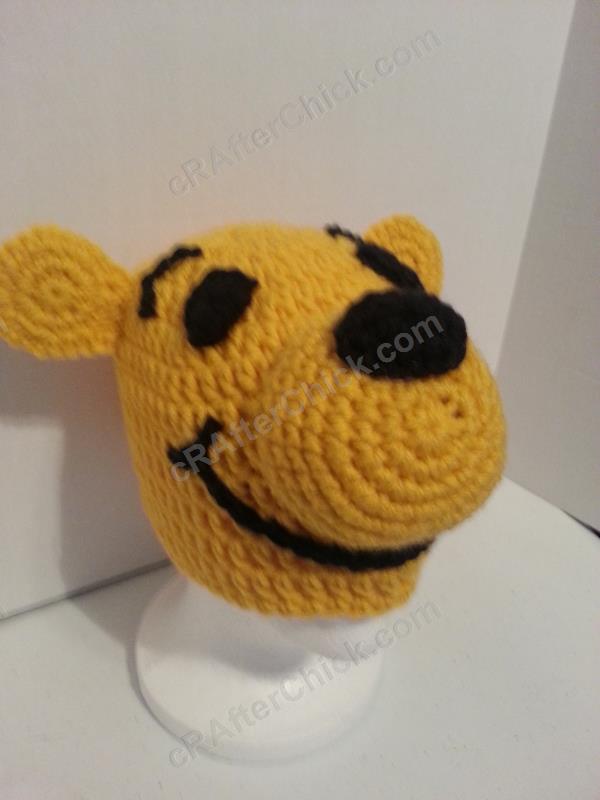
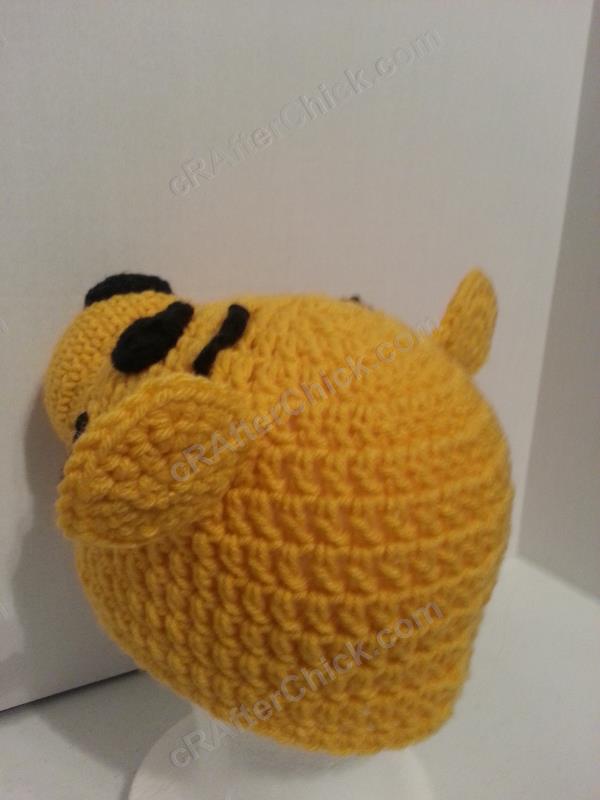
All done! You have one easy Winnie the Pooh Bear Beanie Hat to show off. I’ve gotten such great responses from my completed one so far. I would love to see your version if you make one, just drop me a link. 🙂
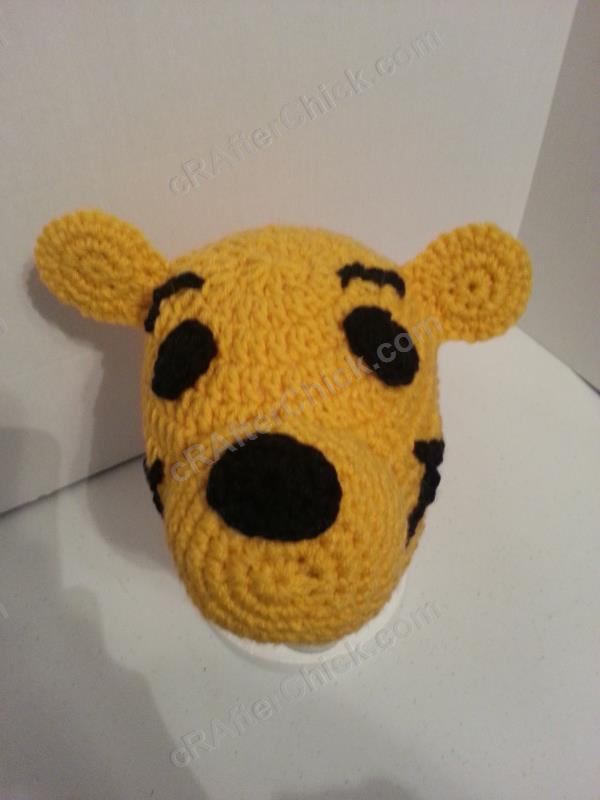
Here are some of the pictures I took to show how it looks worn and from different directions when completed:


Want more free patterns? Follow cRAfterChick on Facebook or Pinterest to get updates on patterns as they are added.
Note: All the cRAfterChick patterns shared on this site are free of charge. Please feel free to use them to make your own items. If you use it to make items to sell please credit cRAfterChick for the pattern and provide link to our site. Please do not copy and paste my pattern or try to use my images as your own. You can link to any of my patterns. Happy crafting!
Hey just wanted to give you a brief heads up and let you know a few of the pictures aren’t loading correctly. I’m not sure why but I think its a linking issue. I’ve tried it in two different web browsers and both show the same results.
please can I use this photo in my course work.
Much appreciated.
Billlie
Yes you may. 🙂 I would be honored. I would love to see any you make.