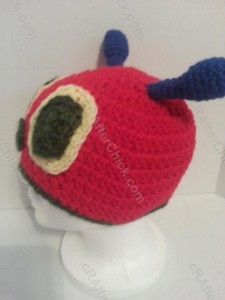
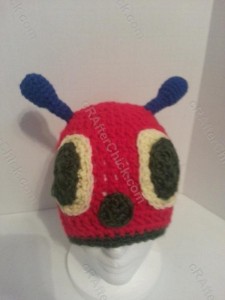
Jordan’s Pink Angels Beanie Hat Crochet Pattern

Jordan's Pink Angels Beanie Hat Crochet Pattern_ a chick crafting through Rheumatoid Arthritis cRAfterChick.com

Jordan’s Pink Angels Beanie Hat Crochet Pattern

 free crochet pattern from cRAfterChick.com

Jordan’s Pink Angels Beanie Hat Free Crochet Pattern

 Jordan is one of my Autoimmune Arthritis heroes. As she battles her Juvenile Arthritis she is raising awareness for Arthritis and spreading smiles. Her walk team for the Arthritis Foundation walk in her area is Jordan’s Pink Angels, you can also find them on Facebook here. I am blown away by her strength and positive energy she shares with all.  Thank you Jordan <3

Jordan’s Pink Angels Beanie Hat Crochet Pattern Notes

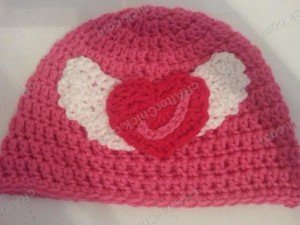
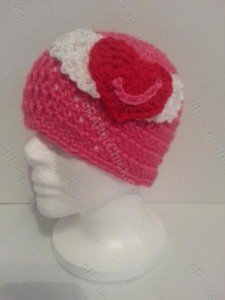
Jordan's Pink Angels Beanie Hat Crochet Pattern Laying Flat View

Project requires:
Pink Yarn for Beanie Hat and I used it for J as seen in picture above-  (I use a lot of Red Heart Saver yarn but any medium to normal weight yarn will do)
Red yarn for heart
White Yarn for angel wings
“J” hook (6.0 mm)
Scissors or Yarn Cutter
Blunt large eye yarn / tapestry needle to weave in ends

Abbreviations used in this pattern (US crochet stitches):
ch – chain
st – stitch
sl st – slip stitch
sc – single crochet (US)
sctog – single crochet two st together (US) 
dc – double crochet (US) 
hdc – half double crochet (US)

Jordan's Pink Angels Beanie Hat Crochet Pattern

Pattern Instructions:
*Note: This project is worked in the round on the base of a magic ring. If you do not know how to do this, please see tutorial here from: yarntomato on CrochetMe

The hat in this picture is made with my Easy Peasy  Pre-Teen / Teen / Women Double Crochet Beanie Pattern which you can find here as a foundation for the project.  Want it in another size? No worries. Head over to Easy Peasy All Family Sizes Free Double Crochet Beanie Patterns to select the size you want for your project.

Hat Base: using medium to dark pink yarn or desired color for hat base
Use Easy Peasy Crochet Beanie Size of your choice. Once finished put it to the side until you are ready to attach applique.

Heart : Using Red (or other color you want for heart) yarn with “J” crochet hook
The heart I made by this tutorial for Medium sized heart (2 rounds) by HeloiseV Crochet.
(Note: Make sure you leave an extra long tail at the end. This will be used in finishing steps below.)

Angel Wings (Make 2): Using white yarn with “J” crochet hook
Round 1: Chain 9. Sc in second chain from hook and continue making one sc per chain until end.  Ch 2 and turn. (8 sc)
Round 2: For this row, dc once in first two st, hdc in next 3 st, sc in next st and sctog last two st.  Ch 1 and turn. (7 st total).
Round 3: For this row, sc in first two st, hdc in next 3 st, dc in last two st. Ch 3 and turn.  (7 st total)
Round 4: Sl st in first st, *ch 3 then sl st in next st* repeat * until at end of starting corner. Ch 1 and rotate piece so you are working at back end of Round 1.
Round 5: (Note: This is an optional round. I like the more finished look with my wings.) Sc in first sc and each sc across (8 sc). Pull through.

(Tip: Make sure you leave an extra long tail at the end. This will be used in finishing steps below.)

Letter J or whatever letter you choose (in matching main color to beanie base – in my case hot pink)For my “J” I just single crocheted a chain the approximate length I wanted to make the J on the heart. For this one shown in pictures it was a chain of 9.
Then just use your tapestry (large eye yarn) needle to secure it in the finished place on top of the heart. This is an optional step that you can exclude from your project if so desired. 

Finishing off:
To attach the wings to the heart, overlap them slightly behind heart before using needle to pull through and make a few stitches with your starting tail. It doesn’t have to be much or long as it is just to keep them about where you want them to attach to hat.

*Tip: If your wings seem to be too tall or fat, pull on outermost corner, diagonally. This will stretch out the wings making them shorter and longer.

Now place your appliques on top of the beanie where you want them to be on the finished project.

*Tip: If you want to, you can use clothing pins or safety pins to hold them in place during your stitching. I tend to pin mine in place with some straight pins on to my Styrofoam model head. I’m a bit of a planner..

Taking your end tail from one wing, work on sewing a simple stitch around the perimeter of the wing through the beanie with your tapestry needle. Pull end through and finish off.

Using tail end from other wing duplicate what is done in first wing but in a mirror image of the location of the first one with tapestry needle. This is where using those pins can come in handy so they don’t move about on you. 😉 Pull end through and finish off.

Taking the last end tail hanging from your applique, for the heart, thread tapestry needle and secure heart in place on to beanie.

Just finish off and cut off extra lengths. You are ready to go!

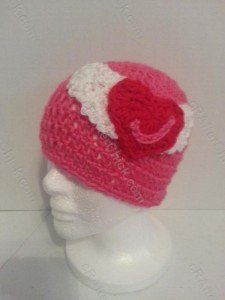
Here are some pictures to show how this beanie looks worn from different directions once fully assembled:
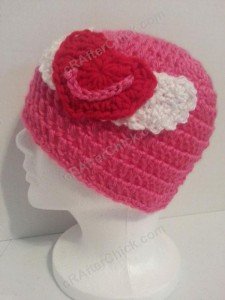
Jordan's Pink Angels Beanie Hat Crochet Pattern 1

Jordan's Pink Angels Beanie Hat Crochet Pattern Front Left View

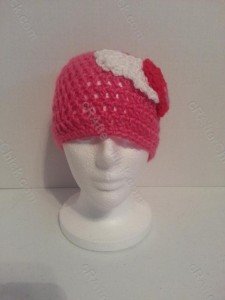
Jordan's Pink Angels Beanie Hat Crochet Pattern Front View

Jordan's Pink Angels Beanie Hat Crochet Pattern Right Profile View

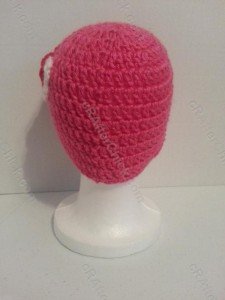
Jordan's Pink Angels Beanie Hat Crochet Pattern Rear View

Want more free patterns? Follow cRAfterChick on Facebook or Pinterest to get updates on patterns as they are added.

Note: All the cRAfterChick patterns shared on this site are free of charge.  Please feel free to use them to make your own items.  If you use it to make items to sell please credit cRAfterChick for the pattern and provide link to our site.  Please do not copy and paste my pattern or try to use my images as your own.  You can link to any of my patterns.  Happy crafting!

Three Little Pigs Beanie Hat Crochet Pattern for Storytelling

Three Little Pigs Beanie Hat Crochet Pattern_ a chick crafting through Rheumatoid Arthritis cRAfterChick.com

Three Little Pigs Beanie Hat Crochet Pattern for Storytelling

 free crochet pattern from cRAfterChick.com

Three Little Pigs Beanie Hat Free Crochet Pattern for Storytelling

This crochet pig hat was created for my mother to wear why she was reading the Three Little Pigs and related stories during story time in her classroom. She is a very hands on teacher and I love creating fun crochet character hats for her to keep them involved in her lessons. :)

Here is the free crochet pattern for creating your own pig beanie hat.

Three Little Pigs Beanie Hat Crochet Pattern for Storytelling Notes

Three Little Pig Storytime Crochet Beanie Pattern

Project requires:
Pink Yarn for Beanie Hat-  (I use a lot of Red Heart Saver yarn but any medium to normal weight yarn will do)
Contrast darker Pink Yarn for ears, nose and trim
White Yarn for outer part of eye
Black Yarn for eye pupils
“J” hook (6.0 mm)
Scissors or Yarn Cutter
Blunt large eye yarn / tapestry needle to weave in ends
Small amount of fiberfill stuffing

Abbreviations used in this pattern (US crochet stitches):
ch – chain
st – stitch
sl st – slip stitch
sc – single crochet (US)
dc – double crochet  (US)

Three Little Pig Storytime Crochet Beanie Pattern Laying Flat Not Worn

Pattern Instructions:
*Note: This project is worked in the round on the base of a magic ring. If you do not know how to do this, please see tutorial here from: yarntomato on CrochetMe

The hat in this picture is made with my Easy Peasy  Pre-Teen / Teen / Women Double Crochet Beanie Pattern which you can find here as a foundation for the project.  Want it in another size? No worries. Head over to Easy Peasy All Family Sizes Free Double Crochet Beanie Patterns to select the size you want for your project.

Hat Base: using pink yarn 
Use Easy Peasy Crochet Beanie Size of your choice
Starting off we are going to put a simple contrast color band to the bottom of the hat.  For this sl st your darker Pink contrast  yarn to a st on the last round. Ch 1, then work 1 sc in each st around, sl st to top of first st in round before finishing off.
Once you have completed your beanie for the base you are ready to start on making your own Three Little Pig hat.

Eye Construction (Make 2):  

Inner Pupil of Eyes: using black yarn
Round 1:  Starting off with your black yarn for the pupils of the eye, ch 1 (does not count as a st throughout pattern) before placing 6 sc in a magic circle. Pull circle tight before sl st in top of beginning st. ( 6 sc) Cut yarn leaving long enough tail to sew the pupil on to the eye white during assembly. Pull yarn through and sit to side until ready to assembly hat.
Repeat process for eye number 2.

Outer Eye: using white yarn
Round 1: Using white yarn, in a magic circle ch 2 before placing 10 dc. Pull circle closed before making a sl st in to the top of the 1st st from round. (10 dc)
Round 2:  Ch 2 before placing 2 dc in first st, 2 dc in next 7 st, 1 hdc in last two st. Sl st in to top of first st in round. (18 dc and 2 hdc)
Leave a long enough tail to sew your eyes directly on to the beanie during assembly before cutting your yarn and put to the side for now.
Repeat process for eye number 2.

Nostrils (make 2): Using black yarn
With black yarn, ch 4 before making 1 sc in 2nd ch from hook, 1 sc in following ch and sl st into the last ch. Pull yarn through leaving a tail long enough to secure on to nose/snout during assembly. Repeat process for second nostril.

Nose  / Snout: starting with contrast darker pink yarn and end will switch to main pink yarn in round 6
Round 1:  In magic circle with your contrast pink yarn, ch 1 before placing 6 sc in to circle. Pull circle closed and sl st in to the top of 1st st. (6 sc)
Round 2: Ch 1 before placing 2 sc in first st and in each of the following 5 st. Sl st in top of the 1st st in round. (12 sc)
Round 3:  Ch 1 before placing 2 sc in 1st st, *place 1 sc in next st, 2 sc in following st* Repeat * around until end of round. Sl st in top of 1st st. (18 sc)
Round 4: Ch 1 before placing 2 sc in 1st st, *place 1 sc in next 2 st, 2 sc in following st* Repeat * around until end of round. Sl st in top of 1st st. (24 sc)
Round 5: Ch 1 before placing 2 sc in 1st st, *place 1 sc in next 3 st, 2 sc in following st* Repeat * around until end of round. Sl st in top of 1st st. (30 sc)
Cut yarn, pull through and fasten off.
This is a good time to pick up your nostrils you made before and sew them in place on the front of the nose.  Once you secure them, pull yarn through to inside/ back of nose and finish off.
Now switch to main color pink yarn, attach to where you left off on round 5 with a sl st.
Round 6-7: Ch 1 placing 1 sc in first st and each st around. Sl st in top of 1st st of round. (30 sc)
Round 8: Ch 1 placing 1 sc in first st and each st around. Sl st in top of 1st st of round. (30 sc)
Cut yarn leaving a long enough tail to attach nose back (optional step below) and nose/snout on to the beanie hat.

Nose back (optional):  using main pink color yarn
This is not a necessary step in making this hat but I highly recommend doing this. Since we are putting fiberfill stuffing inside nose / snout during assembly and the openings between st on beanie expand when worn, this will keep it in the snout and not of the wearers forehead which can get a bit itchy. :)
Repeat round 1-5 of nose front. Cut yarn and finish off.

Ear front (Make 2): Using darker pink contrast yarn and “H” hook
Round 1:  With your contrast pink yarn, ch 9. Starting in 4th ch from hook (first 3 ch counts as a dc in the ears), place 1 dc in 4th chain and each of the following 5 ch. Ch 3 and turn. (7 dc)
Round 2:  Dc in second st skipping 1st st, 1 dc in next 4 st. Ch 3 and turn. (6 dc)
Round 3:  Dc in 2nd st skipping 1st st, 1 dc in next 3 st. Ch 3 and turn. (5 dc)
Round 4:  Dc in 2nd st skipping 1st st, 1 dc in next 2 st. Ch 3 and turn. (4 dc)
Round 5:  Dc in 2nd st skipping 1st st, 1 dc in next st. (3 dc)
Cut yarn, pull through and fasten off.
Repeat process for second Ear.

Ear back (Make 2): using main pink color yarn
Repeat rounds 1-5 from ear front above but do not finish off after 5th round.

Ear assembly:
Round 6:  Place one ear front in front of the ear back you are working on. Ch 1 before working a round of sc around the perimeter of both in the color of your ear back to show a contrast ear trim in front.  I tend to put 2 sc in the side of dc st and 3 sc in tip plus corners.  Sl st back in to your first st. You can choose to fasten off here and reattach yarn to bottom corner to sew ear on to beanie or just work down one side to a corner with sl st down in each sc.  Leave long enough tail to be able to fix securely on to the beanie hat.

Finishing off:
Since I like to start adding my features from the bottom up we will start with the nose/snout pieces of the pig.  I find that by working from bottom up you get a better idea of how much space you have during the process.  Otherwise you may find yourself scrunching up features at the bottom if you haven’t left enough space in your process. By working upwards you always have extra room as you can just move the next feature up a little higher if need be.
Take the nose back and place it on top of the opening at the end of the snout / nose piece.  Using the tail you left in your previous steps for the nose, sew the nose back to close the opening. You will want to stop 1/2 to 2/3 of the way around in order to fill your snout with your fiberfill stuffing.  You don’t need much or it will end up giving the nose front a really rounded dome appearance instead of flat.  Do not cut off extra yarn from tail once sewed on!  You are now going to use this to sew it into place on the hat.  Once you have secured it into place, bring the yarn into the inside of the beanie hat and finish off.
Next we will work on the pig’s eyes.  Take the tail from one black eye pupil and sew it into place on top of one of the outer eye whites. Once secure, pull yarn through to back and finish off.   Repeat process with other pupil and eye white.   Now take the white yarn tail from one assembled eye and sew it into place on to the hat. Once it’s all sewn on, pull yarn in to the inside of the hat before finishing off.  Repeat for second eye.
Now all that is left is to attach the pig’s ear on to the beanie hat.  Sew each on by using the leftover yarn tail from when you crocheted the ears with the contrast dark pink yarn facing forwards on the hat.  Once secure, pull yarn in to inside of your hat before finishing off.
Check for any tails or ends that you may have missed in process to weave in and finish off. Do so if you find any. Then you are all done. :)
One crocheted Three Little Pigs beanie all ready to wear for storytime, costume or just everyday fun. Oink oink!

Here are pictures to show how it looks worn and from different directions when completed:

Three Little Pig Storytime Crochet Beanie Pattern Front Right View

Three Little Pig Storytime Crochet Beanie Pattern Front Left View

Three Little Pig Storytime Crochet Beanie Pattern Left Side Profile View

Three Little Pig Storytime Crochet Beanie Pattern Right Profile View

Three Little Pig Storytime Crochet Beanie Pattern Rear View

Want more free patterns? Follow cRAfterChick on Facebook or Pinterest to get updates on patterns as they are added.

Note: All the cRAfterChick patterns shared on this site are free of charge.  Please feel free to use them to make your own items.  If you use it to make items to sell please credit cRAfterChick for the pattern and provide link to our site.  Please do not copy and paste my pattern or try to use my images as your own.  You can link to any of my patterns.  Happy crafting!

One Giant Daisy Beanie Hat Crochet Pattern

One Giant Daisy Beanie Hat Crochet Pattern_ a chick crafting through Rheumatoid Arthritis cRAfterChick.com

One Giant Daisy Beanie Hat Crochet Pattern

 free crochet pattern from cRAfterChick.com

One Giant Daisy Beanie Hat Free Crochet Pattern
I adore daisies in general so a giant daisy is what popped in to my head to use for the base of the Pay Attention hat my mother requested to wear in her classroom when she wants the students to listen and not talk.  I will modifying this pattern to add a giant colorful butterfly at her request but this pattern is for the giant daisy on top of the beanie.

I was pretty happy with how it turned out minus some of my horrible sewing skills to anchor it in to place. My hands really hate the sewing in part.  Happy crafting!

One Giant Daisy Beanie Hat Crochet Pattern Notes

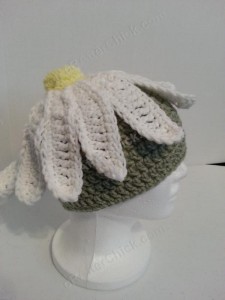
Giant Daisy Beanie Hat Crochet Pattern Left Side View

Project requires:
Green Yarn for Beanie Hat base, sage green for mine-  (I use Red Heart Saver yarn but any medium to normal weight yarn will do)
White Yarn for Giant Daisy
Yellow Yarn for daisy center
“J” hook (6.0 mm)
Scissors or Yarn Cutter
Blunt large eye yarn / tapestry needle to weave in ends
Small amount of fiberfill stuffing

Abbreviations used in this pattern (US crochet stitches):
ch – chain
st – stitch
sl st – slip stitch
ch-1 sp – chain one space
sc – single crochet (US)
dc – double crochet (US) 
tc- triple crochet (US) 

Pattern Instructions:

*Note: This project is worked in the round on the base of a magic ring. If you do not know how to do this, please see tutorial here from: yarntomato on CrochetMe

The hat in this picture is made with my Easy Peasy  Pre-Teen / Teen / Women Double Crochet Beanie Pattern which you can find here as a foundation for the project.  Want it in another size? No worries. Head over to Easy Peasy All Family Sizes Free Double Crochet Beanie Patterns to select the size you want for your project.

Hat Base: using green yarn or main color yarn of your choice

Use Easy Peasy Crochet Beanie Size of your choice. 

Once you have your beanie finished put to side while you work on your giant daisy starting with the yellow center.

Large Daisy Instructions:

Daisy Center: Using yellow or gold/yellow yarn
Round 1: In a magic circle, ch 1 before making 6 sc in circle.  Pull circle closed and sl st in to the top of the 1st sc in round. (6 sc)
Round 2: Ch 1 before placing 2 sc in first st and in each of the following 5 st. (12 sc)
Round 3:  Ch 1 placing 2 sc in first st, *1 sc in next st, 2 sc in following st* repeat until end of round. (18 sc)
Round 4: Ch 1 before placing 1 sc in first st and in each of the following st in round. (18 sc)
Pull yarn through leaving a long enough tail to secure your daisy center on to the top of attached daisy in assembly process before cutting off yarn.

Giant Daisy: using white yarn
Round 1: In a magic circle, ch 1(does not count as a st) before making 12 sc in circle.  Pull loosely closed so that ends touched but not pulled fully closed or tightly.  Sl st in to the top of the first st in the round. (12 sc) *This will be flower base you will branch your petals off of.
Round 2:  Ch 1, sc in 1st st, *chain 1, sc in next* repeat around to end of row. Sl st to top of 1st st in the round. (12 sc and 12 ch-1 sp)
Round 3: Starting with 1st ch-1 sp, sl st into space before creating a *chain of 17. Starting with the 4th ch from the hook work 1 tc in each of the following st until you are back at flower base working 1 sc into the last st before base. Sl st back into ch-1 sp you left off at. Sl st  into next ch-1 sp.* Repeat from * process around in each ch-1 sp until you are back at beginning. Sl st in to the base of the first st in 1st petal.
Round 4:  Ch 1, then working around the whole flower place 1 sc in to each st around and putting 3 sc in the end of each petal to round them out.
Pull yarn through leaving an extra long tail to attach it to beanie.

Assembling:
Daisy: Using your large blunt eye yarn / tapestry needle and the long tail left from daisy in previous step, sew your daisy on top of your beanie hat.  I centered mine right on the center of round 1 circle at top of hat and it worked out pretty well there for me.   Once you have fully secured it to the hat, pull yarn through to inside of hat before fastening off. It’s up to you on how far down you want to sew the daisy.  For mine I sewed down each petal about 1/3 of the way, back up to flower base, then down next petal etc.

Daisy Center: Take the yarn tail that you left off for assembly on the yellow daisy center and using your yarn needle start stitching in to place over the center circle of your daisy flower. About halfway through stitching this into place start adding small amounts of fiberfill stuffing to give your flower a more 3D appearance. Once you have secured it fully in place and stitched closed, pull yarn through to inside of hat before fastening off.

There you go. If you followed all the steps your giant daisy crochet hat should be complete and ready to wear!

Here are some pictures to show how this beanie looks worn from different directions once fully assembled:

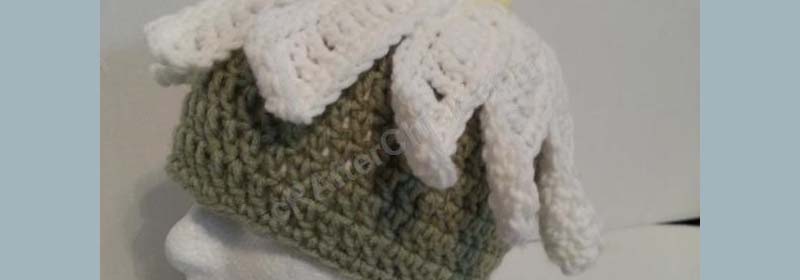
Giant Daisy Beanie Hat Crochet Pattern Front View

Giant Daisy Beanie Hat Crochet Pattern

Giant Daisy Beanie Hat Crochet Pattern Front View

Giant Daisy Beanie Hat Crochet Pattern Right Back View

Giant Daisy Beanie Hat Crochet Pattern Right Side Profile

Giant Daisy Beanie Hat Crochet Pattern Front Right Side View

Giant Daisy Beanie Hat Crochet Pattern View from Behind

Giant Daisy Beanie Hat Crochet Pattern from top view

Want more free patterns? Follow cRAfterChick on Facebook or Pinterest to get updates on patterns as they are added.

Note: All the cRAfterChick patterns shared on this site are free of charge.  Please feel free to use them to make your own items.  If you use it to make items to sell please credit cRAfterChick for the pattern and provide link to our site.  Please do not copy and paste my pattern or try to use my images as your own.  You can link to any of my patterns.  Happy crafting!
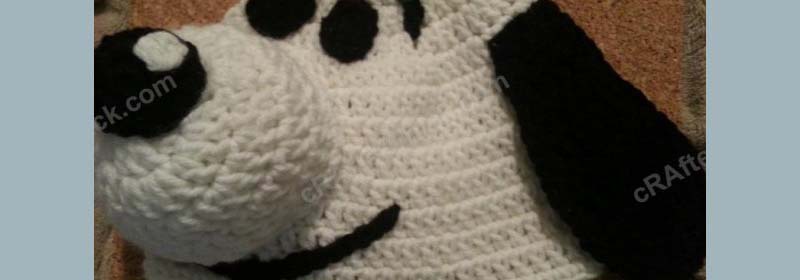
Curious George Beanie Hat for Story Reading Time Crochet Pattern

Curious George Beanie Hat for Story Reading Time Crochet Pattern_ a chick crafting through Rheumatoid Arthritis cRAfterChick.com

Curious George Beanie Hat for Story Reading Time Crochet Pattern

 free crochet pattern from cRAfterChick.com

Curious George Beanie Hat for Story Reading Time Free Crochet Pattern

When I started brainstorming on book characters to bring to life in the form of crocheted beanie hats for my Mother to wear during story reading time in her classroom, Curious George kept popping up. I adore anything monkey related so Curious George quickly made it to the top of my list.

Though it may look complicated it really is not too hard to work out. I think it will be a great crochet project for advanced beginners and up. Get your crochet on and make a fun Curious George crochet beanie hat of your own. Here is the picture I used for modeling this crocheted hat after:

Curious George logo for crochet hat inspiration

Curious George Beanie Hat for Story Reading Time Crochet Pattern Notes

Curious George Book Reading Time Beanie Hat Crochet Pattern

Project requires:
Darker Brown Yarn for Beanie Hat-  (I use a lot of Red Heart Saver yarn but any medium to normal weight yarn will do)
Contrast lighter Brown Yarn for face area, ears and trim
White Yarn for outer part of eye
Black Yarn for eye pupils, nose, mouth and eye liner at top of eye
“J” hook (6.0 mm)
“H” hook (5.00 mm)
Scissors or Yarn Cutter
Blunt large eye yarn / tapestry needle to weave in ends

Abbreviations used in this pattern (US crochet stitches):
ch – chain
st – stitch
sl st – slip stitch
sc – single crochet (US)
sctog – single crochet two st together (US)
dc – double crochet (US) 

Pattern Instructions:

These features will fit most sizes from toddler up to adult male. If you are going to attempt this on an infant size I recommend omitting a few rounds from face area and start with a chain 4 less.  You can also switch to a smaller hook like D or E to scale down the size of the features without changing up the pattern. Hope you like this as well.

*Note: This project is worked in the round on the base of a magic ring. If you do not know how to do this, please see tutorial here from: yarntomato on CrochetMe

The hat in this picture is made with my Easy Peasy  Pre-Teen / Teen / Women Double Crochet Beanie Pattern which you can find here as a foundation for the project.  Want it in another size? No worries. Head over to Easy Peasy All Family Sizes Free Double Crochet Beanie Patterns to select the size you want for your project.

Hat Base: Using “J” Hook and dark brown yarn 

Use Easy Peasy Crochet Beanie Size of your choice

Contrast Band Hat: using lighter brown yarn

Starting off we are going to put a simple contrast color band to the bottom of the hat.  For this sl st your lighter brown yarn (the same to be used for face area part) to a st on the last round. Ch 1, then work 1 sc in each st around, sl st to top of first st in round before finishing off.

Once you have completed your beanie for the base you are ready to start on making your own Curious George hat for reading time, costume or even everyday fun. This one is for my Mom to wear in her classroom and it has been a giant hit with the students. Put it to the side until you are ready to finish off the hat and assemble pieces.

Face Area: using contrast lighter brown yarn
Round 1:   Ch 15. Sc in 2nd ch from hook and in each of following 15 ch. Ch 1 and turn. The Ch 1 does not count as a st through this part of pattern. (15 sc)
Round 2:  Place 2 sc in first st, 1 sc in next 13 st and 2 sc in last st of round. Ch 1 and turn. (17 sc)
Round 3:  Place 2 sc in first st, 1 sc in next 15 st and 2 sc in last st of round. Ch 1 and turn. (19 sc)
Round 4-7:  Place 1 sc in each st across. Ch 1 and turn. (19 sc)
Round 8:  Sctog first two st together, 1 sc in next 15 st and sctog last 2 st of round. Ch 1 and turn. (17 sc)
Round 9:  Sctog first two st together, 1 sc in next 13 st and sctog last 2 st of round. Ch 1 and turn. (15 sc)
Round 10:  Sctog first two st together, 1 sc in next 11 st and sctog last 2 st of round. Ch 1 and turn. (13 sc)
Round 11:  Sctog first two st together, 1 sc in next 9 st and sctog last 2 st of round. Ch 1 and turn. (11 sc)
Round 12:  Sctog first two st together, 1 sc in next 7 st and sctog last 2 st of round. Ch 1 and turn. (9 sc)
Round 13-14:  Place 1 sc in each st across. Ch 1 and turn. (9 sc)
Round 15:  Place 2 sc in first st, 1 sc in next 7 st and 2 sc in last st of round. Ch 1 and turn. (11 sc)
Round 16:  Sctog first two st, sc in next 2 st, sl st in each of the next 3 st, sc in next 2 st, sctog last 2 st in round. Ch 1 and turn.  (6 sc)
Round 17:  Sctog first two st, sc in next 2 st, sctog last 2 st. Ch 1 and turn. (4 sc)
Round 18: Work a round of sc around the perimeter of the face area to give it a more well defined and polished look. Sl st in center st between eye indent on top of face area.
Cut yarn leaving a long enough tail to be able to securely sew on your face area on to the beanie hat.  Put face area aside until you are ready to assemble hat.

*From now on you will be using the “H” hook to complete your crocheted features.*

Eye Whites (Make 2): using white yarn 
Round 1: In magic circle, ch 1 before placing 6 sc in circle.  Pull circle closed and sl st in to the top of the 1st st in round. Note: The starting 1 ch in all sc rounds do not count as a stitch. They are used to hide seams better. (6 sc)
Round 2:  Ch 1 before placing 2 sc in first st and each of the following 5 st around. Sl st to top of 1st st in round. (12 sc)
Cut yarn leaving a long enough tail to sew eyes on to face area during assembly time.  I tend to judge about 2 to 2 1/2 times the perimeter of what I want to attach to my hats.  Put eye whites to the side until ready to assemble.

Eye Pupils (Make 2): using black yarn
Round 1:  In magic circle, ch 1 before placing 4 sc. Pull circle closed and sl st in to the top of the 1st st in round. (4 sc)
Cut yarn leaving a long enough tail to secure the pupils on to the eye whites during assembly. Put to the side until ready for assembly.

Upper liner to eyes (Make 2): using black yarn
With black yarn, ch 5. Pull yarn through leaving a long enough tail to sew on with your large blunt eye tapestry / yarn needle before cutting yarn. Put to side until assembly.

Ear Front (Make 2): using lighter brown contrast yarn for ear fronts
Round 1:   In magic circle, ch 1 before placing 6 sc in circle.  Pull circle closed and sl st in to the top of the 1st st in round. Note: The starting 1 ch in all sc rounds do not count as a stitch. They are used to hide seams better. (6 sc)
Round 2:  Ch 1 before placing 2 sc in first st and each of the following 5 st around. Sl st to top of 1st st in round. (12 sc)
Round 3:   Ch 1 before putting 2 sc in first st, *1 sc in next st, 2 sc in next*  Repeat * until you have 2 st left. Sl st in last 2 st. (15 sc)
Round 4:  Ch 1 before putting 2 sc in first st, *1 sc in next 2 st, 2 sc in next*  Repeat * until you have 3 st left. Sl st in last 3 st. (18 sc)
Cut yarn, pull through and finish off. No tail needed for ear fronts in assembly so cut off any additional length after finishing off.

Ear Back (Make 2): using lighter brown contrast yarn for ear backs
Rounds 1-4: Do the same as you just did on ear fronts but do not cut yarn or finish off. Ch 1 and turn.
Round 5-6:  Ch 1 before placing 1 sc in first st and following 17 st. Ch 1 and turn. (18 sc)
Pull yarn through leaving a long enough tail to secure ear to ear front and then sew on to your Curious George crochet hat.

Nose: using black yarn for nose
Ch 8 before pulling through yarn.  Cut yarn leaving a long enough tail to secure your smile on to George’s face area.

Mouth:  This will require three pieces chain stitches with tails made with the black yarn to sew them in place on the face area.
Main smile piece – With black yarn, ch 15 before pulling through yarn.  Cut yarn leaving a long enough tail to secure your smile on to George’s face area.
Smile sides (Make 2) With the black yarn, ch 6 before cutting off yarn leaving a long enough tail to sew your smile sides on to the face of Curious George.

Assembly:
A little tip- When sewing on features for a beanie hat, I work from the bottom up.  That way you can judge your space better and don’t end up with a bunch of features squished in the bottom if you run out of room.
I use straight pins to pin my features in place to plan their positions but that is not necessary. You can eyeball it.

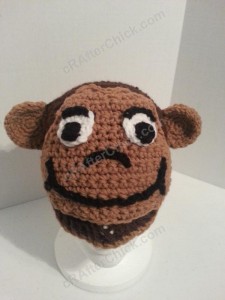
Smile assembly:  You are now going to work on the face area starting at the bottom and working up.  Using your blunt eye yarn needle and tail from main smile piece, sew the smile in a curve -like a smile ).  Make sure you leave enough room to attach the sides of the smile next.  Use the ch 8 for the nose, sew nose into place on the face area above the smile in an upside down frowny face like curve. (see pictures below for clarification on this positioning)

Eye assembly: Take the tail from one black eye pupil and use your yarn needle to sew it in place near the bottom of an eye white, not center to get George’s look.  Once attached to eye white, pull yarn through to back and finish off.
Now take the tail from the eye liner ch 5 to sew it along the top rim of eye.  Pull yarn through to back and finish off.
Now that pupil and eye liner have been assembled to an eye, use your needle and tail left on the eye white to securely sew your eye in to desired position onto the face area. (See pictures below to see my placement) Pull yarn to the back of face area before finishing off and cutting off any extra length.
Repeat this process for the second eye.

Your Face Area should now be complete and ready to attach! Line it up on the beanie hat in the position you would like it on the front of your beanie hat. I always put my seam from my crocheted beanie hats to the back of the project but you could use the face area to cover most of seam on front if you choose to do so.    Take your yarn needle and use the tail left previously on face area  to sew it on to the Curious George hat.  Once you have it secured, pull yarn through to inside of hat before finishing off and cutting off any additional tail length if necessary.

Ear assembly:  Place ear front in front of ear back.  Using your large blunt eye yarn / tapestry needle and the tail you left on ear back to sew both together all around ear.  Your yarn should now be at back in corner of ear bottom.   Repeat process for second ear.  Then using needle sew the ears into place in the desired location on side of beanie hat.  You can use my pictures below to see where I placed my own.  Cut yarn and finish off.

All done. You now have one completed Curious George crocheted beanie hat ready for story time, costumes or just everyday wearing fun.   You don’t have to be a kid to appreciate how cute this little monkey translates in crochet.  He makes me smile. 😀

Here are some pictures to show how the Curious George story time hat looks worn from different directions when crocheting is completed:

  Curious George Book Reading Time Beanie Hat Crochet Pattern Zoom Out View

Curious George Book Reading Time Beanie Hat Crochet Pattern Front View

Curious George Book Reading Time Beanie Hat Crochet Pattern Front Left View

Curious George Book Reading Time Beanie Hat Crochet Pattern Front Right View

Curious George Book Reading Time Beanie Hat Crochet Pattern View from Behind

Want more free patterns? Follow cRAfterChick on Facebook or Pinterest to get updates on patterns as they are added.

Note: All the cRAfterChick patterns shared on this site are free of charge.  Please feel free to use them to make your own items.  If you use it to make items to sell please credit cRAfterChick for the pattern and provide link to our site.  Please do not copy and paste my pattern or try to use my images as your own.  You can link to any of my patterns.  Happy crafting!
Hootie the Wise Owl Beanie Hat Crochet Pattern

Hootie the Wise Owl Beanie Hat Crochet Pattern_ a chick crafting through Rheumatoid Arthritis cRAfterChick.com

Hootie the Wise Owl Beanie Hat Crochet Pattern

 free crochet pattern from cRAfterChick.com

Hootie the Wise Owl Beanie Hat Free Crochet Pattern


The wise old owl was another character in the classroom play that my mother’s elementary school students were performing. I was asked to make some crocheted hats for costumes for them to wear.  Of course I couldn’t refuse.  I was making so many items in such a short period of time I went for a basic pattern for this owl versus my typical 3D features I do often on character hats.

This is a beginner friendly crochet pattern and can be made for all sizes from newborn to toddler to adult.  Here are the free crochet pattern instructions from my Hootie the Wise Owl crocheted hat.

Hootie the Wise Owl Beanie Hat Crochet Pattern 2

Hootie the Wise Owl Beanie Hat Crochet Pattern Notes

Project requires:
Yarn for main color (I used dark brown in picture)
White Yarn for eyes
Black Yarn for pupils of eyes
Orange Yarn for beak
(Note:I use a lot of Red Heart Saver yarn but any medium to normal weight yarn will do)
“J” hook (6.0 mm)
Scissors or Yarn Cutter
Blunt large eye yarn / tapestry needle to weave in ends

Abbreviations used in this pattern (US crochet stitches):
ch – chain
st – stitch
sl st – slip stitch
sc – single crochet (US)
dc – double crochet (US)

Hootie the Wise Owl Beanie Hat Crochet Pattern

Pattern Instructions:

*Note: This project is worked in the round on the base of a magic ring. If you do not know how to do this, please see tutorial here from: yarntomato on CrochetMe

The hat in this picture is made with my Easy Peasy Youth Sized (Age 3-10 years old) Double Crochet Beanie  Hat Pattern which you can find here as a foundation for the project.  Want it in another size? No worries. Head over to Easy Peasy All Family Sizes Free Double Crochet Beanie Patterns to select the size you want for your project.

Hat Base:  using medium to dark brown yarn or desired main color yarn for owl

Use Easy Peasy Crochet Beanie Size of your choice

One you fasten off your beanie hat, you are ready to start working on your Hootie the Wise Owl crocheted hat! Put aside until ready in finishing off stage.

Ears (Make 2): using medium to dark brown yarn or desired main color yarn for owl
Round 1: Using your orange yarn (or desired beak color in this project) ch 6. Sc in the 2nd ch from hook and next 4 ch. Ch 1 and turn. (5 sc)
Round 2-4:  Sc in second st from hook, skipping 1st st in each round, placing 1 sc in each of the following st. Ch 1 and turn at end of round. By following this instruction for rounds 3 and 4 you will be decreasing by one st in each row.
Round 5: Now sl st in each st around the perimeter of the ear from where you left of in round 4 until bottom corner of ear.  Your yarn should now be in an ideal location to leave a long enough tail to secure ear in place on hat.
Put aside until ready in finishing off stage.

Eyes (Make 2):
Note: If you are doing this for newborn to 12 month sizes, you may want to decrease one round of the eyes or make 1  -2 of the rounds in single crochet versus double crochet so they are more in proportion to size of hat.

Pupils: using black yarn
Round 1: In a magic circle ch 2 before placing 12 dc.  Sl st to top of beginning st in round. (12 dc) Cut yarn, pull through and fasten off.

Eye White: using white yarn
Round 2: Attach white yarn on to round 1 where you left out with a sl st.  Ch 2 before making 2 dc in first st and each of the following 11 st around. Sl st to top of beginning st in round. (24 dc)
Cut yarn leaving a tail long enough to secure your eye on to the hat and pull through. Put aside until ready in finishing off stage.

Beak: using orange yarn or desired beak color
Round 1:  Ch 6. Sc in the 2nd ch from hook and next 4 ch. Ch 1 and turn. (5 sc)
Round 2-4:  Sc in second st from hook, skipping 1st st in each round, placing 1 sc in each of the following st. Ch 1 and turn at end of round.
Round 5: Sc in remaining st. Ch 1 and turn.
Round 6: Make 1 sc in each st around the whole perimeter of your beak, placing 3 sc in each of the two top corners and beak tip point to give it a more defined plus rounded look.
Cut yarn leaving a long enough tail to have enough yarn to sew the beak securely on to the hat. Put aside until ready in finishing off stage.

Finishing off:
In order to finish off the hat, you will want to lay out your hat, the two ears, two eyes, and beak before you get started.  Some people just eyeball where they want the pieces but I’m a bit OCD about my work being straight so I pin them to place on my Styrofoam head model before sewing them on.  I have found that if you start with the features closest to the bottom of the hat and work your way up you have an easier time and can judge your space better as you work.  Otherwise you might end up with some features squished together at bottom if your space planning is off.
Using the tails you have left on the beak and your yarn needle sew it into your desired location on the hat. I just do a basic in and out or back and forth type of stitch to secure mine.  Pull your yarn through to inside of hat before finishing off. That way it won’t be on front of your work.
Using the tails you left on the eyes, follow instructions as before with beak but to secure first one and then the other eye into your desired location on hat above beak. Pull your yarn through to inside of hat before finishing off. That way it won’t be on front of your work.
Now you just need to judge where you would like to place your eyes in correlation with features, top of hat etc.  Once you pick the locations, use the tails left behind when working on ears before to sew them on to your crocheted hat. Pull your yarn through to inside of hat before finishing off. That way it won’t be on front of your work.
Double check your work for any loose ends or tails you didn’t finish off through process doing so now and removing extra lengths.
All done!  There you go. Your own easy owl beanie crocheted hat! :)  It’ s a really fun but quick project.

Here are some pictures to show what the completed Hootie Owl hat looks like once it’s fully done and worn:

Hootie the Wise Owl Beanie Hat Crochet Pattern 3

Hootie the Wise Owl Beanie Hat Crochet Pattern Front Left View

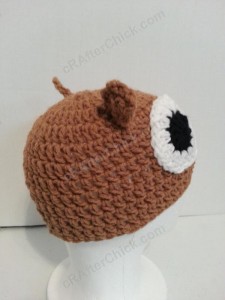
Hootie the Wise Owl Beanie Hat Crochet Pattern Left Side View

Hootie the Wise Owl Beanie Hat Crochet Pattern Back View

Hootie the Wise Owl Beanie Hat Crochet Pattern Left Side View

Hootie the Wise Owl Beanie Hat Crochet Pattern Back Right View

Hootie the Wise Owl Beanie Hat Crochet Pattern Zoom Out View

Want more free patterns? Follow cRAfterChick on Facebook or Pinterest to get updates on patterns as they are added.

Note: All the cRAfterChick patterns shared on this site are free of charge.  Please feel free to use them to make your own items.  If you use it to make items to sell please credit cRAfterChick for the pattern and provide link to our site.  Please do not copy and paste my pattern or try to use my images as your own.  You can link to any of my patterns.  Happy crafting!


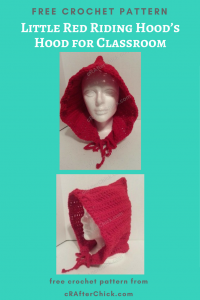
Little Red Riding Hood’s Hood Crochet Pattern for Classroom

Little Red Riding Hood's Crocheted Hood Crochet Pattern_ a chick crafting through Rheumatoid Arthritis cRAfterChick.com

Little Red Riding Hood’s Crocheted Hood Crochet Pattern for Classroom Play

  free crochet pattern from cRAfterChick.com

Little Red Riding Hood’s Hood Free Crochet Pattern for Classroom

When my mother asked me to help out by making some hat and headwear costumes for her little students doing a class play on a mash up of fairy tale characters I couldn’t resist saying yes as I have so much fun making character hats.

I couldn’t find a pattern online that wasn’t too complicated or ornate. I just wanted a fast and easy hood to work up since I was doing so many of the costumed pieces in a short amount of time.  So I decided to wing it and I thought it turned out pretty okay so I wrote down the pattern in case anyone ever needs a Little Red Riding Hood hood. You never know right? 😉

This crochet pattern will work on Youth sized (3 -10 yrs), preteen, young adult, and adult women. You can easily tailor it down in size for younger wearers or add some additional stitches to fit a larger woman or adult male. Just make sure you increase or decrease stitches in multiples of 2.

Little Red Riding Hood’s Crocheted Hood Crochet Pattern for Classroom Play Notes

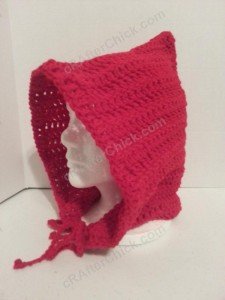
Little Red Riding Hood Crochet Pattern picture

Project requires:
Red Colored Yarn for Hood – the brighter the better :)
(I use a lot of Red Heart Saver yarn but any medium to normal weight yarn will be fine)
“J” hook (6.0 mm)
Scissors or Yarn Cutter
Blunt large eye yarn / tapestry needle to weave in ends

Abbreviations used in this pattern (US crochet stitches):
st – stitch
sl st – slip stitch
sc – single crochet (US)
dc – double crochet (US)

Pattern Instructions:

Crochet Hood:
Starting with a foundation chain of 28.
Round 1: Dc in third ch from hook (First 2 ch does not counts as first dc the first dc worked in first st is 1st in round throughout pattern). Work 1 dc in each of the following ch across until end. Ch 2 and turn. (26 dc)
Round 2-39: Dc in first st and each of the following 25 st across until end. Ch 2 and turn. (26 dc)
Round 40: Dc in first st and each of the next 25 st across until end. Ch 1 and turn. (26 dc)
Round 41: Fold your hood in half so that you can make seam for the back of the hood. You should have 20 rows on each side above / below your fold. Ch 1 and slip st through both pieces in first st and each st until the corner. Slip st back into last st, pull yarn through and fasten off

Front Trim and Ties:
Chain 40.  Sl st to bottom right corner of hood front.  This will be your first tie. Ch 2 and work 1 dc in each st around the front part of hood to bottom left corner. Sl st down side of last dc worked before ch 40 for last tie.
Cut yarn, pull through and fasten it off. Now you have one quick and easy Little Red Riding Hood’s crocheted hood. :) In this case it is for Kindergarten class play but it can easily be used for a costume, part of a cosplay outfit or to use as a pattern for a hood to add to other projects.

If you are interested in adding a capelet or cape to the hood, just work a circle type of increase all the bottom back and forth until width of shoulders. Then just work 1 dc in each round until length desired. I may even give this a shot for next year’s class or Halloween even :)

Here are some pictures to show how the Little Red Riding Hood’s crocheted hood looks like worn and from different angles:

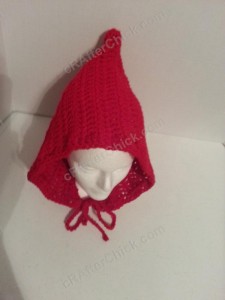
Little Red Riding Hood Crochet pattern front view crocheted hood
Little Red Riding Hood Crocheted hood crochet pattern side profile
Little Red Riding Hood's Crochet Hood crochet pattern rear view
Little Red Riding Hood's Crocheted Hood Crochet Pattern side view
Little Red Riding Hood's Crocheted Hood Crochet Pattern looking down at top
Little Red Riding Hood's Crocheted Hood Crochet pattern zoom out view

Want more free patterns? Follow cRAfterChick on Facebook or Pinterest to get updates on patterns as they are added.

Note: All the cRAfterChick patterns shared on this site are free of charge.  Please feel free to use them to make your own items.  If you use it to make items to sell please credit cRAfterChick for the pattern and provide link to our site.  Please do not copy and paste my pattern or try to use my images as your own.  You can link to any of my patterns.  Happy crafting!

Grandma’s Large and Fast Kerchief Crochet Pattern

Grandma's Large and Fast Kerchief Crochet Pattern_ a chick crafting through Rheumatoid Arthritis cRAfterChick.com

Grandma’s Large and Fast Kerchief Crochet Pattern

 free crochet pattern from cRAfterChick.com

Grandma’s Large and Fast Kerchief Free Crochet Pattern

When my mother asked me to help out by making some hat costumes for her little ones doing a class play on a mash up of fairy tale characters I couldn’t say no.  I made this pattern up to whip something up quickly for Little Red Riding Hood’s Grandma to wear in the class play.

This Kerchief crochet pattern will work on Youth sized (3 -10 yrs) as a larger cover for the head but normal fit for preteen, young adult, and adult women.  Even though this was created as a costume piece it can definitely be used as a normal head covering and would look amazing in some vibrant colors too.  So here it  is:

Grandma’s Large and Fast Kerchief Crochet Pattern Notes

Grandma's Kerchief Crochet Pattern Picture

Project requires:
Main Colored Yarn for Kerchief
(I use a lot of Red Heart saver yarn but any medium to normal weight yarn will be fine)
“J” hook (6.0 mm)
Scissors or Yarn Cutter
Blunt large eye yarn / tapestry needle to weave in ends

Abbreviations used in this pattern (US crochet stitches):
ch – chain
ch-1 sp  – chain 1 space in between stitches
ch-3 sp -chain 3 space in between stitches
st – stitch
sl st – slip stitch
sc – single crochet (US)
dc – double crochet (US) 

Pattern Instructions:
Starting with a foundation chain of 41.
Round 1: Sc in 2nd ch from hook, *ch 1, skip next st, sc in following st* continue until the end. Ch 4 and turn.
Round 2: Work 1 dc in first ch-1 sp,  *ch 3, work 1 dc in next ch-1 sp* repeat * until end of row. Sl st into the last ch-3 sp created, ch 4 and turn.
Round 3 – 20: Work 1 dc in to the first ch-3 sp, *ch 3, work 1 dc in next ch-3 sp* repeat * until end of row. Sl st into the last ch-3 sp created, ch 4 and turn.  You will notice that in each round your kerchief will be getting one ch-3 sp smaller than previous round. This will give it the nice triangular shape. Repeat round 3 until you finish last round leaving 1 ch-3 sp. In Round 20, dc in last sp as previous rounds. Sl st into the side of ch 3 sp you just created. Ch 1 and turn.
Round 21: Turn piece so you are now working counter clockwise from where you left out.  Place 2 sc in the side of each ch -3 space until you reach the right top corner. Place 2 sc in corner. Chain 41. Work 1 sc in second ch from hook and each of the following 39 st. Sl st back into st you started ch from. Continue working to the left putting 1 sc in each st across to the left corner. Sl st in to corner before making a chain of 41. Like before starting at 2nd ch from hook work 1 sc in each st back down to corner, sl st into st before placing two sc.  Turn piece so you are working last side of the triangle placing 2 sc in the side of each ch-3 sp until you are back at the beginning of round. Sl st to first st in round.
Cut yarn, pull through and fasten off.  All done!

Want a bit of a color pop to add to your crocheted kerchief?  Try doing that round with ties in a contrasting shade of yarn. :)

Here are some pictures to show how this kerchief looks like worn and from different angles:

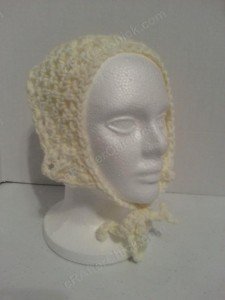
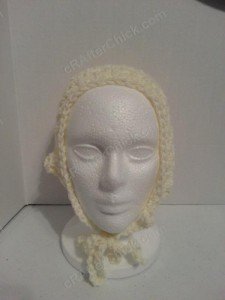
Grandma's Kerchief Crochet Pattern Picture Front View

Grandma's Kerchief Crochet Pattern Picture Side View

Grandma's Kerchief Crochet Pattern Picture Downward View

Grandma's Kerchief Crochet Pattern Picture Side Back View

Want more free patterns? Follow cRAfterChick on Facebook or Pinterest to get updates on patterns as they are added.

Note: All the cRAfterChick patterns shared on this site are free of charge.  Please feel free to use them to make your own items.  If you use it to make items to sell please credit cRAfterChick for the pattern and provide link to our site.  Please do not copy and paste my pattern or try to use my images as your own.  You can link to any of my patterns.  Happy crafting!
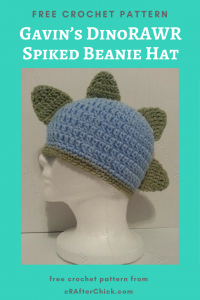
Gavin’s DinoRAWR Spiked Beanie Hat Crochet Pattern

Gavin's DinoRAWR Spiked Beanie Hat Crochet Pattern_ a chick crafting through Rheumatoid Arthritis cRAfterChick.com

Gavin’s DinoRAWR Spiked Beanie Hat Crochet Pattern

 free crochet pattern from cRAfterChick.com
  Gavin’s DinoRAWR Spiked Beanie Hat Free Crochet Pattern

This crochet pattern was designed in honor of and for a little Juvenile Arthritis hero of mine, Gavin.  He is a big dinosaur fan so I figured I would make something special for him.  It turned out to be a pretty easy and quick way to customize a hat for the dinosaur fan in your life. Give is a try. Happy crafting!

Gavin’s DinoRAWR Spiked Beanie Hat Crochet Pattern Notes

Gavin's DinoRAWR Spiked Beanie Hat Crochet Pattern

Project requires:
Main Colored Yarn for Beanie Hat
(I use a lot of Red Heart Saver yarn but any medium to normal weight yarn will be fine)
Contrast yarn for bottom contrast trim and dinosaur spikes
“J” hook (6.0 mm)
Scissors or Yarn Cutter
Blunt large eye yarn / tapestry needle to weave in ends

Abbreviations used in this pattern:
ch – chain
st – stitch
sl st – slip stitch
sc – single crochet (US)
dc – double crochet (US)

Pattern Instructions:

*Note: This project is worked in the round on the base of a magic ring. If you do not know how to do this, please see tutorial here from: yarntomato on CrochetMe

The hat in this picture is made with my Easy Peasy  Pre-Teen / Teen / Women Double Crochet Beanie Pattern which you can find here as a foundation for the project.  Want it in another size? No worries. Head over to Easy Peasy All Family Sizes Free Double Crochet Beanie Patterns to select the size you want for your project.

Hat Base:

Use Easy Peasy Crochet Beanie Size of your choice
Once you have completed your beanie for the base you are ready to get started on making this a dinoRAWR spiked hat. :)

Hat Contrast Band: using contrast color yarn of your choice
Taking contrast color yarn, attach to bottom of last round of beanie with a sl st. Ch 1 and work 1 sc in to each st around. Sl st to top of first st in round.
Cut yarn and fasten off.

If you like a wider contrast band or want to make the color contrast pop more, try adding an additional row of sc to the bottom. I sometimes do this when I feel a project needs it but it’s not necessary, just my personal preference. :) 

Dinosaur Spikes (Make 4):
Round 1: In magic circle, ch 2 before making 8 dc into circle. Sl st to top of first st in round.  (8 dc)
Round 2: Ch 2.  Place 3 dc in first st, 1 dc in each of the next 3 st, 3 dc in next st and 1 dc in last st. Sl st to top of first st in round. (12 dc)
Round 3:  Ch 2. 1 dc in 1st, 3 dc in following st, 1 dc in each of the next 5 st, 3 dc in next st, 1 dc in each of last 4 st.  Sl st to top of first st in round. (16 dc)
Round 4: Ch 3. 1 dc in first 2 st, 1 dc in each of the following 7 st, 3 dc in next st, 1 dc in each of last 5 st.  Sl st to top of first st in round. (20 dc)
Round 5:  Sl st in first two st. Fold your spike in half so that you are now working in a corner. Ch 1 before placing 1 sc through both st lined up in fold and in each to the end. (10 sc)
Make sure you leave a long enough tail to secure your spike to the crocheted hat when finished!
Cut yarn and pull through.  Put to side until finished with all 4 spikes (or desired amount if you want more or less)

Finishing off:
At this point you should have your finished crocheted beanie hat base and your finished dinosaur spikes.  For this hat I arranged them evenly from front forehead to back of head by pinning mine in place first with straight pins to make sure placement was okay.  Yes I have a little bit of OCD with my crocheting.  This is not necessary but it’s a good idea to mark your starting or ending points with pins, stitch markers or even a few short scraps of yarn.
Taking your yarn needle, use tails on spikes to sew them directly on to the beanie hat.  I just did a basic in and out stitch to weave it in securely.  Pull yarn through to inside of hat after spike is attached, perform a double knot (where you pass the yarn through the loop twice before pulling tightly to close). You can do one or two additional knots if you prefer, I often do but it’s because I’m always paranoid of unraveling. I haven’t had that happen since using the double knots though so it will do the job well. :)
One you have all the spikes attached where you want them, fasten off any loose ends, cut additional yarn, weave in and you are all done.

All done. One super special DinoRAWR crocheted hat. This pattern is dedicated to my little Juvenile Arthritis hero Gavin.

Here are some pictures to show how this hat looks worn and from different angles:

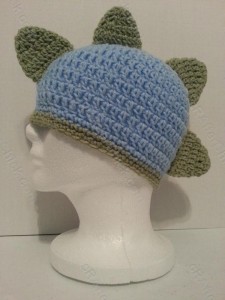
Gavin's DinoRAWR Spiked Beanie Hat Crochet Pattern Front View

Gavin's DinoRAWR Spiked Beanie Hat Crochet Pattern Front on View

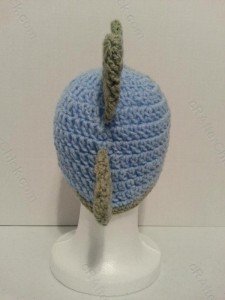
Gavin's DinoRAWR Spiked Beanie Hat Crochet Pattern View from behind

Want more free patterns? Follow cRAfterChick on Facebook or Pinterest to get updates on patterns as they are added.

Note: All the cRAfterChick patterns shared on this site are free of charge.  Please feel free to use them to make your own items.  If you use it to make items to sell please credit cRAfterChick for the pattern and provide link to our site.  Please do not copy and paste my pattern or try to use my images as your own.  You can link to any of my patterns.  Happy crafting!

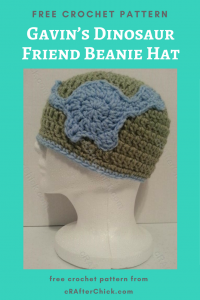
Gavin’s Dinosaur Friend Beanie Hat Crochet Pattern

Gavin's Dinosaur Friend Beanie Hat Crochet Pattern_ a chick crafting through Rheumatoid Arthritis cRAfterChick.com

Gavin’s Dinosaur Friend Beanie Hat Crochet Pattern

 free crochet pattern from cRAfterChick.com

Gavin’s Dinosaur Friend Beanie Hat Free Crochet Pattern

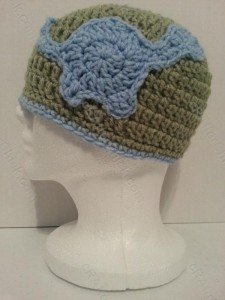
This crochet pattern was designed in honor of and for a little Juvenile Arthritis hero of mine, Gavin.  He is a big dinosaur fan so I figured I would make something special for him.  Thus the Dinosaur Friend applique for beanie hats was born.  You can use it on tons of other projects too. I plan on using it on some bibs in the near future and maybe a crocheted tote bag for my nephew to take to school.

 I am still a beginner at writing patterns so if anything is confusing please let me know and I will try to straighten it out for you.  I would say in my own crocheting I’m only advanced beginner to intermediate so I think this crochet pattern will work well for even those that just recently picked up crochet hooks. Happy crafting!

Gavin’s Dinosaur Friend Beanie Hat Crochet Pattern Notes

Gavin's Dinosaur Friend Beanie Hat Crochet Pattern

Project requires:
Main Colored Yarn for Beanie Hat
(I use a lot of Red Heart Saver yarn but any medium to normal weight yarn will do)
Contrast yarn for bottom contrast trim and dinosaur applique
“J” hook (6.0 mm)
Scissors or Yarn Cutter
Blunt large eye yarn / tapestry needle to weave in ends

Abbreviations used in this pattern (US crochet stitches):
ch – chain
st – stitch
sl st – slip stitch
sc – single crochet (US)
hdc -half double crochet (US)
dc – double crochet (US)
tc – triple crochet (US) 

Pattern Instructions:

*Note: This project is worked in the round on the base of a magic ring. If you do not know how to do this, please see tutorial here from: yarntomato on CrochetMe

The hat in this picture is made with my Easy Peasy  Pre-Teen / Teen / Women Double Crochet Beanie Pattern which you can find here as a foundation for the project.  Want it in another size? No worries. Head over to Easy Peasy All Family Sizes Free Double Crochet Beanie Patterns to select the size you want for your project.

Hat Base: using main color yarn of your choice

Use Easy Peasy Crochet Beanie Size of your choice
Once you have completed your beanie for the base you are ready to get started on making this a dinosaur friend hat. :)
Taking contrast color yarn, attach to bottom of last round of beanie with a sl st. Ch 1 and work 1 sc in to each st around. Sl st to top of first st in round.

Dinosaur friend applique: using contrast color yarn
Round 1: In magic circle, ch 2 (does not count as a st) before placing 10 dc. Sl st in to top of first st in round. (10 dc)
Round 2: Ch 2, place 2 dc in each st around. Sl st in to top of first st. (20 dc)
Round 3: Sl st in first st, in next st sc, ch 9, sc in 2nd ch from hook, in following ch st place 1 hdc and 1 dc, 3 dc in following st, 2 sc in next st, 1 sc in next 4 st. Sl st into stitch on circle from round 2.
Continuing from where you left off at neck working counter clockwise, sc in next st, 2 sc in next st, 1 hdc in next 2 st, sc in next. Sl st in to next 3 st.
Now starting at tail sc in next st to start top of tail. Ch 8. Sc in bottom of second ch from hook , 2 sc in next 3 st, 1 sc in next 3 st. Sl st back in to main circle.
Sl st in next 2 st, ch 3, sl st down side of last st, 2 tc in next st, sl st up side of st and back into body round. Sl st in next 2 st, Chain 3, tc in same , 2 tc in next st, sl st up side of last st joining back into dinosaur’s body.
Sl st up side to base of neck joining of dino. Ch 1, 2 sc in first neck st, 1 sc in next 2 st, sctog next 2 st, end with 3 sc at top of head to round it out.
Cut yarn with an extra EXTRA long tail in order to sew this applique  securely on to the hat.  I tend to go for roughly three times the perimeter length by rough sight estimate.

Finishing off:
Using the yarn needle use the tail to secure the dinosaur friend crocheted applique on to your beanie hat.  I just do a simple in and out weaving the two pieces together. It lays more flat when finished.
One thing I do often is to use straight pins to hold the applique in place. My hands aren’t the best so the appliques or features I attach tend to move around a bit while I’m sewing and I can’t stand for it to be crooked. 😉
Cut off any lose ends after fastening off to finish off this project.
All done. One super special Dinosaur Friend Beanie Hat Crochet Pattern dedicated to my little Juvenile Arthritis hero Gavin.

Want more free patterns? Follow cRAfterChick on Facebook or Pinterest to get updates on patterns as they are added.

Note: All the cRAfterChick patterns shared on this site are free of charge.  Please feel free to use them to make your own items.  If you use it to make items to sell please credit cRAfterChick for the pattern and provide link to our site.  Please do not copy and paste my pattern or try to use my images as your own.  You can link to any of my patterns.  Happy crafting!


The Very Hungry Caterpillar Beanie Hat Crochet Pattern for Story Reading Time

The Very Hungry Caterpillar Beanie Hat Crochet Pattern_ a chick crafting through Rheumatoid Arthritis cRAfterChick.com

The Very Hungry Caterpillar Beanie Hat Crochet Pattern for Story Reading Time

 free crochet pattern from cRAfterChick.com

The Very Hungry Caterpillar Beanie Hat Free Crochet Pattern for Story Reading Time

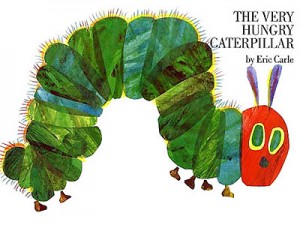
My mother, who is a teacher, requested that I make her a hat for reading / story time in her classroom for when she reads The Very Hungry Caterpillar book by Eric Carle.  It’s a classic children’s book that I remember from my own childhood.  So I wanted to make it as close as possible to how the caterpillar on the book cover (see picture below).  I was pretty happy with how it turned out and it was a giant hit in the classroom.

the very hungry caterpillar book

The Very Hungry Caterpillar Beanie Hat Crochet Pattern for Story Reading Time Notes

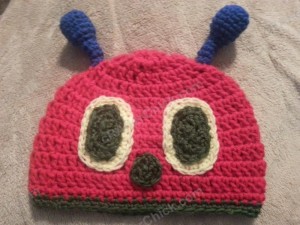
The Very Hungry Caterpillar Beanie Hat Crochet Pattern

Project requires:
Bright Red Yarn for Beanie Hat-  (I use a lot of Red Heart Saver yarn but any medium to normal weight yarn will do)
Dark Green Yarn for eyes, nose and trim
Yellow Yarn for outer part of eye
Bright Blue or Dark Purple Yarn for antennae
“J” hook (6.0 mm)
“H” hook (5.00 mm)
Scissors or Yarn Cutter
Blunt large eye yarn / tapestry needle to weave in ends
Small amount of fiberfill stuffing for antennae

Abbreviations used in this pattern:
ch – chain
st – stitch
sl st – slip stitch
sc – single crochet (US)
sctog – single crochet two st together (US)
dc – double crochet (US)
hdc – half double crochet (US)

Pattern Instructions:

*Note: This project is worked in the round on the base of a magic ring. If you do not know how to do this, please see tutorial here from: yarntomato on CrochetMe

The hat in this picture is made with my Easy Peasy  Pre-Teen / Teen / Women Double Crochet Beanie Pattern which you can find here as a foundation for the project.  Want it in another size? No worries. Head over to Easy Peasy All Family Sizes Free Double Crochet Beanie Patterns to select the size you want for your project.

Hat Base: using red yarn
Use Easy Peasy Crochet Beanie Size of your choice

Once you have completed your beanie for the base you are ready to start on making your own Very Hungry Caterpillar Beanie!
Contrast Band: using dark green yarn

Starting off we are going to put a simple contrast color band to the bottom of the hat.  For this sl st your Dark Green yarn to a st on the last round. Ch 1, then work 1 sc in each st around, sl st to top of first st in round before finishing off.

Outer Eyes (Make 2): using yellow yarn 
Round 1: In Magic Circle, Ch 1 before placing the following st in this order: 1 sc, 3 dc, 4 sc, 3 dc and 3 sc. Sl st to top of first st in row.  (8 sc, 6 dc)
Round 2: Ch 1. 1 sc in first st, 2 dc in next, dc in next, 2 dc in following st, sc in each of the 4 sc in a row from previous round, 2 dc in next st, 1 dc in next, 2 dc in last dc from previous round, 1 sc in each of the last 3 st for round. Sl st in top of first st in row. (8 sc, 10 dc)
Round 3:  Ch 1. 1 sc in first st, 2 sc in next, 1 sc in next 3 dc st, 2 sc in next st, 1 sc in next 4 st, 2 sc in next, 1 sc in next 3 dc, 2 sc in last dc, 1 sc in last 3 st. Sl st to top to of first st in row.  (22 sc)
Pull yarn through leaving a long enough tail when cutting so you will have a suitable enough length to secure to hat when sewing on. Put this to side for moment.

Inner Eyes (Make 2): using dark green yarn
Round 1: In magic circle, ch 1 before placing the following st in this order: 1 sc, 2 dc, 3 sc, 2 dc and 2 sc. Sl st to top of first st in row. (6 sc, 4 dc)
Round 2: Ch 1, sc in 1st st, 2 dc in next 2 st, 1 sc in next 3 st, 2 dc in next two st, 1 sc in last 2 st. Sl st to top of first st in row. (6 sc, 8 dc)
Cut yarn leaving a long enough tail to secure on to the center of the yellow eye  back from previous step.  Using yarn needle, place green eye center on top of yellow eye part and sew it in to place. It doesn’t have to be anything fancy. :) I just do a basic in and out stitch to weave it together.  Fasten off.
Now take the tail from the yellow eye part and using your yarn needle, secure the finished eyes on to the hat in your desired position. You can see mine from the photos.

Nose:  using dark green yarn 
Round 1: In a magic circle, ch 1 before placing the following st in this order: 3 sc, 1 hdc, 1 dc, 1 hdc, 1 sc. Sl st in top of first st in row. (3 sc, 3 hdc, 1 dc)
Round 2:  Ch 1 and turn so you can place (1 sc and 1 hdc) into the last hdc st from previous round, in next st (1 hdc, 1 dc, 1 hdc), in next st (1 hdc, 1 sc). Sl st into last st. (2 sc, 4 hdc, 1 dc)
Pull yarn through leaving the last 2 st unworked. Before cutting yarn make sure you have enough of a tail length to now sew on to hat using your yarn needle. You can see my placement of it from pictures.

Antennae (Make 2): Switch to “H” hook (5.00 mm) and bright blue yarn 
Round 1: Starting in a magic circle  ch 1 before placing 6 sc in circle. Sl st to top of first st in round. ( 6 sc)
Round 2: Ch 1, place 2 sc in each st around. Sl st to top of first st in round. (12 sc)
Round 3-7:  Ch 1, place 1 sc in each st around. Sl st to top of first st in round. (12 sc)
This is a good time to put most of your fiberfill stuffing in the antennae. You can add it as you continue. You want them to have enough stuffing to be able to stand upright but not so much that it makes them heavy and weighed down. Then they won’t stand upright at all.
Round 8: Ch 1, sctog first two sc, *sctog next two st together, continue from * around until end of round. Sl st to top of first st in round. (6 sc)
Round 9-12: Ch 1, place 1 sc in each st around. Sl st to top of first st in round. (6 sc)
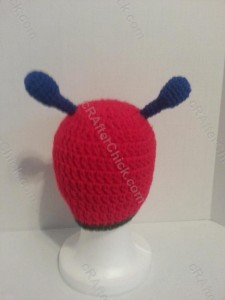
Cut yarn after pulling it through leaving a long enough tail to secure antennae to top of hat.  Using your yarn needle sew your antennae in to place (you can see my placement in pictures below) securely, fasten off any ends.
All done. :) One Very Hungry (and special) Caterpillar Beanie Hat all ready to wear.

Here are pictures to show how it looks worn and from different directions when completed:

The Very Hungry Caterpillar Beanie Hat Crochet Pattern for Story Reading Time

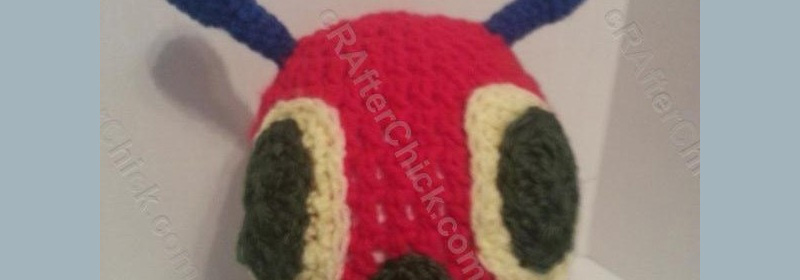
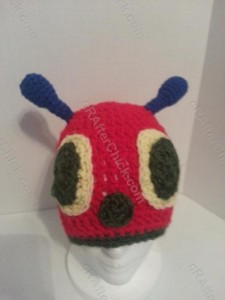
The Very Hungry Caterpillar Beanie Hat Crochet Pattern Front Side View

The Very Hungry Caterpillar Beanie Hat Crochet Pattern for Story Reading Time Side View

The Very Hungry Caterpillar Beanie Hat Crochet Pattern for Story Reading Time Back View

The Very Hungry Caterpillar Beanie Hat Crochet Pattern for Story Reading Time Left Side View

The Very Hungry Caterpillar Beanie Hat Crochet Pattern for Story Reading Time Alternate View
Want more free patterns? Follow cRAfterChick on Facebook or Pinterest to get updates on patterns as they are added.

Note: All the cRAfterChick patterns shared on this site are free of charge.  Please feel free to use them to make your own items.  If you use it to make items to sell please credit cRAfterChick for the pattern and provide link to our site.  Please do not copy and paste my pattern or try to use my images as your own.  You can link to any of my patterns.  Happy crafting!